Mac's blog

This forum is designed to help us spread the knowledge of armouring.
Mac
Archive Member
Posts: 9953
Joined: Thu Jan 04, 2001 2:01 am
Location: Jeffersonville, PA

Re: Mac's blog

Post by Mac »

gaukler wrote: Wed Jun 30, 2021 11:35 am I think that 5934 is a waster. I don’t know if it is for two different mounts or one- the hole isn’t quite the same size as the domed section of the remaining mount.
Thanks for the additional views!

I had not noticed the roping around the perimeter before. Yet, we don't see the roping around the one with the big hole. It sort of looks like they were making two different things, and neither of them worked out right.

Mac
Robert MacPherson

The craftsmen of old had their secrets, and those secrets died with them. We are not the better for that, and neither are they.

http://www.lightlink.com/armory/
http://www.billyandcharlie.com
https://www.facebook.com/BillyAndCharlie
Mac
Archive Member
Posts: 9953
Joined: Thu Jan 04, 2001 2:01 am
Location: Jeffersonville, PA

Re: Mac's blog

Post by Mac »

Scott Martin wrote: Wed Jun 30, 2021 10:42 am Hi Mac

If you are only making a "male" die and striking into lead, you can get the "female" die by striking the die into lead first.
Scott

I been there and done that. The results were still poor. I really think I need to bring those bosses up from the back with something stiffer than lead or tin.

Mac
Robert MacPherson

The craftsmen of old had their secrets, and those secrets died with them. We are not the better for that, and neither are they.

http://www.lightlink.com/armory/
http://www.billyandcharlie.com
https://www.facebook.com/BillyAndCharlie
Mac
Archive Member
Posts: 9953
Joined: Thu Jan 04, 2001 2:01 am
Location: Jeffersonville, PA

Re: Mac's blog

Post by Mac »

Here's the starting blank for the next punch, fresh out of the lathe. The ring will have to be divided up into ten individual bosses, but I can test the proportions first.

Image

When stamped up in the tin block, it looks OK.

Image

With the central dome in place for caparison, it looks like it's close to what I want, but perhaps still a bit shallow. I think I'll deepen it a bit more on the lathe before proceeding.

Image

Mac
Robert MacPherson

The craftsmen of old had their secrets, and those secrets died with them. We are not the better for that, and neither are they.

http://www.lightlink.com/armory/
http://www.billyandcharlie.com
https://www.facebook.com/BillyAndCharlie
User avatar
Johann ColdIron
Archive Member
Posts: 7421
Joined: Mon Mar 03, 2003 2:01 am
Location: Raleigh, NC

Re: Mac's blog

Post by Johann ColdIron »

I think you are on the right track Mac. Certainly reads two piece with a thin wire rivet in the center to me.

Some of the depth might be achieved by the ease at which the reduced contact surface area of the ropes driving into the work piece VS the solid ring. But deepening the solid ring on the lathe is easy and the tips of the rope can always be reduced by hand.
John Cope/ Sir Johann ColdIron, Master- Order of the Laurel

I'm not dead yet!
gaukler
Archive Member
Posts: 225
Joined: Thu Nov 04, 2004 12:30 am
Contact:

Re: Mac's blog

Post by gaukler »

The roping is obscured by the plain mount rim.
The hole is 6mm, and the central dome of the roped mount is 7mm, measured on the back.
Gaukler Medieval Wares
http://www.medievalwares.com
User avatar
Rene K.
Archive Member
Posts: 443
Joined: Tue Dec 02, 2014 11:50 am
Location: Langenzenn, Germany
Contact:

Re: Mac's blog

Post by Rene K. »

I like such tiny items that makes things cool :-D
Those who find spelling mistakes are allowed to keep hold of them...

www.eysenkleider.com
Master armouring and historic replicas
www.freyhand.com
https://de.pinterest.com/kohlstruck/
Mac
Archive Member
Posts: 9953
Joined: Thu Jan 04, 2001 2:01 am
Location: Jeffersonville, PA

Re: Mac's blog

Post by Mac »

I deepened the punch by .010" and then made another test stamp.

Image

I also used a slightly larger blank. By "slightly" I mean that I left the pencil line, rather than cutting it away. In any case, it looked OK, so I moved on to the next step.

The punch went back into the lathe so that the I could use the 60 divisions on the bull wheel to mark off my 10 locations.

Image

Those scribed lines are the ridges in my bosses, and I took out some material from in between. That began with a dremel cutoff wheel and proceeded to a triangular file and then to a square file.

Image

The test in the tin block looks like I'm headed in the right direction.

Image

ImageImage

I need to compare what I have to my images and decide if there are any changes that need to be made to the punch before hardening it.

Mac
Robert MacPherson

The craftsmen of old had their secrets, and those secrets died with them. We are not the better for that, and neither are they.

http://www.lightlink.com/armory/
http://www.billyandcharlie.com
https://www.facebook.com/BillyAndCharlie
gaukler
Archive Member
Posts: 225
Joined: Thu Nov 04, 2004 12:30 am
Contact:

Re: Mac's blog

Post by gaukler »

That looks pretty close, especially in the picture that is a closer match to the angle of the black and white photo.
Gaukler Medieval Wares
http://www.medievalwares.com
Mac
Archive Member
Posts: 9953
Joined: Thu Jan 04, 2001 2:01 am
Location: Jeffersonville, PA

Re: Mac's blog

Post by Mac »

gaukler wrote: Wed Jun 30, 2021 2:41 pm That looks pretty close, especially in the picture that is a closer match to the angle of the black and white photo.
It's closer than I expected it to be. In my head, the bosses looked more gracile out at the edges, but that seems not to be the case. They are blocky and crude. I think I've inadvertently stumbled on the final shape when I thought I was just getting started. There's probably a lesson in there somewhere. :wink:

Mac
Robert MacPherson

The craftsmen of old had their secrets, and those secrets died with them. We are not the better for that, and neither are they.

http://www.lightlink.com/armory/
http://www.billyandcharlie.com
https://www.facebook.com/BillyAndCharlie
User avatar
Rene K.
Archive Member
Posts: 443
Joined: Tue Dec 02, 2014 11:50 am
Location: Langenzenn, Germany
Contact:

Re: Mac's blog

Post by Rene K. »

very nice result !
Those who find spelling mistakes are allowed to keep hold of them...

www.eysenkleider.com
Master armouring and historic replicas
www.freyhand.com
https://de.pinterest.com/kohlstruck/
User avatar
Scott Martin
Archive Member
Posts: 1074
Joined: Wed May 23, 2012 3:34 pm
Location: Calgary AB, Canada
Contact:

Re: Mac's blog

Post by Scott Martin »

Looks good Mac - can we get a picture of the Tin imprint? That looks "sharper" than I expect to get in lead, which suggests that the tin gives a "firmer" backing.

I think that we are back to the "figure out the easiest way to do it, and that's generally how medieval armourers did it"

Any chance that we could purchase some of these? I suspect that there are a number of folks who would be interested in adding the decorative elements without having the equipment to make the tooling. That may be a question for Marc ;)

Scott
User avatar
Galileo
Archive Member
Posts: 5974
Joined: Thu Aug 10, 2000 1:01 am
Location: Casper, WY

Re: Mac's blog

Post by Galileo »

I have found tin to be firmer than lead - a bit more expensive to get, but sometimes easier as it's not toxic like lead can be.
Dia Mathessos, Dynamis


Member#71
User avatar
Otto von Teich
Archive Member
Posts: 17440
Joined: Thu Nov 09, 2000 2:01 am
Location: The Great State of Texas.

Re: Mac's blog

Post by Otto von Teich »

If you decide to make a few extras to sell, I too would be interested! Your doing a Great job on these and the whole project is really coming along nicely. Thanks for showing us your tooling and techniques. And thank you to Rene and Gaukler for sharing pics of the tools and bits! This is all very informative and interesting.
People sleep peaceably in their beds at night only because rough men stand ready to do violence on their behalf.
Mac
Archive Member
Posts: 9953
Joined: Thu Jan 04, 2001 2:01 am
Location: Jeffersonville, PA

Re: Mac's blog

Post by Mac »

Rene K. wrote: Wed Jun 30, 2021 3:12 pm very nice result !
Thanks!

Mac
Robert MacPherson

The craftsmen of old had their secrets, and those secrets died with them. We are not the better for that, and neither are they.

http://www.lightlink.com/armory/
http://www.billyandcharlie.com
https://www.facebook.com/BillyAndCharlie
Mac
Archive Member
Posts: 9953
Joined: Thu Jan 04, 2001 2:01 am
Location: Jeffersonville, PA

Re: Mac's blog

Post by Mac »

Scott Martin wrote: Wed Jun 30, 2021 5:01 pm Looks good Mac - can we get a picture of the Tin imprint? That looks "sharper" than I expect to get in lead, which suggests that the tin gives a "firmer" backing.
Thanks!

I hope to stamp up a few of these this afternoon. I'll get a pic of the tin block then.
Scott Martin wrote: Wed Jun 30, 2021 5:01 pmI think that we are back to the "figure out the easiest way to do it, and that's generally how medieval armourers did it"
It's true. I was overthinking this.
Scott Martin wrote: Wed Jun 30, 2021 5:01 pmAny chance that we could purchase some of these? I suspect that there are a number of folks who would be interested in adding the decorative elements without having the equipment to make the tooling. That may be a question for Marc ;)

Scott
At the moment, I don't see these are a thing I can sell profitably. That may change if I can get a suitable punch/die to cut out the blanks. I'm currently cutting them by hand, and it's way too slow.

Mac
Robert MacPherson

The craftsmen of old had their secrets, and those secrets died with them. We are not the better for that, and neither are they.

http://www.lightlink.com/armory/
http://www.billyandcharlie.com
https://www.facebook.com/BillyAndCharlie
Mac
Archive Member
Posts: 9953
Joined: Thu Jan 04, 2001 2:01 am
Location: Jeffersonville, PA

Re: Mac's blog

Post by Mac »

Galileo wrote: Wed Jun 30, 2021 6:56 pm I have found tin to be firmer than lead - a bit more expensive to get, but sometimes easier as it's not toxic like lead can be.
Indeed!

I've switched over to either tin or lead-free pewter in place of lead for punching. I used to use lead a lot, but I noticed that it was always shedding bits onto the floor... where I supposed I was grinding them to dust underfoot. I'm not at all freaked out by lead, but that just seemed a bit unwise, and I figured I'd get rid of the problem while I could still think straight. :lol:

Mac
Robert MacPherson

The craftsmen of old had their secrets, and those secrets died with them. We are not the better for that, and neither are they.

http://www.lightlink.com/armory/
http://www.billyandcharlie.com
https://www.facebook.com/BillyAndCharlie
Mac
Archive Member
Posts: 9953
Joined: Thu Jan 04, 2001 2:01 am
Location: Jeffersonville, PA

Re: Mac's blog

Post by Mac »

Otto von Teich wrote: Wed Jun 30, 2021 8:47 pm If you decide to make a few extras to sell, I too would be interested! Your doing a Great job on these and the whole project is really coming along nicely. Thanks for showing us your tooling and techniques. And thank you to Rene and Gaukler for sharing pics of the tools and bits! This is all very informative and interesting.
Thanks!

I don't think I'll be selling any unless I can make the process faster.

Mac
Robert MacPherson

The craftsmen of old had their secrets, and those secrets died with them. We are not the better for that, and neither are they.

http://www.lightlink.com/armory/
http://www.billyandcharlie.com
https://www.facebook.com/BillyAndCharlie
Sean M
Archive Member
Posts: 2392
Joined: Mon Oct 05, 2009 11:24 pm
Location: in exile in Canada

Re: Mac's blog

Post by Sean M »

Would the domes be fastened to the disks in some way?
DIS MANIBUS GUILLELMI GENTIS MCLEANUM FAMILIARITER GALLERON DICTI
VIR OMNIBUS ARTIBUS PERITUS
Check out Age of Datini: European Material Culture 1360-1410
Mac
Archive Member
Posts: 9953
Joined: Thu Jan 04, 2001 2:01 am
Location: Jeffersonville, PA

Re: Mac's blog

Post by Mac »

Sean M wrote: Thu Jul 01, 2021 11:27 am Would the domes be fastened to the disks in some way?
Only by the rivet which passes through everything.

Mac
Robert MacPherson

The craftsmen of old had their secrets, and those secrets died with them. We are not the better for that, and neither are they.

http://www.lightlink.com/armory/
http://www.billyandcharlie.com
https://www.facebook.com/BillyAndCharlie
Mac
Archive Member
Posts: 9953
Joined: Thu Jan 04, 2001 2:01 am
Location: Jeffersonville, PA

Re: Mac's blog

Post by Mac »

Here's the stamping setup. The block is tin... mostly. I have three of these blocks cast on some tin that I suspect has gotten contaminated with a bit of our usual pewter. I keep the metal separate from anything else when I recast them... which I did for this project.

The punch has been hardened and tempered except for the driving end. That got taken up to orange heat and then let to cool as it will while I heated and quenched the business end. This leaves the driving end in a normalized condition. That's not ideal, but it's good enough. Hardening the whole punch all at once would be more difficult.

I'm using a 5lb (2.27 kg.) drilling hammer to drive the punch.

Image

A close up of a disc after a couple of blows.

Image

A stamped disc next to the tin block. A couple of the impressions in the tin have gotten a bit messed up from misalignment. They will be corrected and reused until they are too deep, or too messed up to be useful.

Image

The stamped discs sitting in the traditional container. Two of my tin blocks are all clapped out from the procedure, and I re-cast them as soon as I was done stamping. That way they will be al lready for their next assignment.

Image

The thing the camera refused to focus on is a punch I made to mark the location or the punched hole. It also flattens the center a bit if it needs that (and some do). You might ask why I bothered to make a punch for this, rather than using a 5/16" transfer punch. There are a couple of reasons. One is that I wanted the prick to be shallow, so it would not go right through the thin brass before the broad surface had a chance to flatten the center of the mount. The other reason is that I don't own a transfer punch set. :oops:

Image

In addition to flattening the center of the mount, the outer diameter of the punch makes it easy to find the approximate center.

ImageImage

I may get a chance to install these on the shoulder straps later today... we'll see.

Mac
Robert MacPherson

The craftsmen of old had their secrets, and those secrets died with them. We are not the better for that, and neither are they.

http://www.lightlink.com/armory/
http://www.billyandcharlie.com
https://www.facebook.com/BillyAndCharlie
Mac
Archive Member
Posts: 9953
Joined: Thu Jan 04, 2001 2:01 am
Location: Jeffersonville, PA

Re: Mac's blog

Post by Mac »

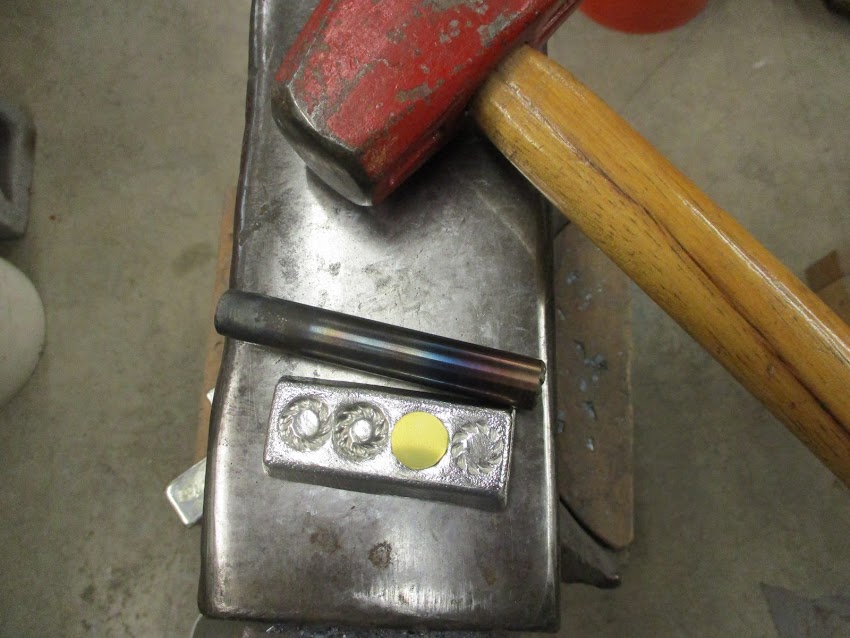
The installation of the mounts looks like this...

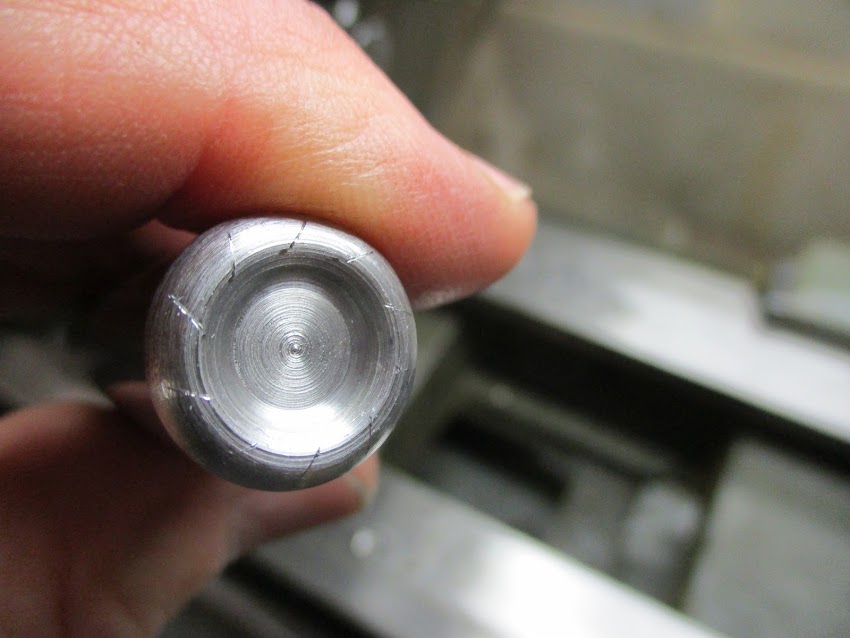
Start with a length of 3/23" (2.4mm) soft brass wire. Flatten and square the end.

Image Image

This will leave a burr that may or may not be sufficient to keep wire from passing through the 3/32" hole in the "dome" part of the mounts.

Image

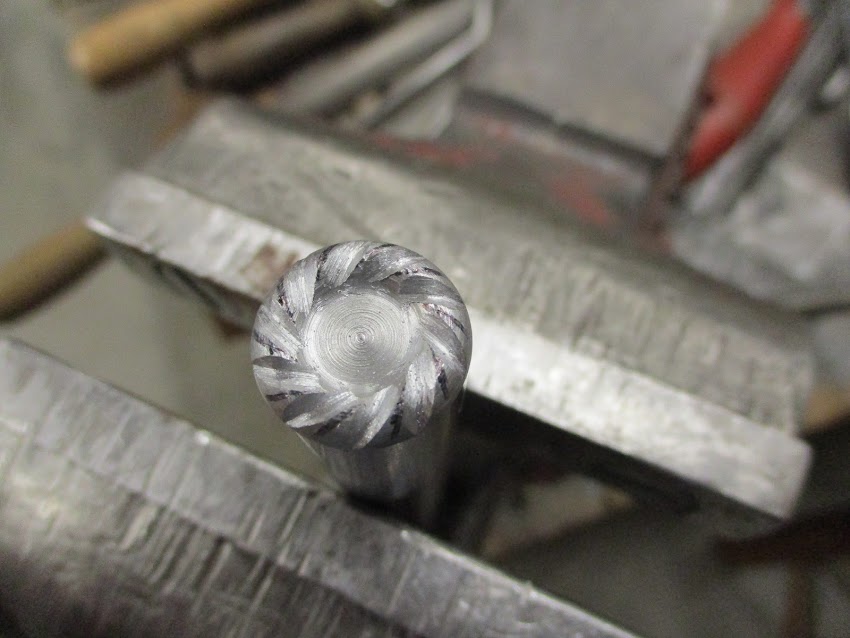
Just to be sure, I lock up the wire in the vise and give it s few taps with the cross peen of a very tiny hammer. A couple of notes here.... First, this vise has un-serrated, mild steel jaws. It's the vise I use for making hinges etc. Second, the hammer really does need to be tiny. If it's too big, it will just drive the wire down in the vise without upsetting the end at all.

Image

The hammering has spread the flat end of the wire slightly. This ensures that it will not just fall through the hole in the next step.

Image

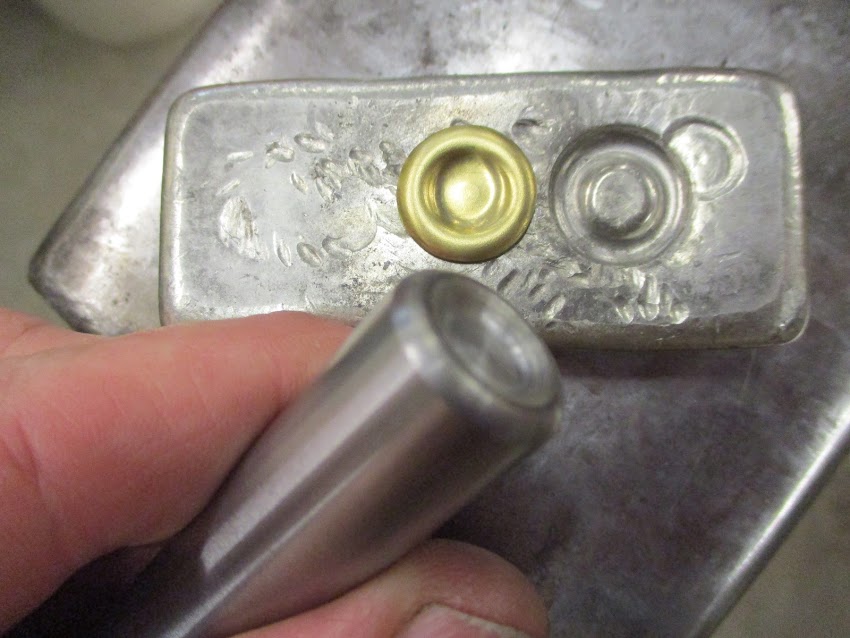
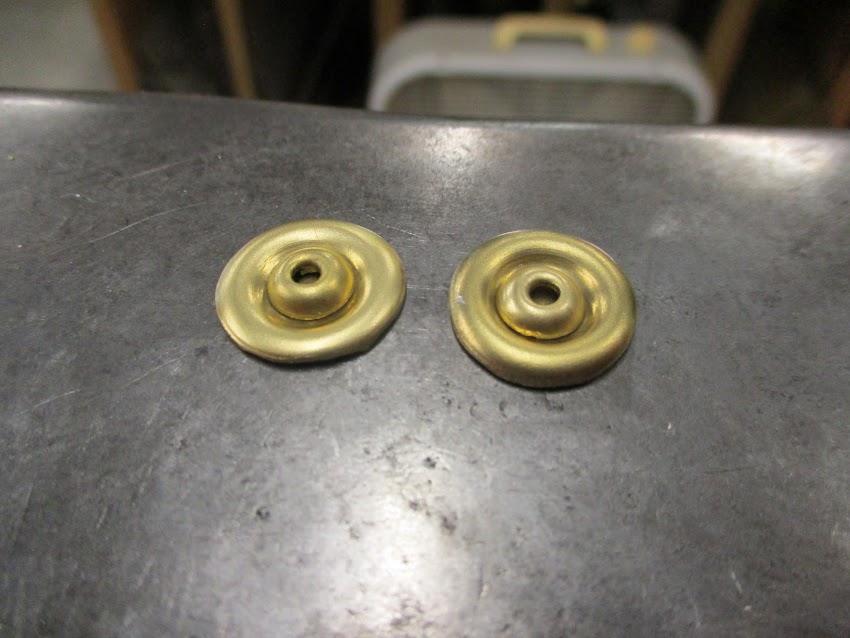
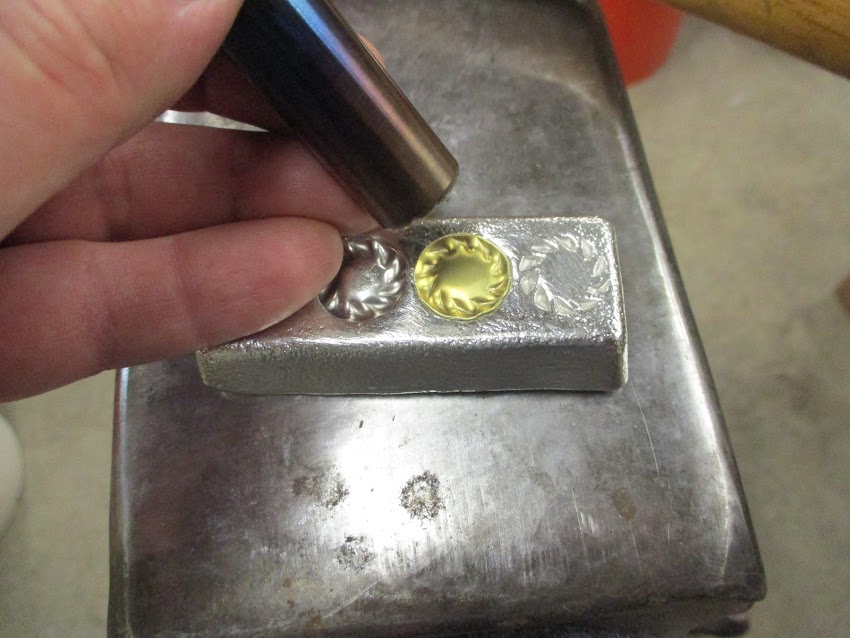
The dome and the disc of the mount are threaded onto the other end of the brass wire. I had not mentioned the point before, but it really helps.

Image

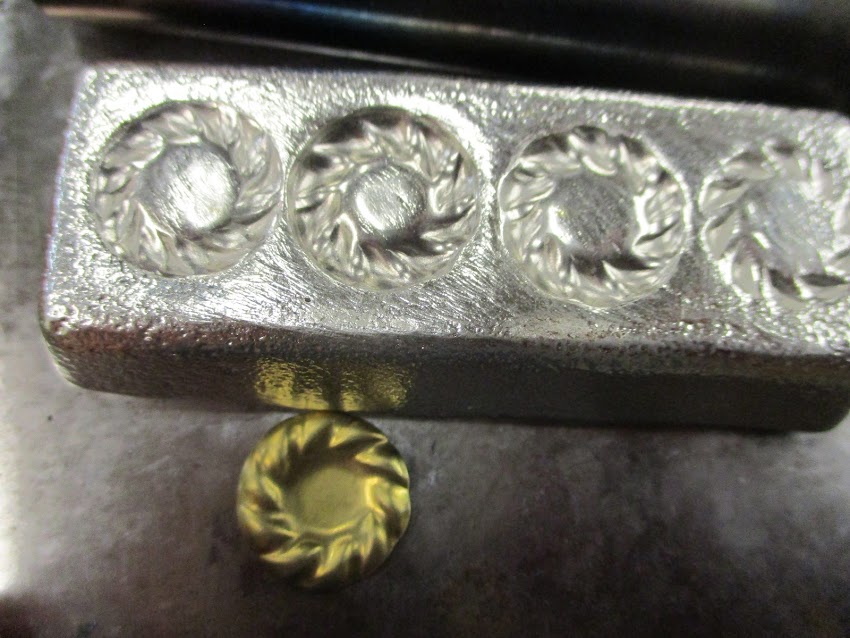
If too much wire sticks up, I tap it down with the mount supported in this heading die. If the wire is upset exactly right, this is not necessary.

Image

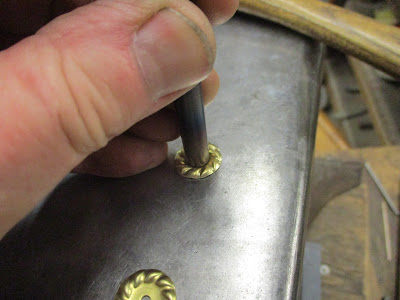
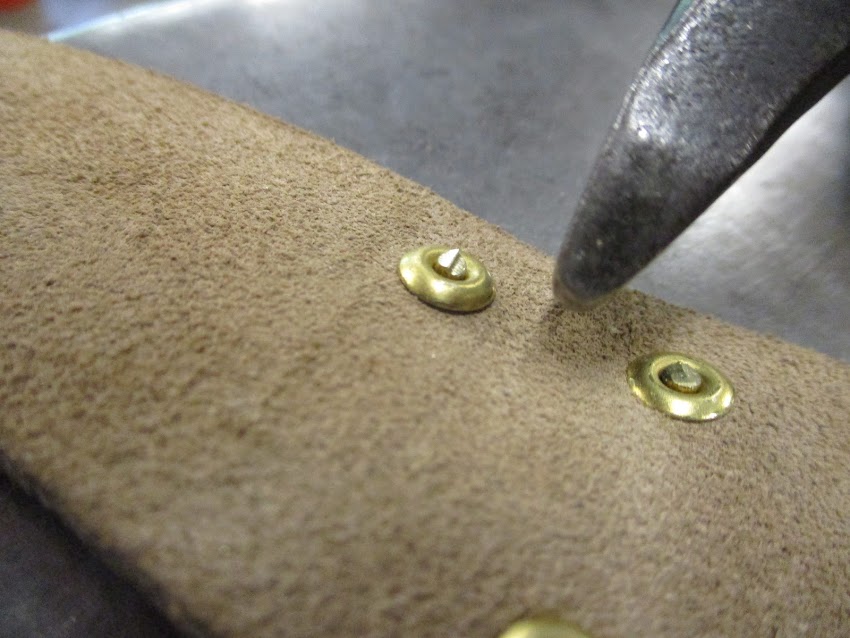
The pre-marked locations are punched with the smallest tube on a rotary punch, and the whole assembly threaded through the leather.

ImageImage

A "bagel washer" is threaded onto the wire on the bottom side, and the wire is clipped off close.

ImageImageImage

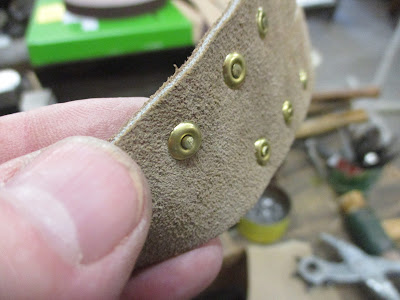
Both sides are peened up with a small cross peen hammer.

Image

Lather, rinse, and repeat.

Image

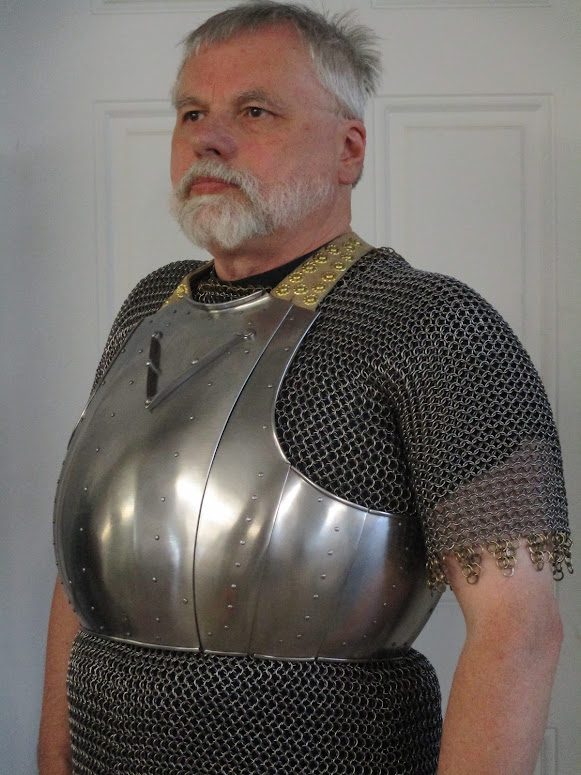
All the straps are attached now... so I guess it's done. I'll get some other pics of it soon.

Image

Mac
Last edited by Mac on Sat Jul 03, 2021 2:06 pm, edited 1 time in total.
Robert MacPherson

The craftsmen of old had their secrets, and those secrets died with them. We are not the better for that, and neither are they.

http://www.lightlink.com/armory/
http://www.billyandcharlie.com
https://www.facebook.com/BillyAndCharlie
User avatar
Galileo
Archive Member
Posts: 5974
Joined: Thu Aug 10, 2000 1:01 am
Location: Casper, WY

Re: Mac's blog

Post by Galileo »

That's really neat!
Dia Mathessos, Dynamis


Member#71
Mac
Archive Member
Posts: 9953
Joined: Thu Jan 04, 2001 2:01 am
Location: Jeffersonville, PA

Re: Mac's blog

Post by Mac »

I managed to squeeze into my old mail shirt for some pics.

Image

Image

Image

Image

I really hate to see the waist rise up in front, but I'm really just too paunchy for this breastplate. Sure, I could have made it to look better on a paunchy guy, but that wasn't the point of the exercise.

Mac
Robert MacPherson

The craftsmen of old had their secrets, and those secrets died with them. We are not the better for that, and neither are they.

http://www.lightlink.com/armory/
http://www.billyandcharlie.com
https://www.facebook.com/BillyAndCharlie
User avatar
Armadillo
Archive Member
Posts: 652
Joined: Thu Aug 10, 2000 1:01 am
Location: Seattle, WA USA

Re: Mac's blog

Post by Armadillo »

That whole process was a treat. Thank you. It's an eye opener for me to see this iconic piece fitted up as it should be, paunch aside.
-Adair
Ilkka Salokannel
Archive Member
Posts: 265
Joined: Mon Nov 09, 2015 3:35 pm
Location: Burnaby BC

Re: Mac's blog

Post by Ilkka Salokannel »

Beautiful job on the Churburg 13.

I have re-drawn my patterns based on your work.
Thanks.
Ilkka
Mac
Archive Member
Posts: 9953
Joined: Thu Jan 04, 2001 2:01 am
Location: Jeffersonville, PA

Re: Mac's blog

Post by Mac »

Armadillo wrote: Sat Jul 03, 2021 9:31 pm That whole process was a treat. Thank you. It's an eye opener for me to see this iconic piece fitted up as it should be, paunch aside.
-Adair
I'm glad you found it useful! There are still some problems of proportion that I hope to work out in MK2. Perhaps by the time I do that I can reduce some of that paunch as well.... Ya' never know.

Mac
Robert MacPherson

The craftsmen of old had their secrets, and those secrets died with them. We are not the better for that, and neither are they.

http://www.lightlink.com/armory/
http://www.billyandcharlie.com
https://www.facebook.com/BillyAndCharlie
Mac
Archive Member
Posts: 9953
Joined: Thu Jan 04, 2001 2:01 am
Location: Jeffersonville, PA

Re: Mac's blog

Post by Mac »

Ilkka Salokannel wrote: Sat Jul 03, 2021 10:32 pm Beautiful job on the Churburg 13.

I have re-drawn my patterns based on your work.
Thanks.
Ilkka
I can post images of the patterns I used for this piece if that would be useful. My only reservations are that.... One.. I'm not satisfied with the proportions. Two.. I made some mistakes with the hole locations. There is not much I can do about the first problem this time, but I can make some indications on the templates of where I should have made the holes.

Mac
Robert MacPherson

The craftsmen of old had their secrets, and those secrets died with them. We are not the better for that, and neither are they.

http://www.lightlink.com/armory/
http://www.billyandcharlie.com
https://www.facebook.com/BillyAndCharlie
User avatar
Johann ColdIron
Archive Member
Posts: 7421
Joined: Mon Mar 03, 2003 2:01 am
Location: Raleigh, NC

Re: Mac's blog

Post by Johann ColdIron »

Mac wrote: Sat Jul 03, 2021 4:58 pm I managed to squeeze into my old mail shirt for some pics.

I really hate to see the waist rise up in front, but I'm really just too paunchy for this breastplate. Sure, I could have made it to look better on a paunchy guy, but that wasn't the point of the exercise.

Mac
Looks sharp Mac. Those rivet details really make it.

Just tilt the pictures till the waist lines up the way you want it then crop the rest of the image to hide the tilt. That is how the instagram models do it... ;)
John Cope/ Sir Johann ColdIron, Master- Order of the Laurel

I'm not dead yet!
User avatar
Scott Martin
Archive Member
Posts: 1074
Joined: Wed May 23, 2012 3:34 pm
Location: Calgary AB, Canada
Contact:

Re: Mac's blog

Post by Scott Martin »

Mac wrote: Sun Jul 04, 2021 8:30 am I can post images of the patterns I used for this piece if that would be useful. My only reservations are that.... One.. I'm not satisfied with the proportions. Two.. I made some mistakes with the hole locations. There is not much I can do about the first problem this time, but I can make some indications on the templates of where I should have made the holes.
I can park your patterns on a server that will not be changing terms of service periodically, and I suspect that JT would also be more than happy to do so.

(Digression warning)

I've been giving some thought to how we can teach the next generation of armourers, which is why I have been (slowly) posting patterns and tutorials. It may be worth having a more fulsome discussion and looking at what "holes" we should be filling. Albert Collins is trying to build armouring as a craft from the master down. I think that we need more work at the apprentice to journeyman level, and I think that we need to put some "journey" in place for the journeyman, Books like Albert's are valuable, but IMO they are more valuable for those of us who have been doing things for a while than for a "new" armourer. I have some hopes that the book that the Greenleaf Workshop is working on will fill some of this gap, since I think that the novice to intermediate armourer is where the largest amount of help is needed. I know that if I had access to you and Wade 25 years ago it would have made an enormous difference to my learning curve.

Scott
Ilkka Salokannel
Archive Member
Posts: 265
Joined: Mon Nov 09, 2015 3:35 pm
Location: Burnaby BC

Re: Mac's blog

Post by Ilkka Salokannel »

Post away Mac. We can all benefit from it.

I share my patterns freely, at least locally.

The main change in my old patterns was that I made the patterns of the smaller side plates fit the expanding cone of my torso from waist to chest, which I had failed to accomodate on the inital pattern. I even have the plates all cut out, which will have partial changes done and will most likely finish them off for SCA use, but I will build Churburg 13 to fit myself properly.

Thanks.

PS: Scott, you have to post more. Just a reminder.

Best wishes.
Ilkka
Signo
Archive Member
Posts: 4963
Joined: Thu Jul 25, 2002 1:01 am
Location: Italy
Contact:

Re: Mac's blog

Post by Signo »

I think that one of the greatest help new armourers could receive is to stop looking at armourmaking as an artisan job from start to finish, reinventing each time the wheel, making stuff from scratch always the same, but always different. This thing of "custom armour made on measure" has gone out of control, with armourers reinventing the same pattern again and again just to change a final measurement of few mm compared to the previous project, when 2 minutes with a angle grinder can deal fast and precisely the same outcome. The work ouf armourers was industrial, and today it must be seen in the same perspective to be profitable. Metal is dirt cheap today, labor is hugely expensive,this must be taken into account. Many parts can be rough formed, even stacked together, then put aside for the next job, and from project to project simply shaped to measure, trimmed as needed and the assembled as usual.
Gordon Thompson
Archive Member
Posts: 88
Joined: Thu Jan 10, 2019 7:04 am

Re: Mac's blog

Post by Gordon Thompson »

Hell yea, trimming. I've noticed similar "mistake" here and there, some guys when they want to build something for the first time, they want to make "ideal pattern", spending hours of measuring and thinking. I think thats counterproductive(ineffective?), as their "novice pattern" will probably be not ideal anyway and shaping also makes all the difference. IMO better way is just draw it more-or-less to measure and add excess everywhere. Like your idea with stacked pieces - roughly form a piece and then trim it where needed. And its good to repeat trimming on pattern as well for future use and fixes - it will be also better that way than overthinked one (keep in mind Im talking about unexperienced guys).
I did that with all parts of my work in progress gothic armour, and its not bad - it would be worse if Id try to make a "perfect pattern" first.
- "There's three of you, and only one of me. But that doesn't mean there are more of you. It's a mathematical paradox and an exception from the rule.
- What? What does that mean?
- That means *uck off. While you still can".
Mac
Archive Member
Posts: 9953
Joined: Thu Jan 04, 2001 2:01 am
Location: Jeffersonville, PA

Re: Mac's blog

Post by Mac »

I've drawn up clean copies of the templates. Here are my questions...

Is it better to have the template centered on the "bull's eye"...
Image

..or out in the uniform grey field?

Image

Should all the images be at the same distance etc regardless of size?.. or should they be cropped?

I realize that my writing is illegible. I will go back and darken it up. That should help a bit anyway.

This is a 1" grid. Apologies to the metric world, but that's what I have.

Mac
Robert MacPherson

The craftsmen of old had their secrets, and those secrets died with them. We are not the better for that, and neither are they.

http://www.lightlink.com/armory/
http://www.billyandcharlie.com
https://www.facebook.com/BillyAndCharlie
Indianer
Archive Member
Posts: 598
Joined: Fri Nov 06, 2015 8:07 am
Location: Northern Germany

Re: Mac's blog

Post by Indianer »

Mac wrote: Tue Jul 06, 2021 11:49 am Is it better to have the template centered on the "bull's eye"...

..or out in the uniform grey field?

Should all the images be at the same distance etc regardless of size?.. or should they be cropped?
Mac
None of that matters. Useful however for those that can not digitalize the stuff would be aligning a straight edge along the long axis of any given pattern with a line in the grid.

Best
Indi
Mac
Archive Member
Posts: 9953
Joined: Thu Jan 04, 2001 2:01 am
Location: Jeffersonville, PA

Re: Mac's blog

Post by Mac »

Indianer wrote: Tue Jul 06, 2021 12:16 pm

None of that matters. Useful however for those that can not digitalize the stuff would be aligning a straight edge along the long axis of any given pattern with a line in the grid.

Best
Indi
I rather expect people to lay out a suitable grid and transfer the lines and rivet locations square by square.

Mac
Robert MacPherson

The craftsmen of old had their secrets, and those secrets died with them. We are not the better for that, and neither are they.

http://www.lightlink.com/armory/
http://www.billyandcharlie.com
https://www.facebook.com/BillyAndCharlie
Post Reply