It's time to build another helm (actually this is my third helmet in two weeks, yesterday I finished THIS bascinet).
So, this is a Vendel style viking helmet for sca fighting and this is todays progress.
Spangens are much more fun to build than bascinets and other welded helms. Don't like much of welding...
My work, closed sallet in prog. (03-20-16)
My work, closed sallet in prog. (03-20-16)
- Attachments
-
- IMG_4665.jpg (75.63 KiB) Viewed 5890 times
-
- IMG_4664.jpg (79.44 KiB) Viewed 5455 times
-
- IMG_4663.jpg (79.67 KiB) Viewed 7274 times
Last edited by Ghostpig on Sun Mar 20, 2016 1:32 pm, edited 116 times in total.
...
-
Justin Andrews

- Archive Member
- Posts: 1009
- Joined: Wed Sep 20, 2000 1:01 am
- Location: Leicester, UK
- Contact:
Based on the Valsgarde 5 I'd wager.
No lattice work though? Pity, thats the one outstanding feature of the Valsgarde 5. If it strength thats an issue, then you could put the solid infil plates under the lattice infill.
No lattice work though? Pity, thats the one outstanding feature of the Valsgarde 5. If it strength thats an issue, then you could put the solid infil plates under the lattice infill.
Suzerain - "I'll continue to make just as many off-colour comments on that as I would about our own proud history of blue facepaint, carblankets, and warcries of "you can take our freedom, but Hollywood will rape our digniiiiiiiiiiity".... "
I'm gonna stick with the vendel type.
This was my reference: http://www.vendelbygden.se/html/vendel4.jpg
Although you can't see how the bowl is constructed, but the cheek/face plate is somewhat the same as I did it. Also Knotwolf has done it same way.
Here are some more pics
This was my reference: http://www.vendelbygden.se/html/vendel4.jpg
Although you can't see how the bowl is constructed, but the cheek/face plate is somewhat the same as I did it. Also Knotwolf has done it same way.
Here are some more pics
- Attachments
-
- IMG_4669.jpg (87.82 KiB) Viewed 4976 times
-
- IMG_4668.jpg (84.49 KiB) Viewed 4668 times
-
- IMG_4667.jpg (83.97 KiB) Viewed 5018 times
...
-
Mord
- Archive Member
- Posts: 9752
- Joined: Fri Apr 16, 2004 7:48 am
- Location: Philadelphia, PA (looking at a wall)
That's the helmet from Grave XIV (14) from Vendel. There are couple of others from that graveyard. This particular helm has gone through a couple of different reconsturctions. It can get confusing.Ghostpig wrote:I'm gonna stick with the vendel type.
This was my reference: http://www.vendelbygden.se/html/vendel4.jpg
Although you can't see how the bowl is constructed, but the cheek/face plate is somewhat the same as I did it. Also Knotwolf has done it same way.
Here are some more pics
Mord.
Keep calm and carry a bigger stick.
-
Justin Andrews
- Archive Member
- Posts: 1009
- Joined: Wed Sep 20, 2000 1:01 am
- Location: Leicester, UK
- Contact:
Gotcha. The helm banding is so close to the Valsgarde 5 as to be spooky.Ghostpig wrote:I'm gonna stick with the vendel type.
Its starting to look good, however the lower half of the cheek plates seem to diverge from the original a lot.
Suzerain - "I'll continue to make just as many off-colour comments on that as I would about our own proud history of blue facepaint, carblankets, and warcries of "you can take our freedom, but Hollywood will rape our digniiiiiiiiiiity".... "
Thank you Hal!
Top plates are not welded, just riveted. Today I added some 3mm steel rivets for extra strength. I think they blend in nicely.
Wulfgar, no brass pieces on this one. I have another helm commission coming and there will be brass.
So, the helm is nearly done, only rust prevention to add.
http://s15.photobucket.com/albums/a370/ ... ns/Vendel/
- Attachments
-
- IMG_4679.jpg (79.32 KiB) Viewed 14560 times
-
- IMG_4678.jpg (73.89 KiB) Viewed 14560 times
-
- IMG_4677.jpg (79.52 KiB) Viewed 14560 times
...
-
Oaken Rose

- Archive Member
- Posts: 159
- Joined: Tue Mar 31, 2009 3:26 pm
- Location: Greater Kansas City area
Looks good, even though I'm one of those people who doesn't trust brass rivets. I've had too many fail on me on my last harness. (But that one was a mass-produced model out of India, so take my advice with a grain of salt.) Personally, I only use brass rivets to attach a leather strap, a decorative piece, or if I'm using something other than steel (say for example bronze).
Just my beef. Take it as you will.
Just my beef. Take it as you will.
"We are men of action, you and I. Lies do not become us."
-
Pitbull Armory

- Archive Member
- Posts: 5312
- Joined: Wed Dec 17, 2008 10:28 pm
- Location: Out in the woods
- Contact:
Howdy GP
Hi Ghostpig, That is a fine helm there for sure. Nice finish also. Build them how you feel like building them, your the man, err... the pig, erm..... the dead pig, .... ok nevermind.
Keep on Piggin
Pitbull
Keep on Piggin
Pitbull
Hi, Please visit https://www.facebook.com/PITBULL-ARMORY-264094743168/ if you get time. Or contact me at leiderandy@yahoo.com if you have any questions. Take care, Andy @ Pitbull Armory
-
Konstantin the Red
- Archive Member
- Posts: 26725
- Joined: Sun Oct 21, 2001 1:01 am
- Location: Port Hueneme CA USA
Thank you all!
Pitbull,
I shall keep on piggin (in the free world...)
Dan,
I usually hammer all bars. That way I can control the curve better.
Konstantin,
that bascinet came out pretty good, but I still can't figure out how to weld the top part and the skirt properly. I allways end up with a lumpy surface. Maybe I need to study more about stick welding.
...
-
Mad Matt

- Archive Member
- Posts: 7697
- Joined: Thu Aug 10, 2000 1:01 am
- Location: Ontario Canada
- Contact:
What signo said. Those bars are gonna move easy. They'll be able to rotate on the rivets and will get whacked out of place real quick. Either welding the center bar to the horizontal ones or riveting them will work but you've really gotta do something.
If you just weld them on the inside spray everything down with wd40 before you weld and it will keep the spatter from sticking. Make sure you've got really good ventilation. Which you should have anyway because of the toxic fumes from the flux on your welding rods.
The lumps on the weld line aren't from the welding. There's two possible problems causing it. First is your helmet top curves in a bit at the bottom more then the skirt inward angle. You can help fix this by tacking the bottom on and then hitting it from the inside over a 2-2.5" pipe or round stock to make a smooth transition. Hold the helmet up and look at it. Or if you can't see it with your eye put a straight edge vertical over the weld line area and make sure there's no gap between the straight edge and the helmet where the weld line will be.
The other problem is sanding technique. Not sure what you're sanding with but when you're doing your rough sanding of the weld 40 grit you need to sand so that you've got a flat surface going across the weld. So if you're using an angle grinder your scratches are vertical. If you sand the other way you end up taking material from beside the weld as well as from the weld and you end up with a lump where the weld is.
The budding mid 14th century German Transitional guy.
MadMatt'sArmory.com
MadMatt'sArmory.com
Thank you Mad Matt for the welding tips! I'll try when I get to work my next bascinet.
Vendel helm is now finished. I welded the bars together so they don't move. I still don't like welding.
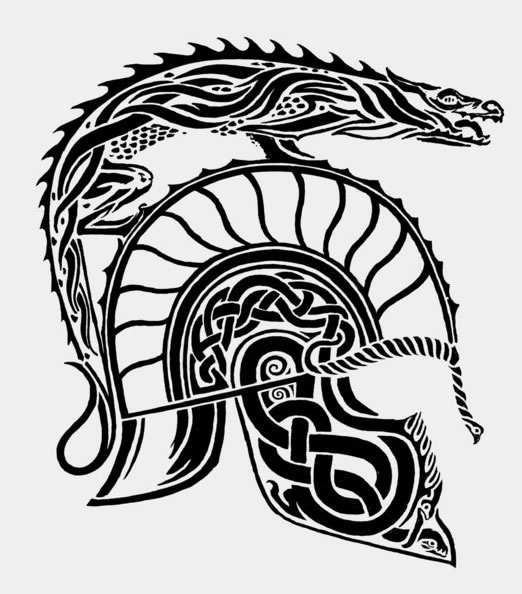
I have also started making a new sca fighting helm. This time it is fantasy/viking/norman style. It is based of Hurin's helm from the Tolkien's book, http://www.tolkienlibrary.com/press/ima ... n_Helm.jpg.
Cheek plates will have some brass decoration, but I'm not gonna do the crest dragon.
Vendel helm is now finished. I welded the bars together so they don't move. I still don't like welding.
I have also started making a new sca fighting helm. This time it is fantasy/viking/norman style. It is based of Hurin's helm from the Tolkien's book, http://www.tolkienlibrary.com/press/ima ... n_Helm.jpg.
Cheek plates will have some brass decoration, but I'm not gonna do the crest dragon.
- Attachments
-
- IMG_4693.jpg (75.64 KiB) Viewed 14183 times
-
- IMG_4692.jpg (78.87 KiB) Viewed 14183 times
...
-
Pitbull Armory
- Archive Member
- Posts: 5312
- Joined: Wed Dec 17, 2008 10:28 pm
- Location: Out in the woods
- Contact:
Howdy
Wow nice armadillo Helm GP, I really like that design and cant wait to see pics of it finished.
Thank you
Pitbull
Thank you
Pitbull
Hi, Please visit https://www.facebook.com/PITBULL-ARMORY-264094743168/ if you get time. Or contact me at leiderandy@yahoo.com if you have any questions. Take care, Andy @ Pitbull Armory
Thank you Redrook!
Hal, yes fantasy stuff is cool to make. There's more freedom in designs and such. Btw. the planishing hammer is great, I have used it quite a lot by now.
Pitbull, I thought also that it looks like an armadillo. Have you tried those patterns yet?
And here's same more progress pics. Plans has changed a bit, cheek plates will be left plain, no brass. If I ever get some time for my own work, I'll make a bling version of this helm.
- Attachments
-
- IMG_4699.jpg (80.35 KiB) Viewed 14051 times
-
- IMG_4698.jpg (77.25 KiB) Viewed 14051 times
...
-
Smilingotter
- Archive Member
- Posts: 3999
- Joined: Mon Jan 16, 2006 11:45 pm
-
Patrick Marshall
- Archive Member
- Posts: 228
- Joined: Sat Jan 05, 2008 12:16 pm
- Location: Howell, Michigan
I love the Vendel but I have to say I absolutely dig the fantasy helm. You have done an awesome job. Makes me want to start patterning something out and going to town. Very cool.
Pat Marshall
Pat Marshall
Patrick Marshall
Quicksilver Armoury
Makers of Larp weapons and Armour
http://quicksilverarmoury.webs.com/
Quicksilver Armoury
Makers of Larp weapons and Armour
http://quicksilverarmoury.webs.com/
No progress has happened with the Hurin helmet, but I have made another helmet during this week. I made a sallet and bevor but the bevor is not yet ready.
I'll finish the Hurin helmet in next week if my drill/sander doesn't explode. It allready wobbles around about 2cm.
More pics: http://s15.photobucket.com/albums/a370/ ... allet%202/
I'll finish the Hurin helmet in next week if my drill/sander doesn't explode. It allready wobbles around about 2cm.
More pics: http://s15.photobucket.com/albums/a370/ ... allet%202/
- Attachments
-
- IMG_4724.jpg (69.34 KiB) Viewed 13808 times
-
- IMG_4722.jpg (71.27 KiB) Viewed 13808 times
-
- IMG_4720.jpg (69.62 KiB) Viewed 13808 times
Last edited by Ghostpig on Fri Jun 05, 2009 11:29 am, edited 1 time in total.
...
-
Pitbull Armory
- Archive Member
- Posts: 5312
- Joined: Wed Dec 17, 2008 10:28 pm
- Location: Out in the woods
- Contact:
Damn
Damng Ghostpig, you are a machine. I love the fantasy helm, and the Sallet is superb.
THE GHOSTPIG STRIKES AGAIN!!
Keep up the great work
Take care
Pitbull
THE GHOSTPIG STRIKES AGAIN!!
Keep up the great work
Take care
Pitbull
Hi, Please visit https://www.facebook.com/PITBULL-ARMORY-264094743168/ if you get time. Or contact me at leiderandy@yahoo.com if you have any questions. Take care, Andy @ Pitbull Armory
-
InsaneIrish

- SQUEEE!
- Posts: 18252
- Joined: Thu Aug 10, 2000 1:01 am
- Location: Jefferson City Mo. USA
That Sallet looks nice, can you give me some specs on it?
price?
Thickness of metal?
Size?
price?
Thickness of metal?
Size?
Insane Irish
Quote: "Nissan Maxima"
(on Pennsic) I know that movie. It is the 13th warrior. A bunch of guys in armour that doesn't match itself or anybody elses, go on a trip and argue and get drunk and get laid and then fight Tuchux.
Quote: "Nissan Maxima"
(on Pennsic) I know that movie. It is the 13th warrior. A bunch of guys in armour that doesn't match itself or anybody elses, go on a trip and argue and get drunk and get laid and then fight Tuchux.
Oh, yes of course!
Top part is 2 piece 2mm cold rolled steel and welded. I also used 6mm bar between the halves to get better shape. All other pieces are 1,5mm crs. This is a boffer helmet so that's why I used some lighter material, but I can't weld any thinner than 2mm so the bowl is 2mm steel.
I made this for 59cm head with enough room for padding. Price for this sallet and bevor is 260 euros, which is about 370 dollars.
...
-
Pitbull Armory
- Archive Member
- Posts: 5312
- Joined: Wed Dec 17, 2008 10:28 pm
- Location: Out in the woods
- Contact:
Nice
Nice Ghostpig, Hey can you post pics of the bevor when you get it done also?
Thanks
PB
Thanks
PB
Hi, Please visit https://www.facebook.com/PITBULL-ARMORY-264094743168/ if you get time. Or contact me at leiderandy@yahoo.com if you have any questions. Take care, Andy @ Pitbull Armory
-
Gordon the Grey
- Archive Member
- Posts: 623
- Joined: Sun Sep 24, 2000 1:01 am
- Location: Trenton, Ontario,Canada
Som pics of finished bevor and I got some work done on the Hurin helm also.
I broke my drill/sander so I can't finish anything until I get a new sander.
Bevor: http://s15.photobucket.com/albums/a370/ ... allet%202/
Hurin:http://s15.photobucket.com/albums/a370/ ... ens/Hurin/
I broke my drill/sander so I can't finish anything until I get a new sander.
Bevor: http://s15.photobucket.com/albums/a370/ ... allet%202/
Hurin:http://s15.photobucket.com/albums/a370/ ... ens/Hurin/
- Attachments
-
- IMG_4731.jpg (79.48 KiB) Viewed 13521 times
-
- IMG_4728.jpg (82.96 KiB) Viewed 13521 times
-
- IMG_4730.jpg (62.86 KiB) Viewed 13521 times
...
-
Greenshield

- Archive Member
- Posts: 884
- Joined: Thu Oct 24, 2002 1:01 am
- Location: New Orleans, La USA - Gleann Abhann(SCA)
- Contact: