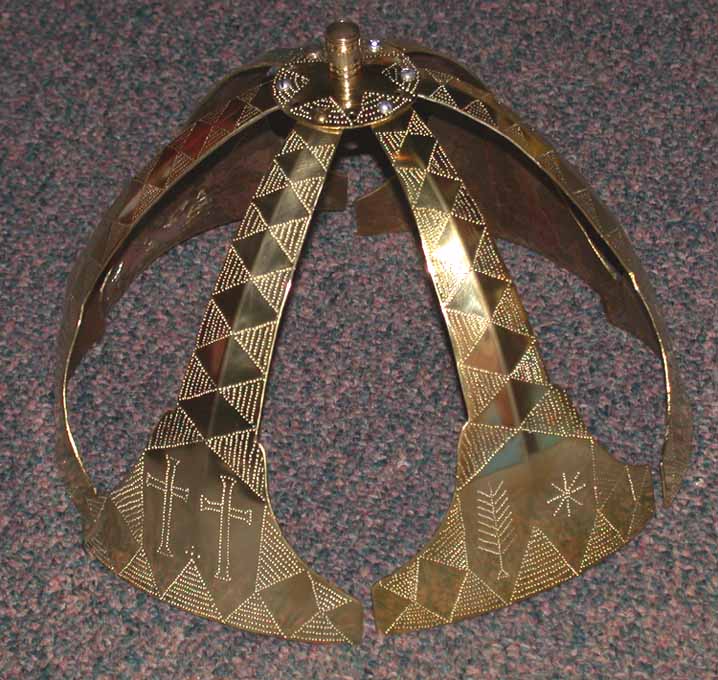
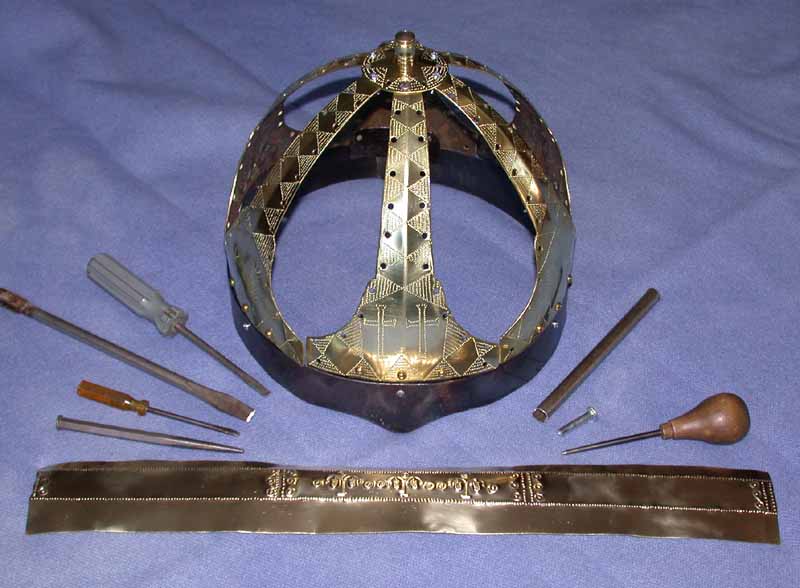
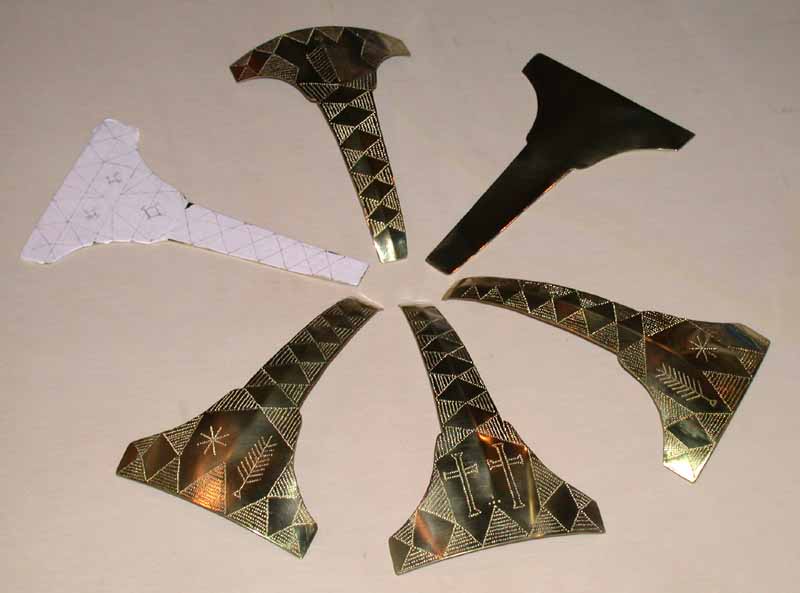
Thought I'd share my latest project, an "Ostrogothic" spangenhelm. So far I have 4 of the 6 brass frame pieces done:
The main basis for this is the first brass-framed helmet shown in this thread:
http://www.myarmoury.com/talk/viewtopic.php?t=5623
The motif is done in "punctim", little punch-marks. LOTS of little punch-marks! Each one takes a couple hours to do, and I think I'm wrecking my shoulders and neck in the process... The fifth one is covered in masking tape with the pattern drawn on it, which I found to be the best way to get a good result. Once that one is punched, I can peel off the tape and stick it on the matching 6th piece, and just follow the holes!
Once the decoration is done, I bend the piece to shape, with just a little dishing near the bottom with a rubber mallet. Add the ridge down the center with a piece of coat hanger wire taped to the back, hammering into a couple layers of heavy scrap leather. Works like a charm! I have also dished out the disc for the top, and stuck a decorative bit of brass tube on it for the crest tube.
SOMEwhere online I found photos of a gorgeous reconstruction, which was helpful for much of the detail that I can't see on the original. I realized right off the bat that the proportions of my frame pieces are not the same as the original, nor do they match the other repro, but they do seem to be in the ballpark compared to other originals. Over 2 dozen are known of this general type, so there's a lot of neat options. Most have gilded brass and silvered iron--I confess that I'm going to skip that part! Sorry...
Two more originals are at the bottom of this page:
http://www.romancoins.info/MilitaryEqui ... -late.html
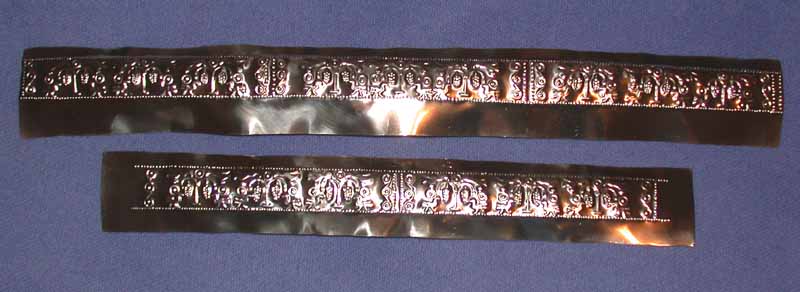
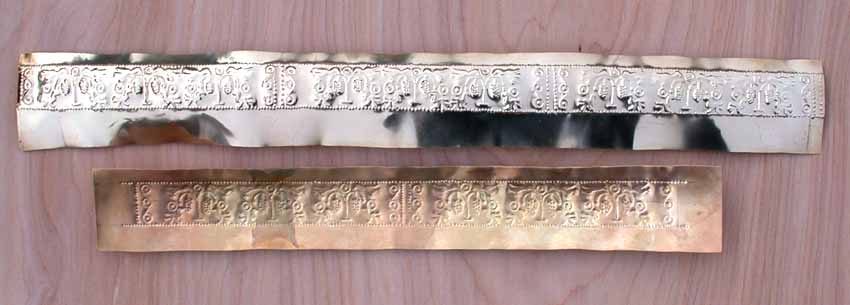
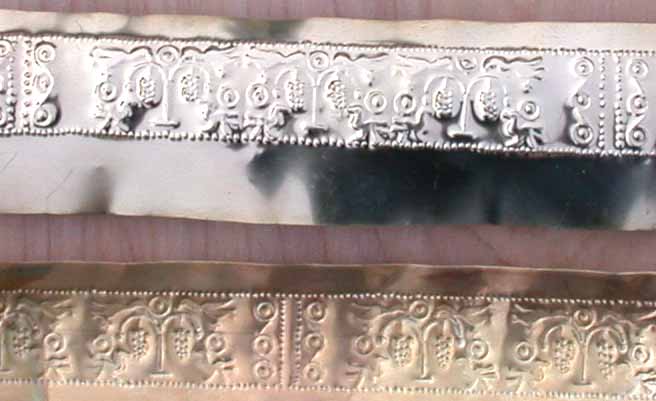
The next-to-last has the brow band that I'll probably base mine on. I'll have to make a couple tools for that. But actually seeing what the design is might be harder than copying it!
The helmet will be used for basic living history stuff, reenactment with steel weapons (no head shots, please!), and maybe some sparring around with latex weapons with the local "Iron Age Heroes" crew. The brass is about 18 gauge or a hair thinner, and the steel panels will be, too. Oh, the browband will actually be thin brass sheet (.015" or .010") wrapped around a steel band, just to complicate things. I have some pieces of riveted mail that I will patch together for the neckguard. Still waffling on the color for the leather edging and the horsehair plume, but no hurry.
Anyway, enjoy! I should make some progress on it this weekend, and more photos will follow, of course.
Thanks for looking!
Matthew