I giveth thee a pattern: welded/riveted 14thC elbow cops

This forum is designed to help us spread the knowledge of armouring.
Post Reply
Aussie Yeoman
Archive Member
Posts: 919
Joined: Tue Apr 11, 2006 10:16 pm
Location: Canberra, Australia

I giveth thee a pattern: welded/riveted 14thC elbow cops

Post by Aussie Yeoman »

Now, 14thC stuff isn't really my thang, but it does seem to be for a great many people around here.

I have in my mind an idea of a pattern for nice, huge-winged Milanese elbows that need no raising too. I'll draw that out eventually too.

One common problem in beginner's and intermediate's armour, is that cops are far too shallow. This is a shame, as elbow cops are beautiful when deep, they aid in articulation, and they actually do what they're supposed to do, which is protect your elbow.

Of course this won't look nearly so nice as a properly raised elbow, however it should look lightyears better than pieces of crap like this:

Image

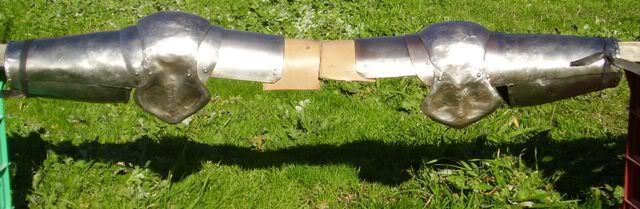
(it's ok to bag it, that armour's mine, from years ago - my first set)

The reason for shallowcopitis is usually at least one of a few things:

People don't have the facilities to raise.
People seem to be frightened to hit the metal hard enough.
People are in a rush to wear some sheet metal.

So I made a pattern for you who like 14thC armour to use which will give you a nice deep elbow cop. It doesn not require raising, and if you don't have a welder, it does not require one of those either.

I know people have done this before, so if nothing else, this should make those who aren't already, aware of the idea.

I modelled it off a real arm harness, from Italy circa 1380.

To make it, print the PDF and cut out the pattern with a generous margin. Like 1/2". Trust me you will be better off, and you can easily trim it later.

Then cut out the outline of the photograph as a measure of how much you ned to dish. As you can see, it really isn't mush dish to go from the extreme outside to the centre of the cop.

Start dishing the cop, and when you're getting close to the right depth, cut to the actual outline. If you are riveting, add a tab along the length of one of the ED lines. If welding, this should not be necessary unless you want to lap-weld (might be a good idea).

Before you weld/rivet, do whatever shaping you want to the fan. I'd do not more than what you see in the photo.

The eye looking thing in the DED angle is where you should drill a 1/4" hole. This will avoid cracking and/or unsightly pinching.

I must admit I haven't made this elbow in steel, however I made the pattern from some real armour according to basic geometric principles to which paper and sheet steel must adhere. That's also why I advise adding extra when you cut it out. :D

Have fun with it. If you make a set, do share your experience (woes).

Dave

EDIT - one thing I hadn't accounted for was that when you dish it, the edges DED might not want to meet so well. I adjusted the pattern to hopefully account for this.

Remember, adding extra is like really cheap, high benefit insurance!
Attachments
14thC elbow.pdf
(40.28 KiB) Downloaded 334 times
copy.JPG
copy.JPG (76.35 KiB) Viewed 429 times
lorenzo2
Archive Member
Posts: 1573
Joined: Thu Sep 26, 2002 1:01 am

Post by lorenzo2 »

Interesting, there are 15th cent german floating elbow cops based on the same general idea. Having made a few of those I would suggest great care when it comes time to roll the cop as cracking can easily occur at the cop point.
Bryan Mcarthur
New Member
Posts: 10
Joined: Mon Jun 07, 2010 9:48 am

Post by Bryan Mcarthur »

err... why dont you post it as a pattern? (and how on earth do you do that anyway?) then you can have something "set in stone", this post will just go away.
Konstantin the Red
Archive Member
Posts: 26725
Joined: Sun Oct 21, 2001 1:01 am
Location: Port Hueneme CA USA

Post by Konstantin the Red »

What does the little bullseye/roundel at Point E mean? "Peak is here?"
User avatar
schreiber
Archive Member
Posts: 3449
Joined: Fri Nov 17, 2000 2:01 am
Location: woodbridge, va, usa

Post by schreiber »

I've found the dart-weld thing to be in between two-piece and total raising, as far as level of complexity of manufacture goes.

I'll have to try it out after war, but I'll modify it so it doesn't have points at the center.
Stuff I will trade for: PWM controllers, steel sheet/rod/bar (4130/410/1050/toolsteel), ITC, casting supplies, wood tools, silver, oxpho blue, gun stuff (9luger/357mag/12g/7.62x54R/22LR), hammers, stakes, or pitch me!
Aussie Yeoman
Archive Member
Posts: 919
Joined: Tue Apr 11, 2006 10:16 pm
Location: Canberra, Australia

Post by Aussie Yeoman »

I have no idea how to post in in the pattern section.

As for the bullseye:
The eye looking thing in the DED angle is where you should drill a 1/4" hole. This will avoid cracking and/or unsightly pinching.
On second thoughts, it may even be better to centre the hole further out, and drill an even larger hole to make the radius a bit bigger in DED.

Gothic floating cops is the principle one which I based the making of the pattern.

Schreiber, a full two-piece might be easier, but having a dart does mean that those who can't weld can still have nice deep elbow cops. I agree with you, however.

Dave
User avatar
Mike F
Archive Member
Posts: 23048
Joined: Tue Mar 30, 2004 3:32 pm
Location: Between the Borders

Post by Mike F »

Bryan Mcarthur wrote:err... why dont you post it as a pattern? (and how on earth do you do that anyway?) then you can have something "set in stone", this post will just go away.
You mention it to me, I complain a bit, drink some Coke, and get it up on the site in a few days*

So if your pattern is pretty well set, with your permission I'll put it up for you. Would you like a name other than your user name, or is that good?


*Nowhere near a guarantee.
It's up to you now.
Aussie Yeoman
Archive Member
Posts: 919
Joined: Tue Apr 11, 2006 10:16 pm
Location: Canberra, Australia

Post by Aussie Yeoman »

I'd be happy to have it up in the pattern section.

My username is fine. My fan base is big enough as it is (the cat at feeding time).

Cheers,

Dave
Post Reply