I would like to thank Scott, whose shield comes to life in the following essay. As the patron of what was arguably an experimental project, he was patient and respectful throughout the duration of the shield's construction, which encountered numerous setbacks. Scott asked for a shield made to the most exacting historic standards, using extant mid-fourteenth century shields as primary evidence. We agreed upon a selection of criteria that was only limited by my personal skills and knowledge as a craftsman. I have done a reasonable amount of research on historical shields, and much of the hands-on experience I gained from this shield's construction has altered or increased my understanding (and appreciation) of the materials and processes involved in creating an historical heater shield. Scott also requested an essay on the shield's construction, and it is that essay which follows.
Jan Kohlmorgen's exacting research, published in Der Mittelalterliche Reiterschild, is the major source for my current knowledge of the construction and materials of a heater shield. I do not read German well, but after spending a deal of time perusing the book and translating key sections, a number of details emerged that helped me to craft this shield. Please note that I have not read much of the book's text outright yet; it is beyond my skill or time to translate (despite my great wish to do so).
The Shield Blank
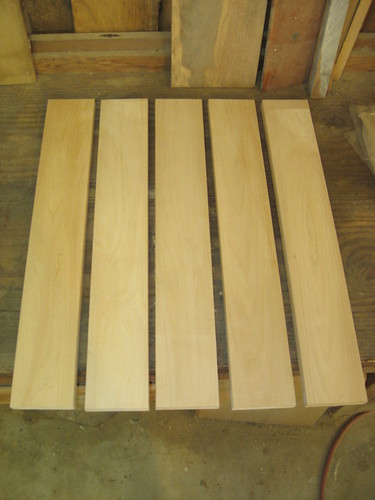
Concerning the shield's blank, Linden was by far the most common wood used in period, with only a couple shields Kohlmorgen examined being made from other sorts of wood (e.g. Ash). In the United States, Linden is commonly known as Basswood. The measurements of surviving shields from the mid-fourteenth century suggest that our finished shield is very typically shaped; 48cm wide, 58cm tall and 12-15mm thick, with a robust downward flare. It is slightly curved along its width. To start, all six of the Linden planks were planed down on their edges at slight angles, to achieve the desired horizontal curvature of the blank. Initially, this was a rather hastily accomplished task, and that proved to be regrettable. After the planks were aligned to one another, 2x4 boards served to make a jig that would hold the wooden blank together as the planks dried to one another. Once the jig was set, it was time to begin making my first batch of milk glue.
---------------------------------------------------------
A Concoction of Milk Glue
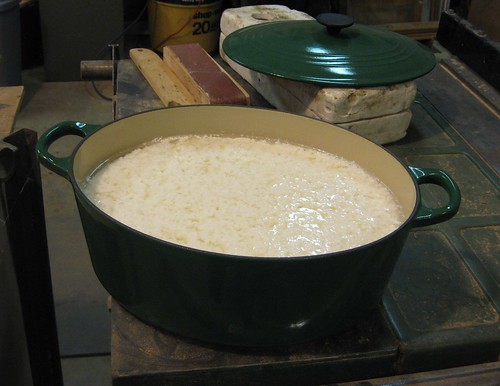
Several medieval recipes for glue exist, mainly dealing with cheese. Milk, obviously, was the base for these glues, but starting with milk itself seems to be an old yet uncommon method by the medieval period. In an excellent article titled Medieval Glues up to 1600 by C. M. Helm-Clark (published as a PDF based on notes for a class at the SCA Estrella event in 2007) an early, solid citation is provided for starting with milk. This came from Pliny in the second century CE, and suggested using separated milk curds as the basis of a glue. Because of various technicalities related to each method, I opted to start with milk. As Helm-Clark noted, Pliny was commonly read in the Middle Ages, so the likelihood that his recipe was used is reasonable. After beginning with half a gallon of milk in a large cooking pot, a cup of vinegar was added to speed up the process of separating the curds and the whey. The milk was left in a garage on a warm evening, and the following morning it seemed sufficiently separated to begin making the glue.
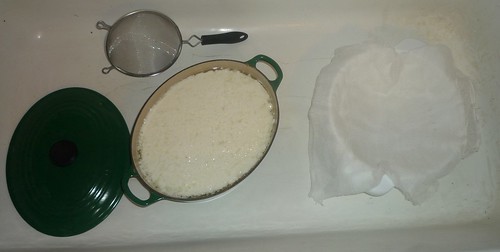
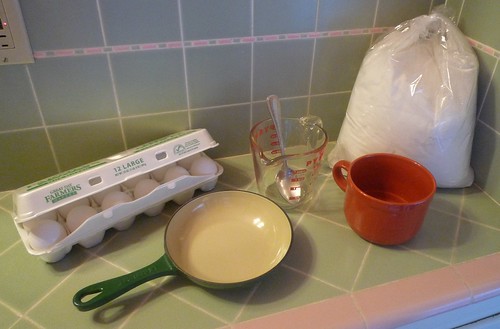
It is very important to be prepared for every step of an operation such as extracting milk curds from a large pot. In addition to the tools in the photo below, which includes a strainer, lots of cheese cloth draped over a colander and the milk in its container, there was also a measuring cup ready to accept the strained curds and plenty of paper towels handy in case of a mess!
With each batch of milk glue made for this shield (in the end, there were six batches made) the resulting curds varied a lot in consistency. This depended primarily upon how well they were strained from the whey, and the amount of patience allowed for squeezing and rinsing the cheesecloth full of curds. It is important to rinse it well to remove the vinegar, which can potentially ruin the glue. Once the process was understood and some notes taken, from half a gallon I could get about a cup full of curds about the same consistency as cottage cheese (and which tasted much like it).
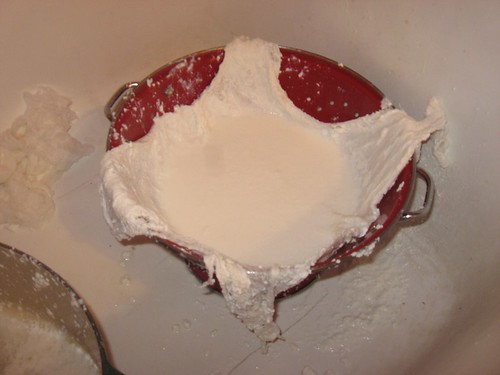
Casein is the binder in milk and cheese glues. It is the majority protein found in cow's milk. Unable to know how ancient man stumbled upon the discovery of casein's bonding qualities, modern science can at least reveal some of the nitty-gritty aspects. Just like Pliny or the medievals working with cheese, the key to breaking down the casein for re-bonding is a reaction with Calcium Oxide, or quicklime. One medieval recipe called for grinding the cheese directly with limestone. In this case I opted to use safe, powdered pickling lime to create the reaction. After enough lime was added to the curds (a factor that seems to vary depending on the curds, but roughly three heaping tablespoons per cup) and a bit of stir put to, the reaction began. The immediate effect was that the white, solid curds turn into a sticky, grey soup. At this point the casein had almost completely broken down, and was ready for application.
The glue has to be applied quickly, because it has a short dry time and cannot be kept wet easily. The Casein reformulates itself as the glue dries, creating a very solid bond that is quite weatherproof for its natural formulation.
---------------------------------------------------------
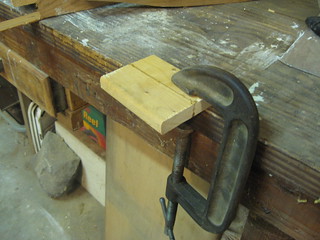
With the planks set up on the makeshift jig in the order they'd be glued together, it was time for them to do some bonding. The glue was brought out and hastily painted onto the sides of the planks, and they were set down and the entire back of the blank was covered in glue to compensate the tiny air cracks that developed as the glue settled. I'll stop there - that method didn't work well. As I began to cut out the shape of the shield from the blank, a piece of the excess hit the floor and cracked right along the glue seam, exposing a porous, dusty layer of glue between the wood. The entire blank was disassembled (easily except for one joint, which seemed to have a much fuller body of glue than the others) and the planks very carefully cleaned along the seams, and then re-planed for a more perfect fit. Apparently the planks had to be held in place as they dried, and tightly at that.
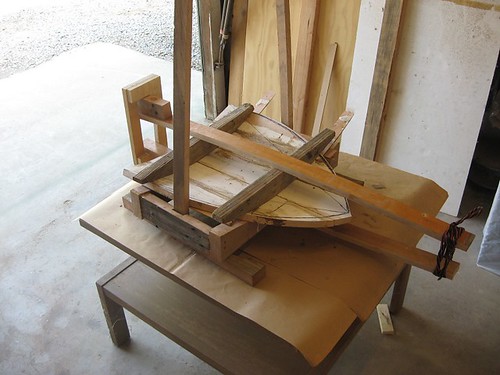
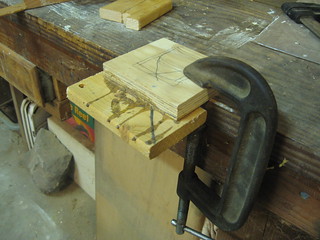
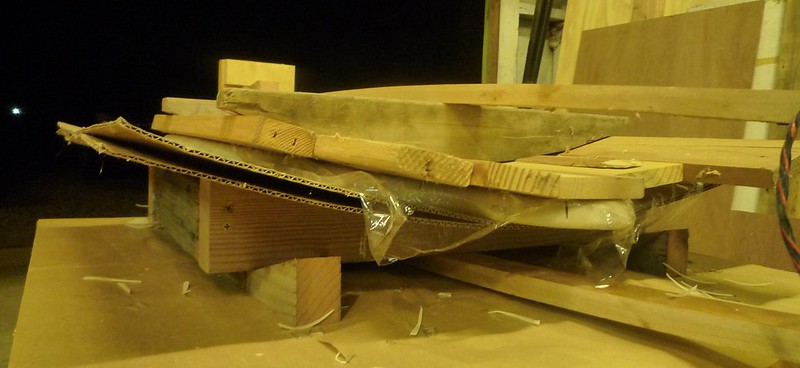
My father gets most of the credit for the following invention. As we discussed the dilemma he frequently came up with good, simple ways to clamp the planks together as they dried, and I kept shooting him down. "It has to be something that a man in the Middle Ages would have feasibly recognized as a solution!" We continued to ponder, and at one point touched upon the possibility of using tension with ropes or rocks. The evening passed and no progress had been made... Next morning I woke up, and the solution had been built.
The jig I hadn't even assembled yet had been made into a stout framework, with slots cut around its inside circumference at various points to set slender oak boards through. Once the heater blank was placed on the jig, said oak boards were placed horizontally and vertically over the jig, and were then tied together at both ends to create tension. This very effectively jammed the planks into place very tightly. It was brilliant and effective.
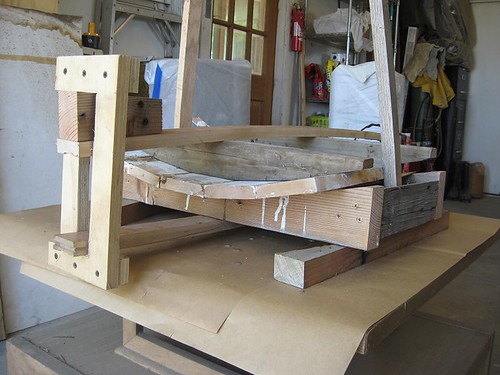
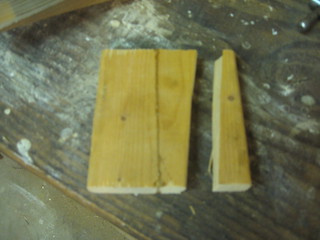
After making a second batch of glue the contraption was set up to accept the drying blank. While waiting for the blank to dry, the glue was tested on two scraps of wood, both about 6" square and half an inch thick. Each scrap was taken into two parts, glued together again along a broken seam of one and between the sandwiched pieces of the other. When hit with a hammer while being held securely over the edge of a bench, each piece of wood shattered at points other than the glued sections. Looked good.

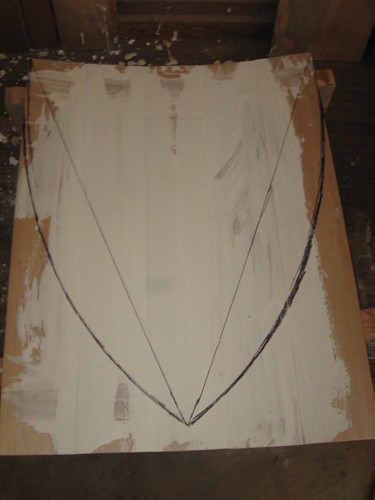
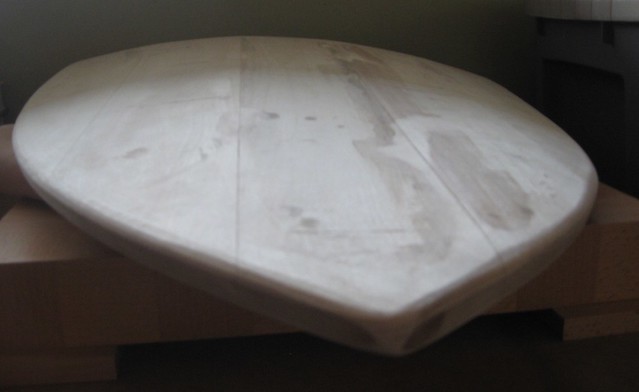
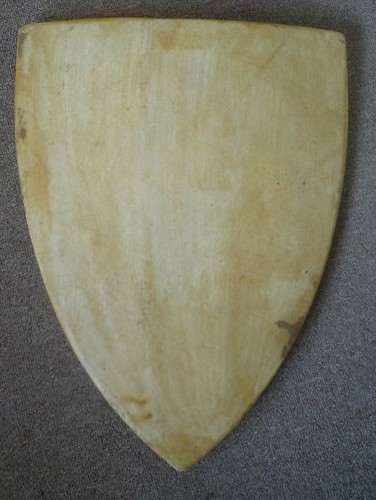
Nearly forty eight hours after assembling the blank inside of the 'tension jig' it was removed for inspection. It seemed very solid and there were only signs of a single break between two of the planks, perhaps three inches long and not wide enough to slide a piece of paper into. A tiny batch of glue was made up to fill this as well as a couple of less prominent gaps. The blank was then cut down to its final shape with a band saw, and underwent a fair amount of surface sanding both by machine and hand. It turned out to be shaped nicely and was lightweight.
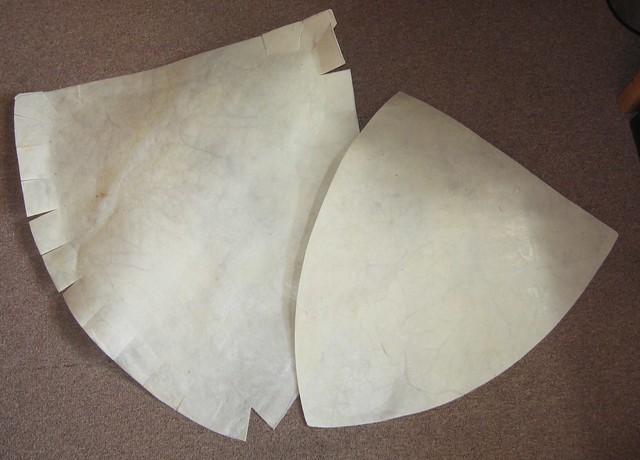
The Rawhide Covering
Thick parchment was used to cover both the front and the back of nearly every surviving shield from the high Middle Ages, and could be from cows, goats or pigs. In the case of this shield, calf rawhide of a thickness appropriate for a large bass drum was selected. After being cut into two basic pieces to fit either side of the shield - the front piece able to fold over the edges about two inches and the back slightly smaller than the blank's dimensions. The front piece had tabs cut around its circumference to make it easier to fold over to the back of the shield.
A prior roommate of mine, Carl, used many of the techniques and materials that this shield was made with when he reproduced a tenth century Viking shield. Without Carl's prior experience this project would have been far more worrisome. When he glued down the rawhide coverings on both sides of his shield, he did so one side at a time and without clamping the shield down. As a result, the final product was slightly bowed due to the pressure of the drying rawhide. (What's awesome is that this showed off all at once the tensile strength of the drying rawhide, the planks, and the milk glue.) With Carl's experience in mind, I opted to use the tension jig again to hold the blank in position as the rawhide dried.
The rawhide was soaked for two hours in a tub, submerged under weights to prevent it floating and absorbing the water unequally. Simultaneously another batch of glue was made. The jig was prepared with two new layers of material to take the blank and rawhide. All at once the shield blank had both rawhide coverings, completely covered in glue, applied to its surface. The tabs were held down with staples from a staple gun. Seran Wrap and cardboard sandwiched the blank as the oak boards were pulled tightly over the jig, which had a number of wood chip spacers slid at various sections to apply pressure to the entire surface of the blank's backside. Not exactly a period bit of construction, but it was effective.
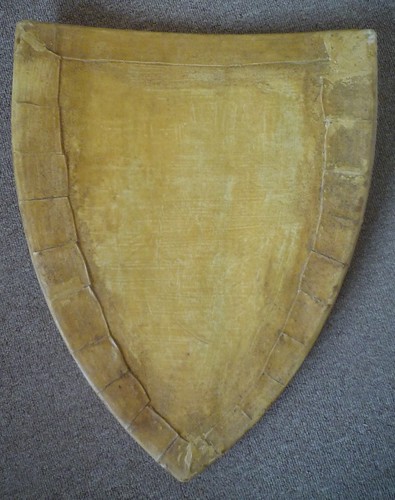
The shield was once again left to dry for two days. After being removed from the jig, the rawhide revealed itself to be very well set over the wooden core, and the staples were removed with ease. Alas, a number of overlaps and gaps in the tabs required attention.

After the rawhide was trimmed up with a razor blade, another batch of milk glue was made. This time it was mixed with a large proportion of sawdust, and served as a putty to fill in the spaces left. This was repeated again after the first coat had dried, but there were still considerable imperfections due to the viscosity of the glue, which was not thickened by the sawdust as much as I had hoped for.
After talking with Scott, it was decided that a bit of wood putty wasn't going to hurt anything. Putty was applied primarily to the upper corners of the shield, where the rawhide tabs initially left very large gaps. After being sanded down some the surface was presentable. Along the same lines of sacrifice, I opted to use a few small tacks to hold down the tabs at points where the edges were beginning to peel up. Now the blank was ready to be painted and assembled.
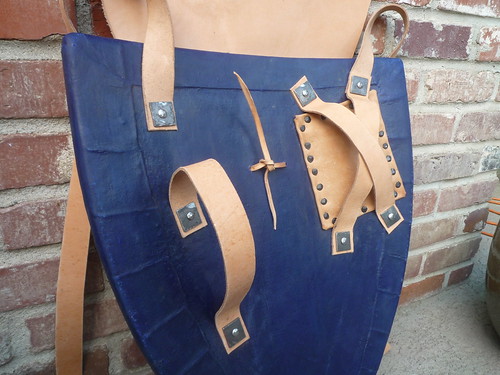
The Hardware
Scott indicated a particular sketch from Kohlmorgen's book, which was a general rear-view of a basic high medieval (Hochmittelalterlichen) heater shield, and apparently not identified with any particular shield examined in the book (p. 14). Its layout very closely resembles reconstructions proposed by Kohlmorgen for shields c. 1300. It's important to note that Kohlmorgen made most of his projections about strapping often without ample evidence (as only the rivets or holes for them commonly remain). They are pieced together with enough common sense that I think Kohlmorgen got them right in the main.
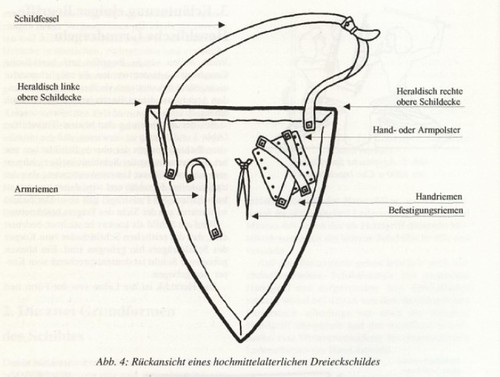
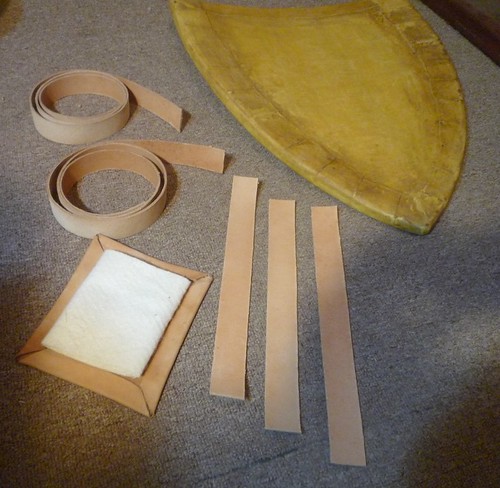
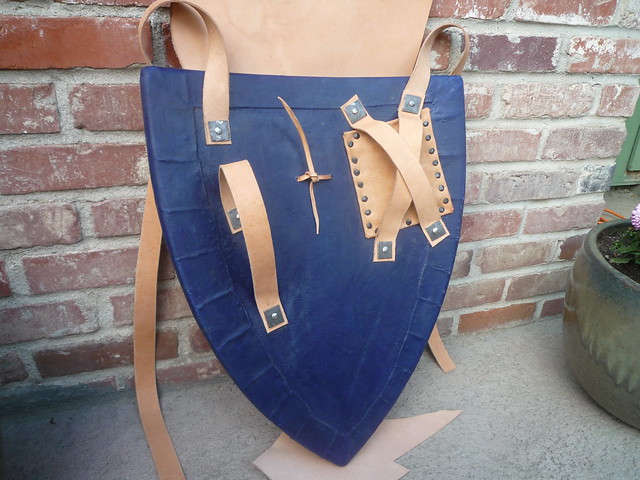
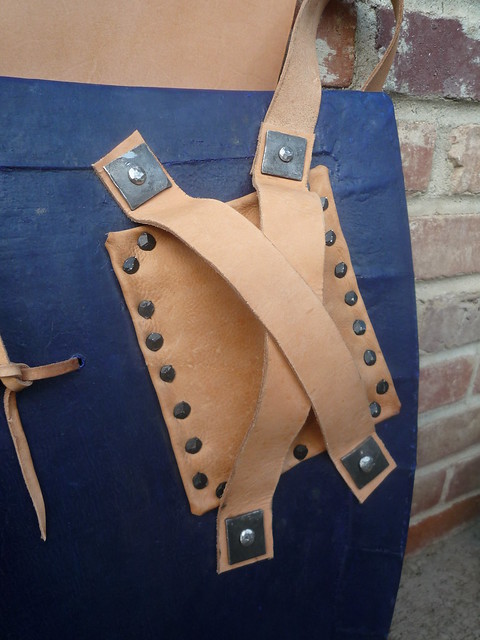
This shield required two guige straps, two criss-crossed hand grips and one looped strap for the forearm. Seven rivets and washers would hold the straps in place. A small leather pad, stuffed with wool batting, was to be tacked down directly below the hand grips. In the middle of the shield, two holes were necessary for a leather lace to pass through; historically such laces were used for hanging the shield up at a man-at-arm's lodgings or with his baggage on the road.
All of the leather used for the strapping was cut from stout, 3 oz. vegetable tanned cowhide. The straps were cut by hand with blades and shears. The result looks hand made compared to pre-cut belt blanks, because it is. The pad was made from supple, strong 1 oz. leather. Beneath it was a layered wool felt pad, about 1/2" thick compressed. All of the leather had two applications of neatsfoot oil brushed on, neatsfoot having been used commonly on historical leather wares. It seems to be generally accepted that neatsfoot oil (which is made from cattle shins and feet) was used in the Middle Ages, but I have yet to come across a period reference.
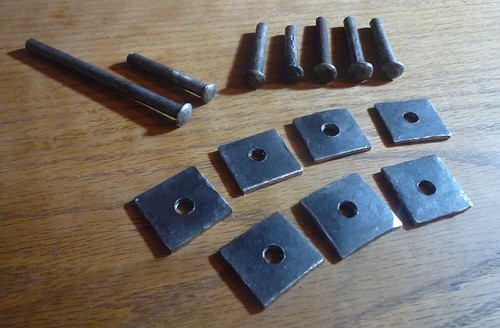
The rivets and washers were made from industrial stock materials, using a mix of power and hand tools. The rivets started life as a 1/4" steel dowel, and were initially cut about 2 1/2" long with a hack saw. They were each firmly placed in a vice and heated to a dull orange a couple of times, being hammered on with a small ball peen to form the relatively smooth tops, which would be exposed on the front of the shield. The washers were made from 1 1/4"x1/8" steel bar stock. Seven holes were drilled in the bar at intervals of 1 1/4" and then the spaces in between were cut without measuring, to create slightly nuanced shapes among the washers. Finally, the entire surface of each was gone over by hand to hide any industrial qualities. The nails used to secure the pad are lovely, individually crafted (as per the advertisement) and sold by a furniture restoration company out of the UK.
A Coat or Six of Tempera
Before any assembly was done on the shield, it was decided that the back should be painted with at least a couple of coats of color. It was not initially expected that I would paint this shield at all. To avoid wandering off into the fine details of the correspondences between Scott and myself, I'll just say that it was nice to have the opportunity to do the painting. It turned out to be a rather illuminating process...
Historically, tempera was one of the main sorts of paint used in the medieval period, and we evidence it most often in frescoes that were painted over in the great halls of castles and manors. Milk paints also seem to have been used frequently, and perhaps would have worked even better for a shield now that I have some experience with tempera under my belt. In order to mix up the routine this shield was painted with tempera.
Tempera is a mix of egg yolk as a binder, a base of either water or vinegar, and pigment. The pigments used for this shield were industrially manufactured from natural, singular ingredients. The red and blue were both from flowers sourced in Europe, the white and grey both from rocks in North America. I used Balsamic vinegar of Modena as the base for the blue and red tempera, and water in the white and grey.
Making tempera is more simple and less time consuming than making milk glue. All of the tools necessary to make the tempera were set out on a clean bathroom counter, and the entire process took all of five or six minutes. The eggs were cracked over a wide pan, the yolks scraped out and the membranes rinsed off, then they were poked with a fork and the contents of the yolk membrane squeezed into a measuring cup. I found that as few as four eggs were be necessary to make enough tempera to roughly coat the entire shield's surface, but at first I used several more than that to be sure not to run out. Like milk glue, tempera dries quickly and needs to have more base material added to it every ten or twenty minutes to maintain its viscosity.
The entire surface of the shield was covered in three thick layers of a yellowish "clear coat," which is essentially what the tempera wound up looking like once the "grey" pigment I purchased was added to it. The pigment was advertised as a good way to thicken various paints and not to cause discoloration, so the yellow came out naturally from the egg yolk. The tempera dried very quickly once it was on the shield and set under the summer sun, so I was able to put down three coats of the clear within an hour's time. When it came to doing the colors later I worked more slowly, as the tempera needed time to completely dry before I could apply coats of different colors or move my tiny brushes (and wrists along with) over the surface of the shield.
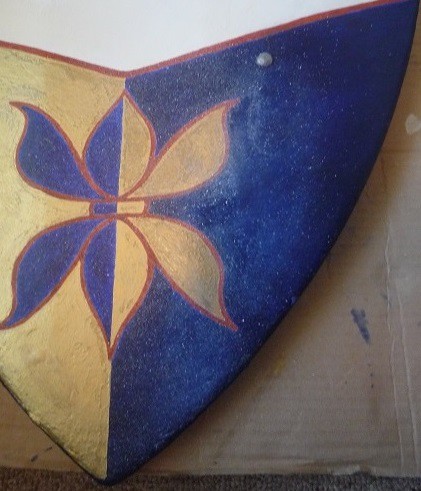
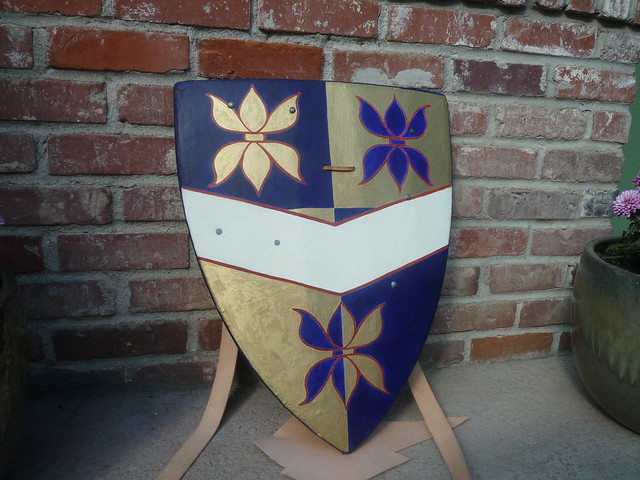
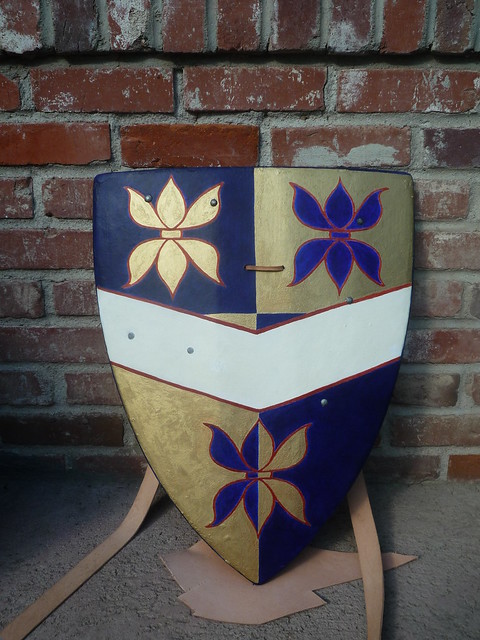
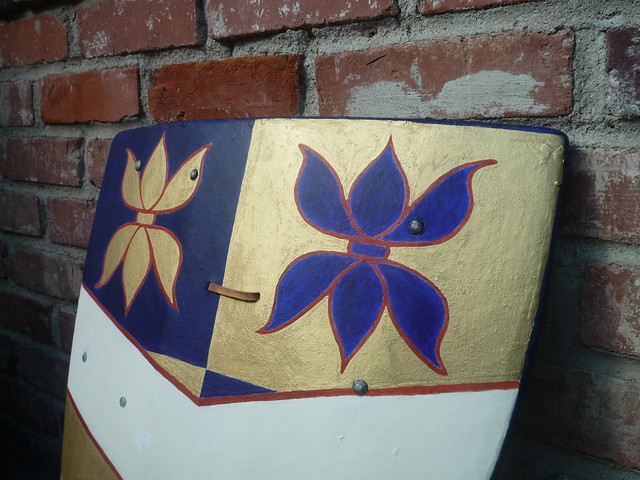
Scott requested that his usual heraldry be put on the shield. This includes three "fleur-double-tets" and a white chevron on a quartered background of blue and gold. Sounded good to me! After looking at a couple photos of his gear that incorporate the designs with varying degrees of detail, I sketched out an interpretation directly onto the shield blank and got prepared for painting. The sequence of painting and assembly took consideration, and below is a breakdown of how it went:
1) Two coats of blue were painted onto the back of the shield.
2) The pad was tacked down to the back of the shield and all of the straps were riveted in place. This process takes two sets of hands to do well, and will inevitably get the shield a bit dirty on both sides. This is why only minimal paint was put down before assembly.
4) The rest of the painting was finished after the shield was assembled. This tallied up to between five and six coats of blue, white and red as well as nearly two complete coats of gold leaf on the front. For the leafing a faux liquid product was used called Liquid Leaf, and the "brass" finish was selected because it has a nice sheen to it. I'd worked with the product before but over such a large surface area it turned out being very fragile.
---------------------------------------------------------
Musing on Endarmes and Guiges
After accepting Kohlmorgen's proposed reconstruction of a typical strap layout, it was time to figure out how long the straps were going to be. As with anything else, there are some important considerations to be made while designing a functional shield. I've made a number of heater shields with historical dimensions and reasonable historical strap layouts. With each new shield the most obvious change has been in the length of the straps - they're getting shorter and tighter, allowing greater control of the motion of the shield by pulling on the taut straps. This concept applies to the guiges, or the long straps for the shoulder, and the endarmes, straps to hold the forearm and the hand grips.
I've built numerous heater shields of different sizes and with strap rivet placement based on historical examples. The dwindling size of shields from the early thirteenth to the mid-fourteenth centuries was likely due to a number of changes in armament and fighting techniques. By the end of the period shields had diminished to sizes scarcely larger than a buckler, and this example is no exception. It is hardly more than 22" in length and is less than 19" wide. This size of shield is very versatile in its handling characteristics compared to larger, heavier shields of the thirteenth century, but also provides much less protection than those shields.
In order to take advantage of the shield's optimal utility at this size and weight, the endarmes had to be responsive to slight changes in the arm's position. This requires that the straps be as tight as possible. The elbow strap was set to fit Scott's 15" forearm circumference snugly, and the grips were tight enough to feel slight pressure from as a gloved hand squeezes between them and the leather pad. Conversely, the guige straps needed to be long, so that they could be slid over the right shoulder but were not short enough to inhibit using most of the left arm's extensive range to wield the small shield in combat.
---------------------------------------------------------
At this point Scott and I discussed options, and in order to avoid too many troubles with the gold leaf, it was decided that a bit of clear coat would come in handy. Well, let's see... Long story short... I sprayed white spray paint onto the surface of the shield, and had to go back and apply two (and even three in some spots) more coats of red and blue tempera, and gold leaf, to a majority of the shield's face.
After the blunder was successfully covered up, a different product was brought to my attention... Some research indicated that it was appropriate to use acrylic fixative to protect the surface of a tempera painting, given that both acrylic and tempera are water based and are often successfully mixed. Three coats of fixative were sprayed onto the front of the shield and then it was packaged up and shipped off. Ironically, just a day later I was introduced to glair, a clear tempera made with egg whites! Glair was often applied to manuscripts to hold down gold leaf.
In Conclusion
To go back to the beginning, one of the first details of concern was sourcing proper materials. At first it seemed a simple task, but it became an increasingly detailed list as the various components of a shield were broken down to their most basic ingredients. The list below is of (approximately) all of the materials that were used to create this shield, without considering waste created by my own errors in judgment. I put it at the end of the essay because it was only known in its entirety after I had finished making the shield.
Six Linden (Basswood) planks (4x22x5/8").
Six square feet cow rawhide.
One gallon milk.
Five cups distilled vinegar.
One cup pickling lime.
Two dozen eggs.
Two cups natural pigments (blue, white, red and grey).
One cup balsamic vinegar.
Two square feet of 4 oz. vegetable tanned leather (in lengths up to 45x1 1/4").
Half cup Neatsfoot oil.
1/4 fluid ounce liquid gold leaf.
1/4 pound steel for various furniture.
I had no idea what the material list would look like with such specificity before beginning construction, and it was rather exciting to witness the ingredients accumulate. Considering the work necessary not only to source these materials in nature, but to process and bring them together in the same place and merge them into a single piece of functional art, greatly increased my awe of the historical craft of shield making.
- Gerhard von Liebau
(High resolution and additional photos may be viewed at the Flickr album, located here!)
