LOL fitting a sandwich in the breastplate... If that's the case I wonder if they used to stuff turkey legs in the days of old.
First Helmet Tips
Re: First Helmet Tips
I'm not a big fan of the bar grill on the bascinet personally. I know for combat purposes for SCA makes a lot of sense, but something about the original look is more appealing to make; atleast for me. As far as raising the face plate and helm I'd have no other choice when I eventually do one because I don't have a welder 
LOL fitting a sandwich in the breastplate... If that's the case I wonder if they used to stuff turkey legs in the days of old.
LOL fitting a sandwich in the breastplate... If that's the case I wonder if they used to stuff turkey legs in the days of old.
-
Konstantin the Red
- Archive Member
- Posts: 26725
- Joined: Sun Oct 21, 2001 1:01 am
- Location: Port Hueneme CA USA
Re: First Helmet Tips
And what goes with a bascinet like that Vogt von Matsch special there, which apparently began service as a Klappvisier bascinet with a small, cupped-form visor with eyeslits and a few vent holes hanging from a single centerline hinge, and later got reworked into a temple-hinged Hundsgugel basc, there are about three well attested historical ways to go, and they're all goodlooking too.
The Camail & Jupon look:
Universal over all of Europe, latter half fourteenth. Basically variations on a theme: bascinet with mail camail usually (rarely, a scaly one) plate armor on the limbs by end of century, splint armor on the limbs early and mid century, particularly in the Germanies, with the torso armor covered over with a jupon, on which one's arms might be displayed. What was under the jupon was something of a mystery, but most of the time something pretty hard -- a Coat of Plates, usually layered over a mail haburgeon, the "little hauberk." The bottom of the haburgeon likely showed over hips and upper thighs.
The Lentner and related garb look:
More cloth and bigger than the usually pretty close-cut jupon. Looked more like some big-sleeved jacket. Most famous example is the memorial effigy of Herr Walter von Hohenklingen (obit 1376 1386 at the Battle of Sempach), whose Lentner has huge, seamed banana sleeves buttoning just at his steel gauntlets. You can hide a lot of functional but nonperiod armor under a voluminous Lentner. Herr Walter is kitted out with a globose breastplate worn over his Lentner, but some simply operated without, and you saw nothing but cloth from camail to wrists, with metal gauntlets on the hands, and the cloth came down to upper thigh and plate legs took over from there. Worn with or without a waist belt, like as not both a waist belt and a knight's plaque-belt lower down about the hips as well -- good place for his dagger, usually a basilard or a rondel dagger, sometimes a bollock. I think this kind of big-jacket look is very stylish. It isn't done often enough, either. At the bottom of this thread are two guys wearing the sort of thing I'm talking about, one in red and a barbute, one in blue and a grilled basc. Less Lentners, than related.
The Globose breast over something like a Jupon look:
More visible iron, now, like the Churburg 13 harness' segmented breastplate. Very famous, perhaps overrepresented in the SCA, much discussed here. There's artwork of the time showing other segmented breastplates, too; they all seemed to work about the same. Breastplates of the time, either solid or segmented, had pretty much the same domed contours, and {ETA: mostly; see the Pistoia Silver Altarpiece for literally a contrary view, dated about when Herr Walter up there died} didn't have taces augmenting them below; those came later with rather different globose breastplates of the more gothic style, which soon enough had taces, then tassets too. Some fabric still shows, but there's more shiny steel and less other color; still with the haburgeon, though they were about to retire this one and go pretty much all plate at the end of the fourteenth. Spaudler-like articulations still up on top of the upper arm, covering the shoulder but connected to the rerebrace. The separate spaudler would appear in the next century too, while they were trying to invent real pauldrons (and further develop the spaudler) and come up with an articulated plate gorget for the neck. Both these things took them quite a while.
And all of these had their sub-variations, since nothing is standard-issue, and an innovation in one place might take a long time to show up in another, medieval travel being what it was.
Last edited by Konstantin the Red on Sun Aug 31, 2014 9:00 pm, edited 3 times in total.
"The Minstrel Boy to the war is gone..."
-
Konstantin the Red
- Archive Member
- Posts: 26725
- Joined: Sun Oct 21, 2001 1:01 am
- Location: Port Hueneme CA USA
Re: First Helmet Tips
critch wrote:LOL fitting a sandwich in the breastplate... If that's the case I wonder if they used to stuff turkey legs in the days of old.
Curiously, turkeys seem somehow to have been brought to India first, maybe by Portuguese sea voyagers who were very busy doing long voyages in the time of Prince Henry the Navigator. They made it to India, going for spices. Clobbered the Middle East-to-Europe spice trade when they succeeded, and could now ship spices all the way by sea. From India they were spread west and got popular, and a lot of languages called them some variation of "the Indian bird," and they didn't mean Amerindians unless I'm completely wrong. I could be; maybe it was American Indians they were talking about. (headscratch)
But a nice Welsh or Scottish meat pie, now, where it wouldn't get smushed... nom nom nom.
"The Minstrel Boy to the war is gone..."
Re: First Helmet Tips
Hah wow you know your stuff! Do you have any reference pictures of all listed above? I couldn't really find examples aside from camail and the globose chest which is fairly common in the average person's eye.
Also is this considered a "Bascinet" as the same category of a pigface minus the pigface or is this considered something else like a mix between a sugar loaf?

Also is this considered a "Bascinet" as the same category of a pigface minus the pigface or is this considered something else like a mix between a sugar loaf?
-
Konstantin the Red
- Archive Member
- Posts: 26725
- Joined: Sun Oct 21, 2001 1:01 am
- Location: Port Hueneme CA USA
Re: First Helmet Tips
That one's bascinet all the way, with an oddball Klapp that's pointy on the bottom. I hope he never bows his head deeply; ouch. I imagine when you looked up "sugarloaf" you found all those tons and tons of pics from people making for the modern market -- and how many of these available for sale sugarloafs have welded-up bascinet skulls, that is, not the kind of shape you see on William de Staunton's memorial slab or in the illuminations in the Luttrell Psalter, nor the visored sugarloafs found in other manuscripts. And let's recall the roundtopped fireplug helms that also come up, the so-called "Valerius" style -- round tops, straight sides, and biker-art slanty-pointy sights. These are also getting called sugarloafs -- well, maybe for a certain (low) value of. In the late 1960's SCA, they were the state of the helm art for some years, when it was remarkable to produce a scratchbuilt, homemade helm that didn't bite you on the nose with a face hit. The hippies' first lesson was to get a helm with some protrusion for nose and mouth... and practically everything then was backyard, garage-built. The hippie who had actually taken metal shop was a man with a big advantage. They devised a lot of oddball methods for workarounds... I've never seen a grill visor sawn out of a sheet of 1/8" steel plate and bent to shape, for instance, but you can find this in old SCA manuals. Even as late as 1985 of the Common Era, Alail Horsefriend wrote up how to do a cut-out bargrill for the Known World Handbook, a useful little compendium on many popular SCA crafts such as sewing medieval garb and making armor, weapons, and shields. Medieval tailoring was, well, pretty different. Old editions of The Fighters' Handbook -- like the KWH it is available from the SCA Stock Clerk, and likely sombody in the local SCA can show you copies of either -- give other rather wooly non-welded bargrill construction methods. But the welded kind are generally stronger of course.
For my hard-earned armor dollar, a true sugarloaf grows out of a barrelhelm development that showed up before the greathelm took over as the barrelhelm's larger son: top caps in helms started off about the size of a smallish dinner plate, lots of area up top and the upper parts of the helm quite vertical all round, not too far from the more cylindrical sorts of pothelm that came before them. You had a regular helipad up there, and prominent corners. In the SCA we don't like that configuration all that much -- no glancing surfaces. Against sharp swords and battle axes back in the day, it actually worked better than in the SCA's stick game, because it made spaced armor for the skull, very hard to cut far enough into to kill a guy. Still, sloping, glancing surfaces were clearly desirable, especially in front, against lances. So the top two plates of a helm began pulling in, and the top cap became smaller and smaller -- and smaller yet. And made deeper and deeper, along with getting a crease along its midline. Until some bright boy wondered what might happen if he dispensed with the top cap altogether, and let the sloping of the upper plates come together into a blunt point -- darned if it didn't work, too! Thus, you get rather point-topped, all-sideplate, comprehensive sugarloafs like in the Luttrell Psalter, and with room for a cerveillière skullcap and camail hung from it, the earliest form of bascinet. The de Staunton sugarloaf has that band port and starboard that goes up to the peak -- different approach to the same end. There's nothing sacred, historically, about constructing a helm only one way; they didn't.
The above-shown pic's basc differs from a pigface in using a smaller visor that you can clap up and down, if you will, for convenience. Where that one has the funny point, many Klapps finish up in a little curved-up tab, that might possibly be useful as a point you could fasten the visor down with a loop of thong, leaving worthwhile freedom to turn your head, and ease of getting the tab out of the loop to open the visor, when you want to. Maybe. It's not attested to, but so many Klappvisiers have the little tab thing, and the features of bascinets and their visors all seem to have a functional purpose. A Klappvisier fits easily into a great helm worn over everything for anti-lance protection. Once the lance charge was done, breaking most of the lances, they'd shed the big helms and go with the better vision available from the bascinet beneath. The pigface visor was to do away with futzing with the great helm and give glancing surfaces to turn a lance thrust to the face. It worked, if how much and how long they kept doing it are any indication. Helms stayed around, as sporting goods for the tilt, for a long time after they became uncommon in battles and war. Because they worked well at the tilt.
I hope I don't exhaust your patience with this info dump. Most of this stuff is around, in various sources and places. What I'm trying to give, me and others who know more than I do, is a sort of condensation of what goes into the hobby.
Last edited by Konstantin the Red on Fri Aug 01, 2014 11:03 am, edited 1 time in total.
"The Minstrel Boy to the war is gone..."
-
Konstantin the Red
- Archive Member
- Posts: 26725
- Joined: Sun Oct 21, 2001 1:01 am
- Location: Port Hueneme CA USA
Re: First Helmet Tips
Nowadays, Ugo Serrano up in the SCA Kingdom of An Tir (Washington, Oregon and the Pacific Northwest into Canada) is the state of the art for cut-out face bars. Can't call them grills; they are sculpture. Absolutely artfully gorgeous. He fights in one of them all the time.
The welded bargrill of round stock is growing steadily more artful too. Some helmet faces rather lend themselves to a Marvel Comics Punisher sort of design. Still, there are plenty of kendo-mask looking jobs soldiering on, on bascinets and Roman and Dark Ages helmets, and I don't look for them to fade out for a long time.
Armor elements which you'd rather not see, a lot of the time you can make them less prominent by painting them black. It's something of a convention with the SCA. Some slatback helms get their slats treated that way, as do some, well, solid-back helms with a nape plate added on to a helmet type that historically didn't have such a thing, like the Phrygian smurf-hat, the Norman conical and the Viking spangenhelm, to bring these up to SCA code. Dark Ages helmets, btw, with their separate cheek-guards and nape-plate (the gap is bridged over with bars as and if necessary), are easier to hear out of than bascinets or Topfhelms. These don't necessarily have any earholes.
Last edited by Konstantin the Red on Fri Aug 08, 2014 1:51 am, edited 1 time in total.
"The Minstrel Boy to the war is gone..."
Re: First Helmet Tips
For making a pig face would you recommend raising one if you do not have a welder? I know it's labor intensive but isn't the final product stronger then one of welds?
You're starting to lose me a little with all the jargon, I need to pick up a book or two lol! Or if you can show photos of what you're describing it'd click a little bit easier. Where did you learn all of this? Books or through others or SCA or here on the forum/ self research?
Ugo Serrano has some pretty amazing stuff. I'm curious what tools and gauge steel (type?) he uses to raise and give the sculptured look to it. Does he do all of this with no welding?
-
Konstantin the Red
- Archive Member
- Posts: 26725
- Joined: Sun Oct 21, 2001 1:01 am
- Location: Port Hueneme CA USA
Re: First Helmet Tips
I've never laid eyes on an Ugo; no idea how he does it. I thought he used a plasma cutter for the piercework and files to shape things.
Brian Price's TOMAR describes and illustrates the whole process of raising a pigface visor -- since he's already been down this road, I'd follow his advice on heating up that metal. You do need enough fire for this kind of thing... so one of those bigger propane bottles, not any tiny one.
Look at sca.org for a rundown on all the SCA Kingdoms. First there was just the one, in California, about the time the Society got its name -- from sci-fi author Marion Zimmer Bradley. Seems to reserve a spot in a park to hold a tourney in, the club needed a name the parks service could put down. Then there were two Kingdoms, West Kingdom and East Kingdom. Then came the Middle, and Atenvelt added on. Atenvelt used to be this huge, L-shaped affair from Montana to Florida, and many assorted SCA Kingdoms hived off from Atenvelt. And so on, to foreign parts, often where Americans sojourn about the world -- the US military, particularly the Army, is the reason the Kingdom of Drachenwald -- Europe -- exists. Now Drachenwald is running very nicely with native-born members too. Worldwide, there are thirty to forty thousand Creative Anachronists.
-
Konstantin the Red
- Archive Member
- Posts: 26725
- Joined: Sun Oct 21, 2001 1:01 am
- Location: Port Hueneme CA USA
Re: First Helmet Tips
Between hot-raising and welded-up fabrication, there's simply nothing to choose for strength. A lot of the time you can make the weld area stronger than the surrounding metal, with the heat or the particular welding rod alloy, in combination. Given, of course, properly done welds; given too that you've not flubbed up and made your metal too thin anywhere trying to hammer-form it. But welding properly's really no mystery, and you can take welding classes in community college to ramp up your skill.
Welding's faster and simpler to learn, with all the benefits that means in building armor pieces for money. Raising is one hell of an artistic arrow to your quiver. Trying to make money, even a living, making armor, having speedy methods makes a lot of sense: swift cutting-out, fast hole making, deep forming that doesn't take all week planishing bumps smooth again -- these things are life and death to a professional maker.
Before going pro, try making a selfsupporting hobby of it as a first grand goal. A good many happy hobbyists that went pro have ended up either owing a lot of debts because they got in a hole, or discovering the hard way the fun had dripped out of it all when they were trying to make armor building pay the bills. The armor biz is vulnerable to economic slowdowns, however fun and busy it might get in boom times. An armourer's shop well enough organized to survive lean times is, well, a rare and precious thing. Specialization is often key, just as it was back in the Renaissance. Somebody good at making plate gauntlets that don't argue with the finger joints and the subtly bizarre things they do closing on a weapon haft and sword hilts, that somebody can always make money. Gauntlet specialist shops were a thing back in the day. There were shops that just made helmets, both plain and fancy. Armored infantry needed a lot of plain, light helmets, and got them by the thousand. And so on. Lorenz Helmschmied, court armourer out of Vienna, spent a lot of his time coordinating things to get a suit of plate produced by the promised date. Poor ol' Lorenz spent even more time dunning the Emperor Maximilian to pay his damn armor bills, too. Maximilian had tastes that were expensive even for an Archduke like he used to be before being Emperor of the Holy Roman Empire. (". . . it is yet neither holy, nor Roman, nor an Empire." Well, thanks, pal... got any other high-Voltaire comments?) Liked his pretty war-tools, Maximilian did; not sure he ever put any miles on them in battle or tiltyard. Now we get to admire the 1480's-date Archduke Maximilian gothic armor, in about pristine condition mostly, in a museum -- living, wearable sculpture at some of its finest. Wearable if you were built like ol' Max.
***********
I've been thinking about it and I don't know as I exactly have a favorite helmet type to build. I've helped with building a few, going back to the days of Army-helmet Boba Fett conversions, and a couple of spun-tops too, which languish partly built and may end up as Shire loaner helms one day.
I have the definite opinion that a grilled bascinet is a most excellent fighting helmet, and all the better a starter-hat for being pretty inexpensive to get at budget, or munition, grade, pro armourers having gotten quite efficient at producing them.
I have some notion of what armor pieces are easy for new chaps to produce, particularly safety gorgets that fit, sets of spaudlers, anything in mail, which is simple to process and takes few tools, demigauntlets in the style of any century (and decade, gauntlets evolved on about a 20-year cycle) and in any sufficient material -- water-hardened leather, which is hardened by moistening it and very gently baking it; steel as well, occasionally aluminum hidden under something.
I particularly like using anti-period materials in concealed torso armor where sweat that could corrode steel hasn't a chance: stainless, hard stainless, aluminum, plastic from cut up buckets and blue barrels, or bought new in sheets. Antiperiod materials are very well in hidden-reinforcement use, with something more period-correct on the outside.
Period, in SCA parlance, means the period between the fall of Rome in the fifth century AD, when the city got overrun twice and the second time, in 476 AD, ended Rome's tenure as the world's major power (not that this stops Roman and Classical Greek personae from showing up) -- and at the other end, the death of England's Elizabeth I in 1603, the earliest beginning of modern times. This very wide time span tends to make the keen and narrow temporal focus of Living History reenactors difficult to do; for a very few SCAdians it might be always one particular year or ten particular years, but most of them just flow with time. The SCA's area centers upon Europe, and extends out to any people Europeans would have encountered in these times -- something done with enough enthusiasm that the 6'3" strawberry-blond, freckled samurai with daito in his sash, hakama trousers, Japanese top and perhaps quite correct Japanese footgear, amounts to a traditional SCA joke. We have more than a few of them, a good many rooted in Monty Python. "Pie Iesu Domine (whack!) Dona Eis Requiem (whack!)" may be all the Latin some SCAdians know, aside from E Pluribus Unum. ( Don't really go much farther than that myself.)
Welding's faster and simpler to learn, with all the benefits that means in building armor pieces for money. Raising is one hell of an artistic arrow to your quiver. Trying to make money, even a living, making armor, having speedy methods makes a lot of sense: swift cutting-out, fast hole making, deep forming that doesn't take all week planishing bumps smooth again -- these things are life and death to a professional maker.
Before going pro, try making a selfsupporting hobby of it as a first grand goal. A good many happy hobbyists that went pro have ended up either owing a lot of debts because they got in a hole, or discovering the hard way the fun had dripped out of it all when they were trying to make armor building pay the bills. The armor biz is vulnerable to economic slowdowns, however fun and busy it might get in boom times. An armourer's shop well enough organized to survive lean times is, well, a rare and precious thing. Specialization is often key, just as it was back in the Renaissance. Somebody good at making plate gauntlets that don't argue with the finger joints and the subtly bizarre things they do closing on a weapon haft and sword hilts, that somebody can always make money. Gauntlet specialist shops were a thing back in the day. There were shops that just made helmets, both plain and fancy. Armored infantry needed a lot of plain, light helmets, and got them by the thousand. And so on. Lorenz Helmschmied, court armourer out of Vienna, spent a lot of his time coordinating things to get a suit of plate produced by the promised date. Poor ol' Lorenz spent even more time dunning the Emperor Maximilian to pay his damn armor bills, too. Maximilian had tastes that were expensive even for an Archduke like he used to be before being Emperor of the Holy Roman Empire. (". . . it is yet neither holy, nor Roman, nor an Empire." Well, thanks, pal... got any other high-Voltaire comments?) Liked his pretty war-tools, Maximilian did; not sure he ever put any miles on them in battle or tiltyard. Now we get to admire the 1480's-date Archduke Maximilian gothic armor, in about pristine condition mostly, in a museum -- living, wearable sculpture at some of its finest. Wearable if you were built like ol' Max.
***********
I've been thinking about it and I don't know as I exactly have a favorite helmet type to build. I've helped with building a few, going back to the days of Army-helmet Boba Fett conversions, and a couple of spun-tops too, which languish partly built and may end up as Shire loaner helms one day.
I have the definite opinion that a grilled bascinet is a most excellent fighting helmet, and all the better a starter-hat for being pretty inexpensive to get at budget, or munition, grade, pro armourers having gotten quite efficient at producing them.
I have some notion of what armor pieces are easy for new chaps to produce, particularly safety gorgets that fit, sets of spaudlers, anything in mail, which is simple to process and takes few tools, demigauntlets in the style of any century (and decade, gauntlets evolved on about a 20-year cycle) and in any sufficient material -- water-hardened leather, which is hardened by moistening it and very gently baking it; steel as well, occasionally aluminum hidden under something.
I particularly like using anti-period materials in concealed torso armor where sweat that could corrode steel hasn't a chance: stainless, hard stainless, aluminum, plastic from cut up buckets and blue barrels, or bought new in sheets. Antiperiod materials are very well in hidden-reinforcement use, with something more period-correct on the outside.
Period, in SCA parlance, means the period between the fall of Rome in the fifth century AD, when the city got overrun twice and the second time, in 476 AD, ended Rome's tenure as the world's major power (not that this stops Roman and Classical Greek personae from showing up) -- and at the other end, the death of England's Elizabeth I in 1603, the earliest beginning of modern times. This very wide time span tends to make the keen and narrow temporal focus of Living History reenactors difficult to do; for a very few SCAdians it might be always one particular year or ten particular years, but most of them just flow with time. The SCA's area centers upon Europe, and extends out to any people Europeans would have encountered in these times -- something done with enough enthusiasm that the 6'3" strawberry-blond, freckled samurai with daito in his sash, hakama trousers, Japanese top and perhaps quite correct Japanese footgear, amounts to a traditional SCA joke. We have more than a few of them, a good many rooted in Monty Python. "Pie Iesu Domine (whack!) Dona Eis Requiem (whack!)" may be all the Latin some SCAdians know, aside from E Pluribus Unum. (
"The Minstrel Boy to the war is gone..."
-
Konstantin the Red
- Archive Member
- Posts: 26725
- Joined: Sun Oct 21, 2001 1:01 am
- Location: Port Hueneme CA USA
Re: First Helmet Tips
It is; your problem is the thin steel. Try putting the stuff in a vise and hand-filing instead.critch wrote:Damn, thanks for all the help everyone! <snip> I'm not sure if it's the 22 gauge or if it'll be easier with thicker steel to grind corners and get them smooth.
Hell yeah; go to the auto body finishing aisle in the nearest automotive shop like NAPA, Kragen Auto, O'Reilly Auto, whoever. They will have carborundum cloth in all grits all the way down to 1500# usually. That stuff delivers a finish close to mirror. A lot of people like a satin finish to hide scratches, but ya know, the medievals went farther. Polished-up metal doesn't rust as fast.For smoothing, is it possible to get large strips of sandpaper? What order grit do you want to use if done by hand to get that nice smooth finish?
The grits start as coarse as 36 or 40 grit, which may be thought of as a file -- it removes stock, fast. Shining metal up begins with about 150 or 220 grit, then 320, then 440 wet/dry and 600 wet/dry, then on to about 1000, 1500, and sometimes even finer. Shop around some and you can really find finer than that.
Scary Sharp, about
How
It's for more than just finishing metal!
"The Minstrel Boy to the war is gone..."
Re: First Helmet Tips
Something like this big enough? Standard grill sized propane tank? I figure I'll likely mount this to my small insulated firebrick forge maybe.

I'm going to poke around SCA's site in a bit..
Did you say a Boba Fett helmet? I've actually wanted to do one. Do you have pics of yours? Do it in steel? Did you weld it? I'm curious!
You mentioned welding, what type of welding do you use? I've looked at TIG and Stick and even Oxy Acetylene. Since I don't have a welder I'm going to have to raise some helmets to get started if I choose to try it out.
If I hypothetically got decent at making basic things like Spaulders, Gauntlets and Great Helms.. How much do you think I could sell 16 or 14 gauge steel decorative on EBAY for? $150? Start out small?
You mentioned leather.. I'll be needing leather to put chin straps, liner in helms and strips to hold spaulders together and even straps to secure armour. Where does everyone buy it from? Is it just vegetable tanned leather?
Anti period materials like aluminum are weak though isn't it?
And I'm going to have to buy sandpaper at once! I picked up 16 gauge steel sheets today and I just picked up a HF throatless shear. To finish by hand (since I don't have a belt grinder) you're saying I need around a 40 grit to start, then move to a 100-150 grit then jump to 320 then to 440 then to 600 then to 1,000 and 1,500? That can all be achieved by hand with no swirls in the metal?
And thoughts on files? I bought one typical file with a coarse side and a finer side; again, I'm not sure if it's my 22 gauge metal but the edges never seem to get smooth with it.
-
Konstantin the Red
- Archive Member
- Posts: 26725
- Joined: Sun Oct 21, 2001 1:01 am
- Location: Port Hueneme CA USA
Re: First Helmet Tips
Yup. You can decide for yourself if you really want to have two of them around in case one goes empty.critch wrote:Something like this big enough? Standard grill sized propane tank? I figure I'll likely mount this to my small insulated firebrick forge maybe.
That's what I call 'em: Army steel helmet with the brim torched off and rivet holes torched in (they were of hard steel) and a sheetmetal lower half added on, by riveting in the SCA's case. T shaped face opening often so you could see and breathe, generally with some bars attached so no individual hole in the helm became illegally too long or too wide. Not too different looking from what Boba Fett had. Obsolete for SCA use now; they worked, but they weren't at all medieval; nor were the glancing surfaces as good as a bascinet's. They have left a descendant: the same kind of construction, one piece skull top and a bottom half added onto it, was used in the spun-top helms. These are obsolete too, mostly. Get 'Em On The Field Armoury used to make a lot of them, built very sturdily, cheap, and again completely unmedieval looking. Spuntops were a little more durable than Army pots for week-in and week-out pounding on, though they had two defects: they still tended to dent easier than anybody liked unless made quite heavy in the spinning process, and they were almost always very very round and didn't conform very much to the oval shape of the human head, giving this bobblehead-in-armor appearance. We like a helm that's rather oval, for fit: leaves the room inside the helm where it's actually needed, doesn't have to be too wide.Did you say a Boba Fett helmet? I've actually wanted to do one. Do you have pics of yours? Do it in steel? Did you weld it? I'm curious!
I've done a little bit of oxyacetylene and stick; they are the easy ones, particularly the O/A. Only thing with O/A gas welding is you're keeping a big bottle of very flammable acetylene and a nice big bottle of pure oxygen along with it. Stick welders don't have to keep such fire hazards around -- I guess the big minus is how a 220V welder would run up your power bills if you use it a lot. A bit trickier to use than a gas welder. And watch out you don't get sunburn off the spark; it'll do that.You mentioned welding, what type of welding do you use? I've looked at TIG and Stick and even Oxy Acetylene. Since I don't have a welder I'm going to have to raise some helmets to get started if I choose to try it out.
For this, I'd see what prices other eBay sellers are trying to command, and take notes. Having gotten this info in front of me, I'd try and figure out what I can do to undersell these people if possible. Thing is, internet armor sellers get their stock in trade from Indian welding shops, who work very cheap. Cheap also cuts corners. What I often see when I bother to look is: 1) It isn't suitable for SCA anyway, generally from being too lightly built to survive rattan for long; 2) The design is usually a sketchy copy of either the medieval, or an oldfashioned SCA type like the "Valerius," so not attractive to the discerning eye of somebody who intends to actually use the stuff for its alleged purpose -- assuming it actually fits him, and that's not guaranteed either; 3) And for all that, it's fearfully overpriced, intending apparently to rook the rubes. A lot more than I'd be willing to pay for what I'd get. Some are better than others -- Kult of Athena is one such reseller of 3rd-world manufactured stuff that actually sells some stuff that's really quite good. Somebody like Historic Enterprises or whatever they're now calling themselves is top-notch, and priced like it too. Talbot's Fine Accessories and Raymond's Quiet Press, both SCA sellers of long standing, are not the generalists KoA and Historic are, but specialists, Talbot's being early-period mostly and Raymond's specialty being useful books.If I hypothetically got decent at making basic things like Spaulders, Gauntlets and Great Helms.. How much do you think I could sell 16 or 14 gauge steel decorative on EBAY for? $150? Start out small?
SCA-market makers, or ACL, or Adria -- other armored historic combat groups -- do a better job. As you notice from checking prices on their sites, some of them charge serious money too -- in the course of providing a superior, high-performance product of historically accurate shape and design and perhaps some desired features like spring latches for visors, etc. Building that sort of thing for your own product and making it strong enough it doesn't get broken, that too runs into some money by the time you're done.
A lot of it is -- for water hardened, or for leather that shows. Some of it is latigo, which is designed to be hardwearing harness and strap leather, and which may be either vegetable or chrome tanned, take your pick. Chrometanned scrap leather can sometimes be very useful and is cheaper than anything else. Brettun's Village Leather online offers deals on leather scrap useful for interior leathers and for straps or home-cutting leather thongs using a thong tool. For interior articulation leathers, use soft leather like from the belly part of a hide, not the stiff leather up by the cow's spine. That stuff is excellent for belts, and straps for buckling, but other leather jobs want soft, pliant leather. Poster Pitbull, who armors professionally, finds he likes to double up internal leathers, two straps of soft leather, for lots of strength but still easy articulation.You mentioned leather.. I'll be needing leather to put chin straps, liner in helms and strips to hold spaulders together and even straps to secure armour. Where does everyone buy it from? Is it just vegetable tanned leather?
Aluminum varies quite a lot. Its stiffness can be shown by its T number. T numbers (for temper) run from about 1 to 10, and T-6 is a lot stiffer than T-3. Structural aluminum alloys like 6061 and 7075 with high enough T numbers after can be so springy they bounce a regular hammer back fast enough to welt you one between the eyes. Only heavy deadblow hammers pound T-6 temper out, and even that takes time. Though a sliproller works it readily enough. The stuff ain't tinfoil, but you do want to try testing it if you're picking some up cheap at a scrapyard.Anti period materials like aluminum are weak though isn't it?
In a word, yes. The trick of sanding first in one direction, then the next grit perpendicular in direction to the first shows up any scratches you missed and should go over again until you've got it. With a hand electric drill, you can put the carborundum cloth on a sanding disc -- much swifter. Just don't gouge by leaning the disc too much to one side.And I'm going to have to buy sandpaper at once! I picked up 16 gauge steel sheets today and I just picked up a HF throatless shear. To finish by hand (since I don't have a belt grinder) you're saying I need around a 40 grit to start, then move to a 100-150 grit then jump to 320 then to 440 then to 600 then to 1,000 and 1,500? That can all be achieved by hand with no swirls in the metal?
16ga mild you can do quite a lot with in body armor pieces. 18ga works too if you flute it, form dishings in it, make dome shapes, roll the edges -- give it some 3-D shaping, see. Quite okay on limbs and backplates, taces, any sort of lame about cops and such. Cops themselves probably want the 16 gauge since you'll be working them pretty deep. Look up anything onsite here about raising, and also on the quasi-raising of "hammer on air"/"softhammer hard anvil" technique, which unlike pounding the metal in the middle as in dishing it, which stretches the center of the metal piece thinner and thinner, soft hammer hard anvil more or less wraps the metal around the hammer head, in effect making the hammer a stake, until the metal is sufficiently curved for your purpose. In 16ga mild, it's easy to do. You will want a rather expensive hammer for this job, a Garland Mfg Split Head hammer, about a No.2, with rawhide hammer faces. And something that will do for an anvil, for instance a couple feet of I-beam or a similar length of scrap RR track. Me, I use my anvil.
What you need is a set of files, not just one, though the one file will remain useful for a very long time yet. Nicholson makes a good set to get you started, and if something isn't smooth enough from one file, use a finer file too. Get and use file handles; much more comfortable. Get a file card to keep your files from getting clogged. Don't grind aluminum on your bench grinder; it will clog the stone right up making it useless to actually grind anything and prone to, well, explode when the aluminum stuck in its pores gets heated up grinding something else, and expands. Expands a lot and cracks the grindstone when it's spinning too. File aluminum, and card your file often.And thoughts on files? I bought one typical file with a coarse side and a finer side . . .
Files come in several shapes for getting into tight spots and reshaping things. Got a straight edge that needs to be curved? -- half-round file fills the bill. A round file/rattail file is a fine tool for making welds in bargrills smooth and pretty. A packet of Swiss files handles little tiny jobs and ornamental filework -- plate armor eventually had a lot of this. Mill files give smoothness, double-cut files remove material aggressively. You want both. To play with the SCA in rattan fighting, you will like to have a carpenters' rasp, a very coarse file, one side flat and one rounded, to shape your rattan sticks with, particularly the handle end.
"The Minstrel Boy to the war is gone..."
Re: First Helmet Tips
For files: http://www.apexhandtools.com/brands/CF_ ... 7103219121 or this http://www.apexhandtools.com/brands/CF_ ... 7103243904
and add in one Swiss you said? http://www.apexhandtools.com/brands/CF_ ... 7103370297
Also I wanted to mention I just picked up my Harbor Freight Throatless Shear and I'm wondering what the best way to set it up is. I'm tinkering around with the bottom blade, but I'm not sure where the blades should sit. From referencing videos of the shears everyone elses' seems higher on the top blade. Out of the box it cut the 22 gauge fine but for the 16 gauge it definitely needs an adjustment, unfortunately Harbor Freight doesn't give good adjustments, surprise surprise...
I've been comparing my top blade position to George's and mine looks too shallow near the heel of the blade.
https://www.youtube.com/watch?v=izInJffsnpQ
Here's mine: (handle is all the way up)
And with a piece of 16 gauge in it.
Shouldn't the sheet go further back into the heel?
and add in one Swiss you said? http://www.apexhandtools.com/brands/CF_ ... 7103370297
Also I wanted to mention I just picked up my Harbor Freight Throatless Shear and I'm wondering what the best way to set it up is. I'm tinkering around with the bottom blade, but I'm not sure where the blades should sit. From referencing videos of the shears everyone elses' seems higher on the top blade. Out of the box it cut the 22 gauge fine but for the 16 gauge it definitely needs an adjustment, unfortunately Harbor Freight doesn't give good adjustments, surprise surprise...
I've been comparing my top blade position to George's and mine looks too shallow near the heel of the blade.
https://www.youtube.com/watch?v=izInJffsnpQ
Here's mine: (handle is all the way up)

And with a piece of 16 gauge in it.

Shouldn't the sheet go further back into the heel?
-
Keegan Ingrassia

- Archive Member
- Posts: 6424
- Joined: Thu Jul 16, 2009 4:07 pm
- Location: College Station, Texas (Shadowlands)
Re: First Helmet Tips
More important is the gap between the blades! The lower blade needs to be moved so there is a wider gap for thicker metal, generally 1/6th the thickness of the metal. Otherwise, you risk chipping your blades. HF blades are generally over-hardened, so they're more brittle than they should be to begin with.
Recap: too much gap, and it tries to turn the sheet metal sideways instead of cut. Too little gap, and you can damage your blades.
As to opening up wider, here is a simple mod one fellow did to fix that (scroll to bottom).
http://www.practicalmachinist.com/vb/ge ... rs-197518/
Recap: too much gap, and it tries to turn the sheet metal sideways instead of cut. Too little gap, and you can damage your blades.
As to opening up wider, here is a simple mod one fellow did to fix that (scroll to bottom).
http://www.practicalmachinist.com/vb/ge ... rs-197518/
"There is a tremendous amount of information in a picture, but getting at it is not a purely passive process. You have to work at it, but the more you work at it the easier it becomes." - Mac
Re: First Helmet Tips
My two blades are close to touching when I use it. I should seperate a bit I'm assuming. That mod looks good but I have no way of doing it and /or don't want to do it only because I'll probably "F" it up lol! Interesting, though, he took all the grease off of the lower blade?
Re: First Helmet Tips
Also I noticed from reading that the top blade is not adjustable? So I guess I should focus all on the bottom one.
Re: First Helmet Tips
FYI, my HF shear was much improved by shoving a thin copper strip in the teeth to take up some of the slop. Things need a lot of TLC, but they're great starters.
It's up to you now.
Re: First Helmet Tips
Could you show me a picture of what you mean, Mike?
-
Konstantin the Red
- Archive Member
- Posts: 26725
- Joined: Sun Oct 21, 2001 1:01 am
- Location: Port Hueneme CA USA
Re: First Helmet Tips
A poor man's feeler gauge is a bit of manila folder or some card stock, to give you that much space between the two blades. A real feeler gauge will show you just how many thousandths of an inch you've actually got. But one layer of manila folder fitting in between the blades does nicely for moderate-gauge sheet metal; fold it double for working with thicker-gauge sheet, stick on some masking tape for something between -- any trick like that. If you're cutting really thin stuff, try one sheet of printer paper.critch wrote:My two blades are close to touching when I use it. I should seperate a bit I'm assuming. That mod looks good but I have no way of doing it and /or don't want to do it only because I'll probably "F" it up lol! Interesting, though, he took all the grease off of the lower blade?
Take this measure at the heel of the blade (deepest in the throat), the toe of the blade, and a spot in the middle. Assess whether you can get all three places spaced the same by doing your adjusting. That way your shear's all right all the way through the stroke of the lever and the blade edges won't run into each other, which chips them. A blade with some minor chips generally still cuts, but more messily. Blades can be reground. HF's Chinese shear blades have been getting better heat treatment than they used to and aren't so likely to be overhardened as they were once.
What Mike F did was stick a very thin-gauge copper strip into the gears, and work the handle so the gears swallowed up that strip -- which then filled in the slop. There's a technical term for the slack between gear teeth that allows meshed gears to actually turn -- they need a tiny wee bit. Appears his shear was rather too generous there though.
"The Minstrel Boy to the war is gone..."
Re: First Helmet Tips
Ah I see what you're saying now. I cut some 16 gauge last night and it did a pretty decent job. I'm working on the late 13th and early 14th century great helm. If it turns out ok I'll sell it for cheap on EBAY so I don't have a million things sitting around lol!
-
Konstantin the Red
- Archive Member
- Posts: 26725
- Joined: Sun Oct 21, 2001 1:01 am
- Location: Port Hueneme CA USA
Re: First Helmet Tips
http://www.apexhandtools.com/brands/CF_ ... 7103370297
Yes, a set of swiss files like that one. Various shapes, good for very fine detail work. Nicholsons are excellent quality; use them myself.
For the sheared edges of armor pieces, either a mill file of whatever size (single cut, smooth-making, flat) or a sanding disc in a power drill are the item. Bigger job, you know, than a swiss needle file would handle.
"The Minstrel Boy to the war is gone..."
-
Sevastian
- Archive Member
- Posts: 1909
- Joined: Wed Aug 17, 2011 8:44 pm
- Location: Anchorage, Alaska
- Contact:
Re: First Helmet Tips
A run of the mill file will be fine for buttering sharp edges in mild steel. Buy a few such files if you can find them cheap if you plan on working stainless. An 80 grit flap wheel and a 4.5 inch angle grinder work wonders though some dressing with a hand file may still be needed. I believe the term Kotya was looking for is "backlash".
Lord Sevastian Agafangilovitch Golytsyn
Cadet to Ancient Guild Mistress Sorcha Careman
Squire to Sir Soren J Alborgh
Познай самого себя
https://www.facebook.com/sonny.merculief
Cadet to Ancient Guild Mistress Sorcha Careman
Squire to Sir Soren J Alborgh
Познай самого себя
https://www.facebook.com/sonny.merculief
Re: First Helmet Tips
No need to adjust two when one will do. Just turn that handy little screw set on the left side.critch wrote:Also I noticed from reading that the top blade is not adjustable? So I guess I should focus all on the bottom one.
ferrum ferro acuitur et homo exacuit faciem amici sui
-
Konstantin the Red
- Archive Member
- Posts: 26725
- Joined: Sun Oct 21, 2001 1:01 am
- Location: Port Hueneme CA USA
Re: First Helmet Tips
I thought there might be a lash in it, but I really couldn't remember.
And if that handy little screw isn't doing anything, well, it's supposed to -- find out why it's not.
See that there's nothing intruding into the bed where the bottom plate rests. Some people have had to take an angle-grinder to some casting flash that got left.
And if that handy little screw isn't doing anything, well, it's supposed to -- find out why it's not.
See that there's nothing intruding into the bed where the bottom plate rests. Some people have had to take an angle-grinder to some casting flash that got left.
Gol dern ya, AutoCorrect? Not sure if you had buffing or beveling in mind... battering, probably not.A run of the mill file will be fine for buttering sharp edges in mild . . .
"The Minstrel Boy to the war is gone..."
Re: First Helmet Tips
My other issue with the HF shear now is that whenever I make a cut.. the bottom blade does not sit flush on the shear. It likes to angleup whenever I make a cut.. All screws are tight so I don't know how to prevent it from happening.
Also I have a mill file.. Edges seem to be.. okay... It's probably because I'm new to this but I have a hard time getting the edges nice and smooth. They're better then they were but I seem to have a lot of uneven surfaces.. Even with the bench grinder I run into this problem.. Too many hooks and barbs from cutting the metal then it's a cluster of sharp metal and takes me a while to file it down but it's still uneven but semi-smooth to the point where I won't cut my hand if I run my hand along it.. Are your guys' edges all like sheet metal edges when you buy it? Perfectly filed and flush, squared along the entire length? I don't know if I'm not doing one of the steps right or maybe I just need practice and some Swiss files!
Also I have a mill file.. Edges seem to be.. okay... It's probably because I'm new to this but I have a hard time getting the edges nice and smooth. They're better then they were but I seem to have a lot of uneven surfaces.. Even with the bench grinder I run into this problem.. Too many hooks and barbs from cutting the metal then it's a cluster of sharp metal and takes me a while to file it down but it's still uneven but semi-smooth to the point where I won't cut my hand if I run my hand along it.. Are your guys' edges all like sheet metal edges when you buy it? Perfectly filed and flush, squared along the entire length? I don't know if I'm not doing one of the steps right or maybe I just need practice and some Swiss files!
-
Keegan Ingrassia
- Archive Member
- Posts: 6424
- Joined: Thu Jul 16, 2009 4:07 pm
- Location: College Station, Texas (Shadowlands)
Re: First Helmet Tips
No, it's very unlikely to have a perfectly mill-finished edge, and you don't want your edges squared off. Moreso slightly chamfered on either side, to smooth and round the edges a bit. This serves three roles. One, it prevents the metal from developing a crack while working it. Two, it keeps your hand from getting lacerated while handling and working it. And three, it will be less likely to injure the wearer.
That semi-smooth edge will serve you well while you're working. During the final stages you can true up the edges to a smooth line with either a belt sander, angle grinder with a sanding disk, or...sandpaper and time.
That semi-smooth edge will serve you well while you're working. During the final stages you can true up the edges to a smooth line with either a belt sander, angle grinder with a sanding disk, or...sandpaper and time.
"There is a tremendous amount of information in a picture, but getting at it is not a purely passive process. You have to work at it, but the more you work at it the easier it becomes." - Mac
Re: First Helmet Tips
Will a bench grinder achieve the effect or will that just sharpen it?
Everyone keeps mentioning angle grinders.. I think I should look into getting one lol!
And you mean like this on the edges? http://forums.autodesk.com/autodesk/att ... erNote.PNG
Everyone keeps mentioning angle grinders.. I think I should look into getting one lol!
And you mean like this on the edges? http://forums.autodesk.com/autodesk/att ... erNote.PNG
-
Keegan Ingrassia
- Archive Member
- Posts: 6424
- Joined: Thu Jul 16, 2009 4:07 pm
- Location: College Station, Texas (Shadowlands)
Re: First Helmet Tips
A bench grinder is very useful, but the stone is coarse. A very light and quick touch is all that it takes to chamfer the raw edge. It's very easy to overdo it and end up with a blade-like edge.
As to angle grinders, you can pick one up from Harbor Freight for about 20-30 bucks. They're very handy to have around because you can swap out the head. Grinder for smoothing welds, sanding disks for stepping down through grits, and buffing heads for polishing. Good all-purpose power tool, cuts down on the hand cramps from trying to polish armor manually. Gotta watch out for the spinning part, though. Grinders feed on human flesh. A saw will cut a piece off...That can be attached, with luck. A grinder sands a piece off...nothing to put back on. Safety first, and all that.
And yes, that pic is exactly what I meant. You don't need much, just enough to knock the harshness off. If you're using the bench grinder, run around the edge on both sides almost perpendicular (not low enough to chatter against the wheel), to smooth the line a bit and knock off any sharp burrs. Then, once more on both sides, the piece held up at about a 45 degree angle, light and quick. That will chamfer it on both sides and leave you with a serviceable edge.
Last edited by Keegan Ingrassia on Mon Aug 04, 2014 4:21 pm, edited 1 time in total.
"There is a tremendous amount of information in a picture, but getting at it is not a purely passive process. You have to work at it, but the more you work at it the easier it becomes." - Mac
-
Konstantin the Red
- Archive Member
- Posts: 26725
- Joined: Sun Oct 21, 2001 1:01 am
- Location: Port Hueneme CA USA
Re: First Helmet Tips
Stick the metal into the vise, take the mill file -- and draw-file the edge, from one end of it to the other. It's like using a file like a spokeshave, sort of.
I get the idea you're trying basically to work the metal edge perpendicular to the edge. Nuh uh! -- go along it instead.
He does mean the beveling, as the autodesk pic shows -- but rounded over. You're not making two bevels meet in the middle, you're making a rounded-off edge -- which you can nicely do with 4-5 light passes draw filing, angling first to one side, then the other, and a light pass right flat down the middle. That way it doesn't try to cut you. More visible on thicker pieces of metal, isn't it?
Chamfering a drilled hole is easier and quicker. A chamfered hole is a hole with a beveled edge. Drill, or bore, your hole to final diameter. Change your bit to the biggest one you've got, get it spinning, touch it to the hole very lightly. Just enough to break the corner there. So it's a bevel that goes around in a circle.
There's an old blacksmith's wisecrack that's still popular among wiseacre machinists: "He don't know if he's punched, bored, or countersunk!"
I get the idea you're trying basically to work the metal edge perpendicular to the edge. Nuh uh! -- go along it instead.
Code: Select all
 the metal         |
 filing/grinding   |
                 _|____
                /     not into there like this
                \________
                  |
                  |

m   |   []
e   |   []   but along it like this, filing or grinding
t   |   []
a   |   \/
l |Chamfering a drilled hole is easier and quicker. A chamfered hole is a hole with a beveled edge. Drill, or bore, your hole to final diameter. Change your bit to the biggest one you've got, get it spinning, touch it to the hole very lightly. Just enough to break the corner there. So it's a bevel that goes around in a circle.
There's an old blacksmith's wisecrack that's still popular among wiseacre machinists: "He don't know if he's punched, bored, or countersunk!"
"The Minstrel Boy to the war is gone..."
Re: First Helmet Tips
Alright I see what you're saying. Is this a better example of what is pictured?
https://lh4.googleusercontent.com/_AEVR ... G_5896.JPG
https://lh4.googleusercontent.com/_AEVR ... G_5896.JPG
-
Konstantin the Red
- Archive Member
- Posts: 26725
- Joined: Sun Oct 21, 2001 1:01 am
- Location: Port Hueneme CA USA
Re: First Helmet Tips
Yes. If you wonder if you've really got 'er, run a finger lightly along the edge and see what you feel.
You're saying your bottom blade moves in its bed as you cut? Shouldn't do that. Shouldn't rock, shouldn't anything. But the fix should be an easy one, since whatever's doing it ought to be right there in/on the blade bed.
You're saying your bottom blade moves in its bed as you cut? Shouldn't do that. Shouldn't rock, shouldn't anything. But the fix should be an easy one, since whatever's doing it ought to be right there in/on the blade bed.
"The Minstrel Boy to the war is gone..."
Re: First Helmet Tips
Alright I'll give that shot with the file and see what happens.
Yeah the blade moves in the bed; I don't know why but something's gotta give! I'll experiment a bit with it tomorrow I guess.
On a side note my rivets will arrive Wednesday. Can't wait then I can finish my helmet and post it and see what needs improvement, etc.
When you're making anything armour related. How symmetrical and "perfect" are all the pieces with one another? Maybe it's because I have the beginner's "lack of trained eyes" but just how perfect are these helmets upclose? I never paid attention all these years I've been to Higgins Armoury. Seems like my pieces, no matter how hard I try, are always off slightly in shape.
-
Konstantin the Red
- Archive Member
- Posts: 26725
- Joined: Sun Oct 21, 2001 1:01 am
- Location: Port Hueneme CA USA
Re: First Helmet Tips
A lot of theirs were very slightly off, too.
Looks like what you need to do is snip some suitable jigs from that thin sheet: draw your desired curve on the jig with a Sharpie, scissor it carefully out with your snips. Use this jig to gauge how you hammer both sides of something like the skull of a helmet out to the same desired contours. Works a treat.
Jigs are also good for tracing out pieces, giving right and left sides the same curves in mirror image. There is also a clever, somewhat comblike tool called a contour gauge. You can press it to any curvature or fancy turning, and it will reproduce those contours anywhere you want them. Popular with wood turners with lathes.
So which piece are you trying to get bilaterally symmetrical now? And about how close are you as of today? Pix are very helpful here.
"The Minstrel Boy to the war is gone..."
Re: First Helmet Tips
I can post some pictures when I get home from work today. I'd like to see what you think. I'll have to look up those tools you mentioned, they sound like lifesavers.
Re: First Helmet Tips
Also what do you mean by Jig? Like a stencil cut out of sheet metal?
That contour gauge is awesome! Man... Just when I think I'm done buying tools to begin I'm getting a buncha ideas.. That thing looks like it saves you a lot of time though.
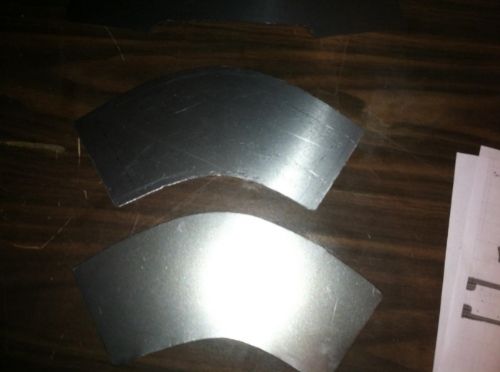
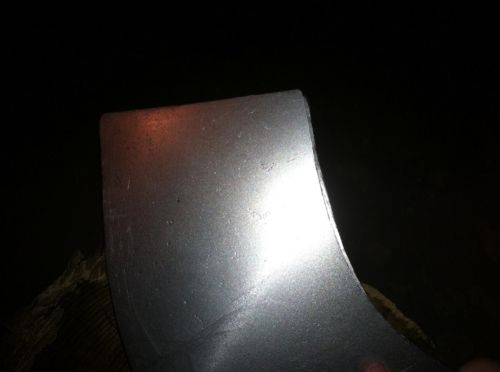
Alright onto the pictures. They're almost like two different pieces, pictures might not be able to show. The curves are wrong and it's practically impossible to get them exact. It's frustrating me to no end, I don't know.. Maybe this is common in armour making.
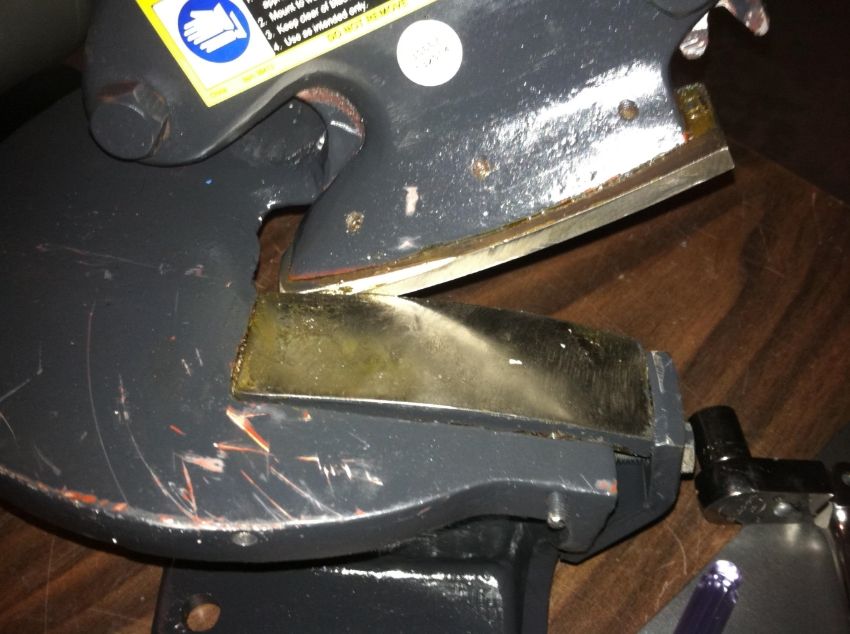
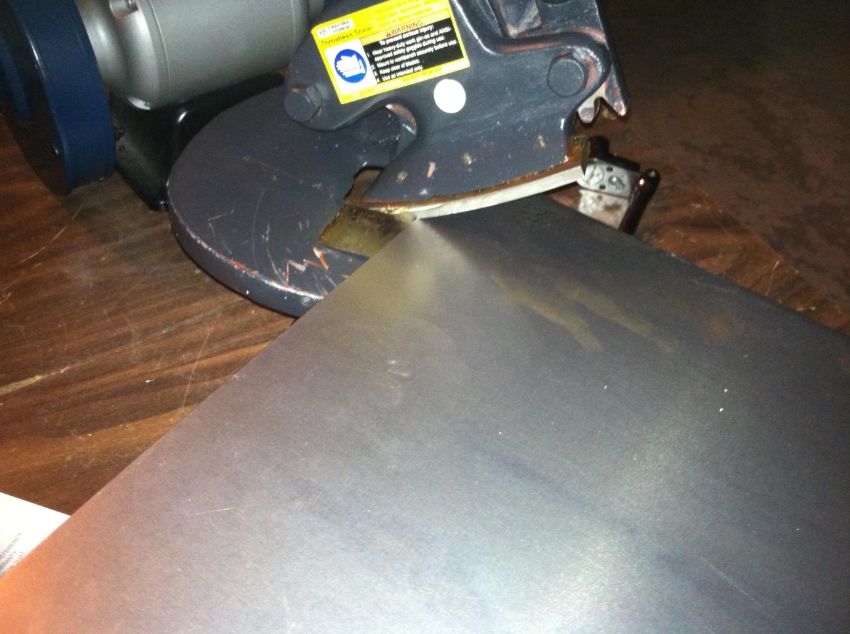
Here I've tried grinding the pieces down more and cutting them to trim but the more I do it the more and more I'm noticing they're not symmetrical at all. The curves themselves are not one smooth long edge, they're kinda crappy.
Here's all the pieces (except cross) brought out for the 13th Century Great Helm.

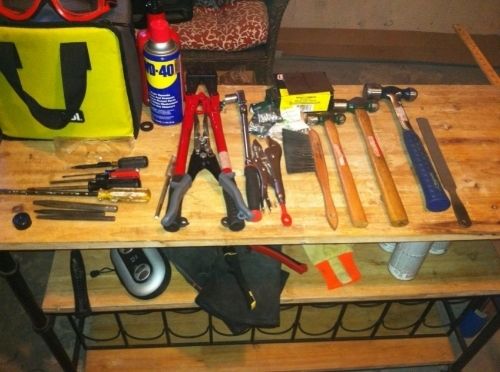
Here's all my hand tools... I think I need more hammers and that contour gauge to help me out..
Thanks,
Nate
That contour gauge is awesome! Man... Just when I think I'm done buying tools to begin I'm getting a buncha ideas.. That thing looks like it saves you a lot of time though.
Alright onto the pictures. They're almost like two different pieces, pictures might not be able to show. The curves are wrong and it's practically impossible to get them exact. It's frustrating me to no end, I don't know.. Maybe this is common in armour making.

Here I've tried grinding the pieces down more and cutting them to trim but the more I do it the more and more I'm noticing they're not symmetrical at all. The curves themselves are not one smooth long edge, they're kinda crappy.

Here's all the pieces (except cross) brought out for the 13th Century Great Helm.

Here's all my hand tools... I think I need more hammers and that contour gauge to help me out..

Thanks,
Nate