First Helmet Tips

Re: First Helmet Tips
Looks like you're off to a good start!
Re: First Helmet Tips
Thanks Ckanite!
-
Konstantin the Red
- Archive Member
- Posts: 26725
- Joined: Sun Oct 21, 2001 1:01 am
- Location: Port Hueneme CA USA
Re: First Helmet Tips
Indeed, you are. Most guys starting out have nothing, at all, for hotwork; you begin with an advantage there once you get your bricks and you're set up to work hot without setting the place on fire.
This bunch is very darn good about tipping you off to resources and supplies and materials.
This bunch is very darn good about tipping you off to resources and supplies and materials.
"The Minstrel Boy to the war is gone..."
-
Konstantin the Red
- Archive Member
- Posts: 26725
- Joined: Sun Oct 21, 2001 1:01 am
- Location: Port Hueneme CA USA
Re: First Helmet Tips
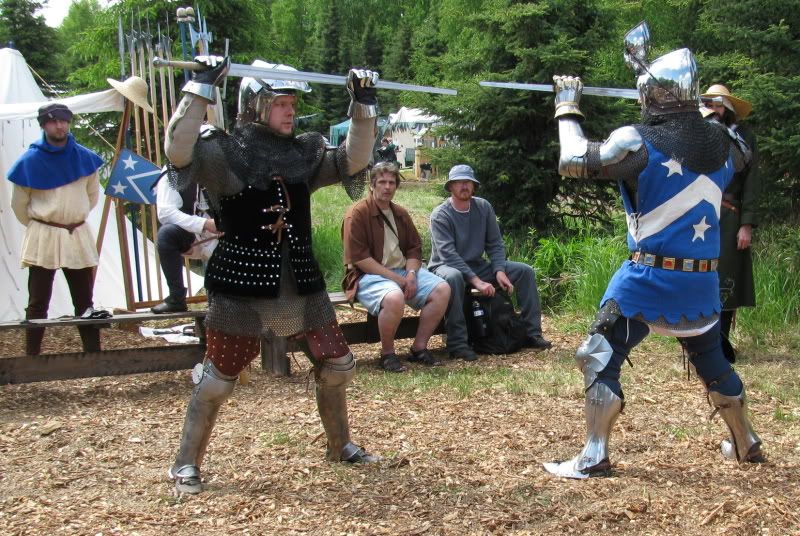
Jupon I've already linked to a thread -- those guys in the red and the blue that I mentioned. Here's another SCA example, a knight in that Society (big white belt is a badge of rank); I'd build me a mail camail to finish the accessorizing:critch wrote:Do you have any reference pictures of all listed above? I couldn't really find examples aside from camail and the globose chest which is fairly common in the average person's eye.
 This one is bigger and looser than many, which were often built pretty snug around the body armor. This one leans toward being a Lentner, what with the long sleeves and its length. But it's a fair example of one of those three looks I mentioned.
Arming-cote and jupon pattern package art:

3 heraldic jupons -- they don't need to be heraldic, but heraldic is fine too:

Articulated plate gorget. This one's very late sixteenth century style at the earliest:

And a gorget that isn't:

-
Konstantin the Red
- Archive Member
- Posts: 26725
- Joined: Sun Oct 21, 2001 1:01 am
- Location: Port Hueneme CA USA
Re: First Helmet Tips
Now for spaudlers and pauldrons:
A page from an auction house -- a 16th-c. right spaudler. Pic also shows a haute-piece, which rides on top of the shoulder, usually on a full-size pauldron, which is bigger. It defends -- in depth -- the side of the neck, which even with an articulated plate gorget in place is still rather vulnerable. So, the spaud is the other thing, on the left. Note that the shoulder-cop is pretty deeply cupped to snug well against the point of the shoulder and bulge of the deltoid.
A shoulder cop:
 This would be good to make a full spaudler from -- a spaud's lames are easier to hammer out and not bad at all to cut out either. If, that is, you're in some kind of hurry.
A pretty nice spaud, in a 15th-c. cusp-y gothic style:
Interior shot of a left spaudler. Forward is up and right.
 16th century style. The rivets with the washers around them are sliding rivets, working in short slots for lots of arm freedom to move the arms forward.
A more profile sort of view:
 The numbers are in there to show where the piece fastens on; thong or strap at #1, strap around the arm at #2. Anyway, shows the depth of the shoulder cop. There are a lot of poor spauds that have hardly any such depth there. The result doesn't look so much Mad Max as World of Warcraft, and other comic book stuff. Dramatic looking -- almost useless against a thrust from your side, getting wounded there would really impair your sword- and shield-work. And shortly, you'd die when the next chap came at you. That's why real armor toters didn't tote anything that stuck out like wings there.
Pauldron, intricately etched; its extensions to cover the arm cutouts of a plate breast-&-back torso armor visible:

Even more like a pauldron, almost as intricate, I'd say c. 1590; has its main plate cut up into segments between shoulder point and where it meets the edge of the gorget, which you can see in the background, with the post there on which the pauldron moves, flops, and swivels -- all these are advanced features.

http://www.ageofarmour.com/instock/ital ... dron-2.jpg -- middle third of the fifteenth century, while they were still not quite settled on the form the pauldron took in later decades, approaching the sixteenth.
A badly made pauldron: myriad useless rivets all over and the main plate needs to lie much more snugly to shoulder blade and pectoral muscle -- and it needs to be coordinated with the breastplate and the backplate, since it lies over them both -- so it can't go much farther in, can it?

Well, thus for the difference between spaudlers and pauldrons.
A page from an auction house -- a 16th-c. right spaudler. Pic also shows a haute-piece, which rides on top of the shoulder, usually on a full-size pauldron, which is bigger. It defends -- in depth -- the side of the neck, which even with an articulated plate gorget in place is still rather vulnerable. So, the spaud is the other thing, on the left. Note that the shoulder-cop is pretty deeply cupped to snug well against the point of the shoulder and bulge of the deltoid.
A shoulder cop:
This would be good to make a full spaudler from -- a spaud's lames are easier to hammer out and not bad at all to cut out either. If, that is, you're in some kind of hurry.A pretty nice spaud, in a 15th-c. cusp-y gothic style:
Interior shot of a left spaudler. Forward is up and right.
16th century style. The rivets with the washers around them are sliding rivets, working in short slots for lots of arm freedom to move the arms forward.A more profile sort of view:
The numbers are in there to show where the piece fastens on; thong or strap at #1, strap around the arm at #2. Anyway, shows the depth of the shoulder cop. There are a lot of poor spauds that have hardly any such depth there. The result doesn't look so much Mad Max as World of Warcraft, and other comic book stuff. Dramatic looking -- almost useless against a thrust from your side, getting wounded there would really impair your sword- and shield-work. And shortly, you'd die when the next chap came at you. That's why real armor toters didn't tote anything that stuck out like wings there.Pauldron, intricately etched; its extensions to cover the arm cutouts of a plate breast-&-back torso armor visible:
Even more like a pauldron, almost as intricate, I'd say c. 1590; has its main plate cut up into segments between shoulder point and where it meets the edge of the gorget, which you can see in the background, with the post there on which the pauldron moves, flops, and swivels -- all these are advanced features.
http://www.ageofarmour.com/instock/ital ... dron-2.jpg -- middle third of the fifteenth century, while they were still not quite settled on the form the pauldron took in later decades, approaching the sixteenth.
A badly made pauldron: myriad useless rivets all over and the main plate needs to lie much more snugly to shoulder blade and pectoral muscle -- and it needs to be coordinated with the breastplate and the backplate, since it lies over them both -- so it can't go much farther in, can it?
Well, thus for the difference between spaudlers and pauldrons.
"The Minstrel Boy to the war is gone..."
Re: First Helmet Tips
Information overload!
I now know a little bit more, thank you very much!
I'm a huge fan of the plates that protect the neck of the wearer. For some reason I like that a lot. That was typically worn over the shield arm right?
I now know a little bit more, thank you very much!
I'm a huge fan of the plates that protect the neck of the wearer. For some reason I like that a lot. That was typically worn over the shield arm right?
Re: First Helmet Tips
Also when you build a whole suit of armour, what makes the most sense to build in sequence?
1.) helmet
2.) cuirass and back?
3.) pauldrons/ spaulders?
4.) legs?
5.) Gauntlets?
Does order matter or should pauldrons generally be saved for last?
1.) helmet
2.) cuirass and back?
3.) pauldrons/ spaulders?
4.) legs?
5.) Gauntlets?
Does order matter or should pauldrons generally be saved for last?
-
Keegan Ingrassia

- Archive Member
- Posts: 6424
- Joined: Thu Jul 16, 2009 4:07 pm
- Location: College Station, Texas (Shadowlands)
Re: First Helmet Tips
Order matters, indeed. You want to build from the innermost layers, outward. Since the overlapping layers have to fit the underlapping layers and you, you want to make sure that your suit doesn't end up rather too small to squeeze into.
1.) Sabatons
2.) Greaves
3.) Legs
4.) Gorget (neck defence)
5.) Body
6.) Arms
7.) Pauldrons/spaulders
8.) Gauntlets
9.) Helmet
Interestingly, this is the same order you take when you put it on. Good way to remember it, that.
1.) Sabatons
2.) Greaves
3.) Legs
4.) Gorget (neck defence)
5.) Body
6.) Arms
7.) Pauldrons/spaulders
8.) Gauntlets
9.) Helmet
Interestingly, this is the same order you take when you put it on. Good way to remember it, that.
"There is a tremendous amount of information in a picture, but getting at it is not a purely passive process. You have to work at it, but the more you work at it the easier it becomes." - Mac
Re: First Helmet Tips
You put the neck piece on before the cuirass and back? Is it supposed to go under the chest piece or sit on the top of the chest?
Good and easy way to remember it though! Unfortunately I'm doing the helmet first LOL!
It's subject to change but I plan on doing a "chain mail" suit for my first suit; so I guess I can cheat a little bit and finish my helmet first
Gauntlets should be interesting.. What did teutonic 13th/14th century "great helmed" knights wear? Was it gloveless or just chainmail? I've seen so many pictures that aren't historically accurate I'm a little confused on that.
Re: First Helmet Tips
Also was armor ever painted in one way or another? Sometimes I see images of helmets "blackened" almost like they've been painted?
And of course Monty Python and the Holy Grail (obviously not historically accurate) liked to play on that with the "Black Knight" and some other characters.
And of course Monty Python and the Holy Grail (obviously not historically accurate) liked to play on that with the "Black Knight" and some other characters.
-
Konstantin the Red
- Archive Member
- Posts: 26725
- Joined: Sun Oct 21, 2001 1:01 am
- Location: Port Hueneme CA USA
Re: First Helmet Tips
Modified rapture! -- the plan, she is working.critch wrote:Information overload!
A hausse -- that plate -- could be on one pauldron or both. Sixteenth century feature.I'm a huge fan of the plates that protect the neck of the wearer. For some reason I like that a lot. That was typically worn over the shield arm right?
Yeah, full harness of plate goes on from the toes up, somewhat modified by putting the foundation garment on. In the later fourteenth century, this was often like a cotehardie with laces, or points, attached for tying things on. It could be a Charles de Blois, also militarized with the addition of points for tying. (The original garment seems just to have been a civvie cotehardie à grands assiètes, an extreme type of set-in sleeve set in very far.) (There are patterns for sale as well as bespoke ones, and the pattern's included in TOMAR too -- and scattered around the Net.) Next century along, foundation garments were doublets, like this one, or this with a little padding, again with laces as required, and for the doublets of the century after that, a commentator advised his readers to stick strictly to doublets without pinks or slashes to them so nothing on your armor would snag getting it on, say if your camp were attacked by night.
In fourteenth century transitional plate armor, the foundation garment was of the greatest importance because everything in harness other than the helmet and greaves was directly attached to, or directly buckled on over, it. In particular, the limbs; only the greaves, sollerets, and gauntlets weren't attached, weren't held in place by a foundation garment.
Essentially, the garment does what modern-day equipment bearers would do with belts, webbing harness, or straps. Having a larger area than any array of straps and belts, it spreads the load well too. Being well-fitted is an essential, particularly being snug about the waist and hips, and cut easier about the shoulders for easy arm movement.
You can find the CdeB on the web looking like this:
http://home.earthlink.net/~lizjones429/ ... s_diag.gif It's a little too wide to just post here.
Last edited by Konstantin the Red on Wed Aug 06, 2014 7:53 pm, edited 1 time in total.
"The Minstrel Boy to the war is gone..."
-
Konstantin the Red
- Archive Member
- Posts: 26725
- Joined: Sun Oct 21, 2001 1:01 am
- Location: Port Hueneme CA USA
Re: First Helmet Tips
Yes, it was painted, and particularly things like city-issued helmets for infantry. Even painted in livery colors. In the fifteenth century there seems to have been a lot of harness painted glossy black, or something near it. They even figured out blueing and the related process of russeting eventually; there are some later-sixteenth blued and gilt armours. Blueing scratches under hits, though.critch wrote:Also was armor ever painted in one way or another? Sometimes I see images of helmets "blackened" almost like they've been painted?
And of course Monty Python and the Holy Grail (obviously not historically accurate) liked to play on that with the "Black Knight" and some other characters.
"The Minstrel Boy to the war is gone..."
-
Konstantin the Red
- Archive Member
- Posts: 26725
- Joined: Sun Oct 21, 2001 1:01 am
- Location: Port Hueneme CA USA
Re: First Helmet Tips
Yep; as long as she gets done, it's all good!critch wrote:It's subject to change but I plan on doing a "chain mail" suit for my first suit; so I guess I can cheat a little bit and finish my helmet first
At the 13th-14th divide, the winds of change were just beginning to blow. In the thirteenth, best guess is mail mitts. Get into the fourteenth a ways and you start seeing hauberk sleeves retreating off the forearm and a safe bet is Wisby-style plate gauntlets: leather shell over numerous small plates inside. Hardened gloves. They've made Wisby gauntlets around here, and you can Search-button onsite after them. They started building leather-articulated plate gauntlets in the last third of the fourteenth -- such as on Edward the Black Prince, and shown prominently on that bad -- though iconic! -- restoration of harness in the Metropolitan Museum of Art, the red one with a bascinet on top. This has numerous rather bad errors in its details -- but can be revised beautifully, correcting these mistakes, to produce a wonderful c. 1380-90 bascinet harness that you can bend over in! And I've let enthusiasm carry me wide of topic.critch wrote:Gauntlets should be interesting.. What did teutonic 13th/14th century "great helmed" knights wear? Was it gloveless or just chainmail? I've seen so many pictures that aren't historically accurate I'm a little confused on that.
Regionally, nationally distinguishable hardware has been more or less such a military given for centuries now that we expect it -- a useful recognition feature when needed, and one that doesn't trumpet "here we are, right here" the way a banner would -- inviting a fire mission. But it wasn't such a thing in the High Middle Ages, and really, simply everybody who was anybody at all bore very similar hardware, knew how to hit men with a lance, kept warhorses. National fashions and styles did not creep into armor until the fifteenth century, another century of experimentation -- and one of faster development than the fourteenth, since the Plague had lost much of its virulence and the innovations of the fourteenth century continued to bear their fruit. National styles basically had to wait this long.
And it just got all the more so after 1492. Look at history long enough and often enough and damn! -- it's this huge network. The networking reflects in martial gear like helmets -- morions and cabassets are Spanish styles of helmet. When Spain rather suddenly became a great power through its trafficking in New World gold (and inflated its economy utterly to death in the process) everybody adopted morions whether they were Spanish or not, with a fine impartiality. Morions seem to have developed as a style descended from what I call the infantry "iron cloche hat" helmets of the fifteenth century. "I like having this headpiece protect my ears but I want this consarn brim out of my eyes."
"The Minstrel Boy to the war is gone..."
-
Konstantin the Red
- Archive Member
- Posts: 26725
- Joined: Sun Oct 21, 2001 1:01 am
- Location: Port Hueneme CA USA
Re: First Helmet Tips
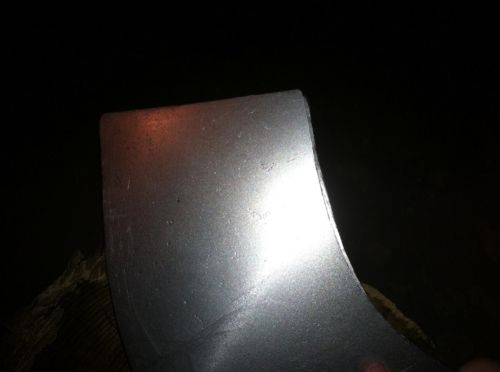
Yeah. Get the curve down perfect like you want it, cut it out (and jot some notes so you can remember what the jig is for), then start bashing, banging, bending metal to make it fit that curve. You can keep checking over and over with it and assess your progress.critch wrote:Also what do you mean by Jig? Like a stencil cut out of sheet metal?
Actually I think it was common. You either try sawing them out at the same time of two stacked sheets of steel, or much better, snip out a pattern piece of that same thin sheet you cut your jigs from and trace around that. Try, when cleaning up two pieces you've just cut out, to work each edge the same way and amount: either file-smooth a particular edge with both the pieces clamped together in a vise so you're filing both their edges at once and the same amount, or file a particular edge and then go to the other piece and file that very same edge. Work back and forth between the pieces like that, so you're really remembering what you just did, and do the same.. . . They're almost like two different pieces, pictures might not be able to show. The curves are wrong and it's practically impossible to get them exact. It's frustrating me to no end, I don't know.. Maybe this is common in armour making.
Here I've tried grinding the pieces down more and cutting them to trim but the more I do it the more and more I'm noticing they're not symmetrical at all. The curves themselves are not one smooth long edge, they're kinda crappy.


Well, I hope you don't have to cut out another top cap because the first one doesn't fit well on the forehead and occiput plate when these are assembled. Tried to tell you trace that one out after you assemble those two. This is, you know, imprecise hand making.critch wrote:Here's all the pieces (except cross) brought out for the 13th Century Great Helm.

Damn good start there, Nate. Everybody thinks they need some more hammers. They're usually right. Just not as right as they thought they were! You're very well fixed for ball peins; they should all do a lot for you. Some people take a grinder to a cheap ball pein's hammer face and grind that side of it into a rectangular raising hammer -- gives better control of how much you move your metal around and which way. The bolties will be great for parting round stock and for cutting butted (and riveted too) mail links off the coil fairly fast. (That's for a certain value of "fast" when it comes to doing anything with mail.) Looks to me like you're going to want more clamps, some more vise grips, and a set of those assorted files from Nicholson or anybody else that's as good.Here's all my hand tools... I think I need more hammers and that contour gauge to help me out..
Thanks,
Nate

"The Minstrel Boy to the war is gone..."
Re: First Helmet Tips
More awesome information!
So this green armour color from Monty Python isn't as far fetched as I once believed?

I'm thinking I might go for the Wisby Style plate gauntlets.. That should be a nice challenge since I don't have small stuff to work finger pieces with! Either way I like the look of them. Did the teutonic knights ever wear greaves or knee armours? I know they wore spurs, I'm just trying to think which rendition would give me the overall best beginner's practice.
You've got so much information, do you recommend any books detailing any of this information? I'd like to know historical accuracy so I don't begin to get too fantasy oriented in the beginning.
Can you tell me anything about tunics and what they meant/mean for an individual? Colors, patterns, symbols etc?
Very good point with the jig/ metal pieces. I could always hang onto a jig and spray WD-40 onto it to save it for a future template if I wanted to. I have about 6 clamps I believe right now from Husky so those will be good to match up the pieces and do the filing together. Unfortunately I am using two of them to clamp my bench shear to my table at the moment hah! But I think you're right some Nicholson files will do me good, they're just so damned expensive!
So this green armour color from Monty Python isn't as far fetched as I once believed?
I'm thinking I might go for the Wisby Style plate gauntlets.. That should be a nice challenge since I don't have small stuff to work finger pieces with! Either way I like the look of them. Did the teutonic knights ever wear greaves or knee armours? I know they wore spurs, I'm just trying to think which rendition would give me the overall best beginner's practice.
You've got so much information, do you recommend any books detailing any of this information? I'd like to know historical accuracy so I don't begin to get too fantasy oriented in the beginning.
Can you tell me anything about tunics and what they meant/mean for an individual? Colors, patterns, symbols etc?
Very good point with the jig/ metal pieces. I could always hang onto a jig and spray WD-40 onto it to save it for a future template if I wanted to. I have about 6 clamps I believe right now from Husky so those will be good to match up the pieces and do the filing together. Unfortunately I am using two of them to clamp my bench shear to my table at the moment hah! But I think you're right some Nicholson files will do me good, they're just so damned expensive!
-
Konstantin the Red
- Archive Member
- Posts: 26725
- Joined: Sun Oct 21, 2001 1:01 am
- Location: Port Hueneme CA USA
Re: First Helmet Tips
Well, save up for a file assortment -- and/or start haunting flea markets and pawnshops with an eye towards cheap(ish) hand tools. Flea markets sometimes you can really score, and get to brag to your pals. Worcester Co. MA like as not has a LOT of old tools and stuff floating around. Exactly the way an anvil wouldn't.
Small C clamps are totally fine for all kinds of this metal work and other stuff. Vise-Grips are nimble and even more versatile -- need a lever? Need a handle? Clamp them grips on. Don't break the bank buying three dozen clamps, just pick 'em up as wanted. Probably two by two.
I can walk you through building a monster strong general workbench out of 2x8 and a little bit of plywood, just using hammer, saw, big nails, carriage bolts and a wrench. And a Stanley measuring tape -- their tapes are their very best product. It's a flat top, conventional-design sort of bench, not the also very impressive butcher block type benches we sometimes show off from people who pound really heavy in their shops. That's not likely to be you right off, so let's stay reasonable here with all these wonderful schemes! But a bench you can bang on that doesn't kill your wallet is a good thing, as Martha says. If you've never before put together something serious out of a bunch of big boards, it'll give you a nice practical-macho thrill of accomplishment too.
Books: yes. There are many, in about every depth. A fairly good once-over-lightly overview of all sorts of arms and armour -- armored fighting vehicles too, what they started off with in August of 1914, what they hit the beach with at D-Day, etc. -- are the Osprey books. The illustrations vary in historical quality, but we around here make a good fact-check library. If an Osprey book said something about something, you might also want to Search-button here to see if we've cussed and discussed, working from study of our own on arms and armor. The gang seems to be pretty much letting me do the chit chat, and I do like bringing the new chums up to speed so they can take a serious place in this company -- but personally, I've learned a lot at their feet, and/or in butting heads with a few of the more acerbic, and found them plenty persuasive.
You've noticed a great many of us come at arms & armour entirely from a users' sort of standpoint. Trying to actually use armor and getting swatted in it to any desired level of, ah, severity teaches you a mighty lot about how armor is supposed to work: it's a tradeoff. There's inconveniences, there's weight, there's that it makes us more bulletproof. Armor's a force-multiplier: reduces casualties, magnifies hitting power.
Others of us, we're all about the craft and craftsmanship.
Still others have a lively interest in other medieval subjects beside, like calligraphy (and that stuff is good for your handwriting) and, as you ask about, HERALDRY. Well, yay; I like that stuff myself a lot.
Okay, literally back then the coat-of-arms was a jupon or tabard, worn on the body like a sleeveless jacket (the tabard sort of had sleeves or sleeve caps) on which your heraldry, your "emblazon" might be displayed. Colorful and lordly. A certain rather small crayon-box of colors, no decorator colors like in Game of Thrones, and rules for putting them together to get the best contrast, like modern day highway signage -- also like in Game of Thrones, come to that. (Ol' George R.R. Martin, he's clever.)
Colors and "charges," things on a colored field -- lions, swords, hearts, mailed fists, other beasts and monsters like dragons -- colors and thingies don't really mean all that much by themselves nor universally. They represent -- specifically for you -- noble things you like. Lions were supposed to be brave and kingly as well as being bloody dangerous; dragons were simply bloody dangerous and fiery too, so here was something for pyromaniacs to love. And then you may wander over to something like a deer, or even just his antlers, as your sigil, your insignia. Charges mean anything you'd like to attach to them. Colors pretty much do too -- no real system, not from them. But you could always find somebody who figures red stands for courage, white for purity, blue for truth. All fine, all whatever -- and it's all good.
A coat of arms is not a coded message, it isn't a rebus -- it's more like your signature, or even better, it's a flag, but a flag for an individual, not a nation. So you can imagine how somebody must be important, to rate having his own flag!
Aside from Charges (yes, let's capitalize) there are also design elements of a category called Honourable Ordinaries (there really aren't dishonourable ones, but work with me here) -- mostly large, generally rectilinear stripes going various ways across the field of the shield: vertical, horizontal, 45 degrees left or right, way up top, and a few combinations of these such as a Cross. They all have their own names, which are mostly brief (that's important to blazon). Most Ordinaries can also be used to indicate the shield's field has been divided up in such-and-such a way. Heraldic blazon says this with the short word "per," as in a shield's field divided vertically down the center is called "per pale," horizontally "per fess" and slanty "per bend/per bend sinister (the other way)." "Per Cross" is possible, but they always say "Quarterly" because that's how the field is left, cut up in four quarters, top and bottom left and right. Yes, there's a way to call it if it's cut up along a big X. There's a name for a big-X Ordinary too; it's called a saltire. (The root of the word is something you jump over, the framework to hold the bar up for you to leap, to saltate. Lots of stuff like that in heraldry-words.)
Crosses carry at least a bit of Christian symbolic weight, of course. A.C. Fox-Davies says there are four hundred different varieties of cross known to heraldry; I can't say I've seen even half so many. Crosses, like any charge, may be of any number or size you can fit on a shield -- and that's exactly what they did. Even charges like little bitty lions scattered evenly all over. Or heraldic ermine spots: Brittany, across the Channel in France, used to be its own independent Dukedom, practically a separate country for quite a time; the Dukes of Brittany bore a shield that was nothing but ermine, no Charge on this field -- an array of black spots on white. Still seen in the canton of Brittany's regional flag, which looks like a weird take on the American flag (which is also duly heraldic). One single huge ermine spot might amount to a charge -- it's not, shall we say, common.
The famous "bar sinister," well, "bar" is getting heraldically misused here, as a bar is a thin horizontal line, a diminutive of its corresponding horizontal Ordinary, the Fess (and always borne in pairs, not singly (? -- never really knew why)); and a slanty one, diminutive again, is blazoned "baton" and is the diminutive in this case of the Bend Sinister, the slanty stripe going the other way from the Bend, which is the usual direction for these things. So, it's the "Baton Sinister" and yes, it has been used, often by nobles of pretty exalted blood, in simultaneously exhibiting two things: he's a by-blow, a bastard, because the noble or the king is sleeping around without protection, and generally with some pretty noble ladies and other folks' wives at that, and the king liked the bastard so much he acknowledges him as having noble blood and thus grants him arms to bear with a difference on them like said Baton Sinister to show that he's quite noble and you better respect that, but he is not an heir to the throne. Same goes for other nobles doing this kind of thing -- indicating that so-and-so isn't his heir, but himself might go on to found a related family of cousins to the original lot: some knight's half brother, yes, and with a noble shield with a little extra on it.
Small C clamps are totally fine for all kinds of this metal work and other stuff. Vise-Grips are nimble and even more versatile -- need a lever? Need a handle? Clamp them grips on. Don't break the bank buying three dozen clamps, just pick 'em up as wanted. Probably two by two.
I can walk you through building a monster strong general workbench out of 2x8 and a little bit of plywood, just using hammer, saw, big nails, carriage bolts and a wrench. And a Stanley measuring tape -- their tapes are their very best product. It's a flat top, conventional-design sort of bench, not the also very impressive butcher block type benches we sometimes show off from people who pound really heavy in their shops. That's not likely to be you right off, so let's stay reasonable here with all these wonderful schemes! But a bench you can bang on that doesn't kill your wallet is a good thing, as Martha says. If you've never before put together something serious out of a bunch of big boards, it'll give you a nice practical-macho thrill of accomplishment too.
Books: yes. There are many, in about every depth. A fairly good once-over-lightly overview of all sorts of arms and armour -- armored fighting vehicles too, what they started off with in August of 1914, what they hit the beach with at D-Day, etc. -- are the Osprey books. The illustrations vary in historical quality, but we around here make a good fact-check library. If an Osprey book said something about something, you might also want to Search-button here to see if we've cussed and discussed, working from study of our own on arms and armor. The gang seems to be pretty much letting me do the chit chat, and I do like bringing the new chums up to speed so they can take a serious place in this company -- but personally, I've learned a lot at their feet, and/or in butting heads with a few of the more acerbic, and found them plenty persuasive.
You've noticed a great many of us come at arms & armour entirely from a users' sort of standpoint. Trying to actually use armor and getting swatted in it to any desired level of, ah, severity teaches you a mighty lot about how armor is supposed to work: it's a tradeoff. There's inconveniences, there's weight, there's that it makes us more bulletproof. Armor's a force-multiplier: reduces casualties, magnifies hitting power.
Others of us, we're all about the craft and craftsmanship.
Still others have a lively interest in other medieval subjects beside, like calligraphy (and that stuff is good for your handwriting) and, as you ask about, HERALDRY. Well, yay; I like that stuff myself a lot.
I guess you mean "coat-armour" here. By the fourteenth century, when the expression "coat of arms" seems to originate from, it literally was a coat, and the nobleman's shield simply a repetition of the pattern. The shield of course was a very convenient way to both display one's arms and to draw them on one of those parchments people like to hang on their walls and think it was one or more of their own bloodline that bore such. Well, that's a big maybe. The Creative Anachronists manage to give an outlet to this urge without permitting (too much) dreadful stomping on other people's intellectual property, nor trespassing on their real property. They're rather famous for it; I've not heard as much from the other battle-play groups like Adria, etcetera.Can you tell me anything about tunics and what they meant/mean for an individual? Colors, patterns, symbols etc?
Okay, literally back then the coat-of-arms was a jupon or tabard, worn on the body like a sleeveless jacket (the tabard sort of had sleeves or sleeve caps) on which your heraldry, your "emblazon" might be displayed. Colorful and lordly. A certain rather small crayon-box of colors, no decorator colors like in Game of Thrones, and rules for putting them together to get the best contrast, like modern day highway signage -- also like in Game of Thrones, come to that. (Ol' George R.R. Martin, he's clever.)
Colors and "charges," things on a colored field -- lions, swords, hearts, mailed fists, other beasts and monsters like dragons -- colors and thingies don't really mean all that much by themselves nor universally. They represent -- specifically for you -- noble things you like. Lions were supposed to be brave and kingly as well as being bloody dangerous; dragons were simply bloody dangerous and fiery too, so here was something for pyromaniacs to love. And then you may wander over to something like a deer, or even just his antlers, as your sigil, your insignia. Charges mean anything you'd like to attach to them. Colors pretty much do too -- no real system, not from them. But you could always find somebody who figures red stands for courage, white for purity, blue for truth. All fine, all whatever -- and it's all good.
A coat of arms is not a coded message, it isn't a rebus -- it's more like your signature, or even better, it's a flag, but a flag for an individual, not a nation. So you can imagine how somebody must be important, to rate having his own flag!
Aside from Charges (yes, let's capitalize) there are also design elements of a category called Honourable Ordinaries (there really aren't dishonourable ones, but work with me here) -- mostly large, generally rectilinear stripes going various ways across the field of the shield: vertical, horizontal, 45 degrees left or right, way up top, and a few combinations of these such as a Cross. They all have their own names, which are mostly brief (that's important to blazon). Most Ordinaries can also be used to indicate the shield's field has been divided up in such-and-such a way. Heraldic blazon says this with the short word "per," as in a shield's field divided vertically down the center is called "per pale," horizontally "per fess" and slanty "per bend/per bend sinister (the other way)." "Per Cross" is possible, but they always say "Quarterly" because that's how the field is left, cut up in four quarters, top and bottom left and right. Yes, there's a way to call it if it's cut up along a big X. There's a name for a big-X Ordinary too; it's called a saltire. (The root of the word is something you jump over, the framework to hold the bar up for you to leap, to saltate. Lots of stuff like that in heraldry-words.)
Crosses carry at least a bit of Christian symbolic weight, of course. A.C. Fox-Davies says there are four hundred different varieties of cross known to heraldry; I can't say I've seen even half so many. Crosses, like any charge, may be of any number or size you can fit on a shield -- and that's exactly what they did. Even charges like little bitty lions scattered evenly all over. Or heraldic ermine spots: Brittany, across the Channel in France, used to be its own independent Dukedom, practically a separate country for quite a time; the Dukes of Brittany bore a shield that was nothing but ermine, no Charge on this field -- an array of black spots on white. Still seen in the canton of Brittany's regional flag, which looks like a weird take on the American flag (which is also duly heraldic). One single huge ermine spot might amount to a charge -- it's not, shall we say, common.
The famous "bar sinister," well, "bar" is getting heraldically misused here, as a bar is a thin horizontal line, a diminutive of its corresponding horizontal Ordinary, the Fess (and always borne in pairs, not singly (? -- never really knew why)); and a slanty one, diminutive again, is blazoned "baton" and is the diminutive in this case of the Bend Sinister, the slanty stripe going the other way from the Bend, which is the usual direction for these things. So, it's the "Baton Sinister" and yes, it has been used, often by nobles of pretty exalted blood, in simultaneously exhibiting two things: he's a by-blow, a bastard, because the noble or the king is sleeping around without protection, and generally with some pretty noble ladies and other folks' wives at that, and the king liked the bastard so much he acknowledges him as having noble blood and thus grants him arms to bear with a difference on them like said Baton Sinister to show that he's quite noble and you better respect that, but he is not an heir to the throne. Same goes for other nobles doing this kind of thing -- indicating that so-and-so isn't his heir, but himself might go on to found a related family of cousins to the original lot: some knight's half brother, yes, and with a noble shield with a little extra on it.
"The Minstrel Boy to the war is gone..."
-
Konstantin the Red
- Archive Member
- Posts: 26725
- Joined: Sun Oct 21, 2001 1:01 am
- Location: Port Hueneme CA USA
Re: First Helmet Tips
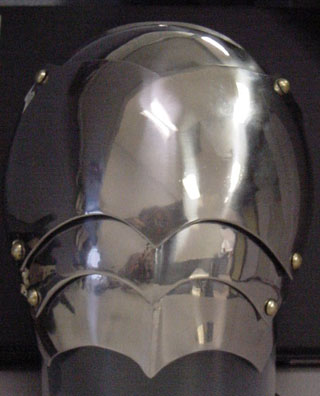
Let's see, are those two pieces the forehead and the occiputal plate of the barrel helm?critch wrote:Alright onto the pictures. They're almost like two different pieces, pictures might not be able to show. The curves are wrong and it's practically impossible to get them exact. It's frustrating me to no end, I don't know.. Maybe this is common in armour making.
Here I've tried grinding the pieces down more and cutting them to trim but the more I do it the more and more I'm noticing they're not symmetrical at all. The curves themselves are not one smooth long edge, they're kinda crappy.
They are not identical plates and they aren't supposed to be. The forehead will slope back considerably more than the occiputal plate slopes forward. Both will be pieces of the surface of cones, but two different cones -- and their ends, which will meet and rivet together right and left sides of the upper half of the helm, will depart from the cones' surfaces and extend towards each other with little conical-ness, just rather a slope inward to the flange of the top-cap.
The occiputal plate is of a much narrower cone than the forehead plate. The conelike parts of each are center forward and center back. Left and right sides, not so very. They lean in a little, but they're extending pretty much parallel to the sides of your skull up there.
But you've got the blessed things to come out right when after you've got the conical bends in them the edges are parallel top and bottom -- the two upper plates will sit on a table and not rock -- and the two side-seams where their ends join up are vertical. So now there's this one slope reaching out to where the eye-slots are, quite slanted, and at the rear is this other, very steep slope that is close to vertical.
Drill rivet holes in the forehead plate first, like three to four of them each side: it overlaps the occiputal, so the seam is facing away from a lance attack coming from the front -- nothing to catch. Getting both pieces lined up straight, taping them together if you want, clamp them in a vise or with clamps and drill one (1) hole all the way through now, through the occiputal plate. The hole you had already in the forehead plate has located exactly where the hole in the occiputal plate should be. The top edges of the two plates are still even and straight, right? Stick a little bolt or screw and nut, or Cleco fastener in this hole and tighten down. Proceed to the other side and do all this over again. Now you have two places, bolted down, holding forehead and occiputal places together and you can go ahead and drill the other holes. Bolting another two of these holds the two pieces in perfect final alignment. Start riveting with the drilled holes that don't have screws in them. Then swap the screws out and continue riveting. Nice and solid when you're done, isn't it?
When you've drilled and riveted together, see to it these plates trace out an oval both on the top and on the bottom -- too circular is not very good, too bulky and heavy-making -- and see if you need a different top cap than you cut out or not. If it isn't oval enough at the bottom edge of this assembly, and anything there around two inches longer than it is wide will do nicely, you can squash it in until it is good.
With the two of them together you can lightly dish these plates all around, "softening" their shape to something less rigidly geometrical, more handmade, more truly medieval. Maybe nobody else will ever know that you did this -- but you will, and this faint bulge, this faint curvature makes your helm look exactly like the medieval models you're imitating. Even that big Pembridge pic I posted shows this on its upper hoop -- but you have to lay a straightedge on your monitor to see it. Once you do see it, you can't miss it.
From here you can test fit with pattern-pieces of the ventail and the nape plate scissored out of manila folder, tagboard, or cereal box, and then bend to shape and tape these prototypes into place with masking tape. Tie a rolled bandana around your head, and put the whole thing on your head resting on the roll to see if there's room enough for your melon in there, right quick.
"The Minstrel Boy to the war is gone..."
-
Keegan Ingrassia
- Archive Member
- Posts: 6424
- Joined: Thu Jul 16, 2009 4:07 pm
- Location: College Station, Texas (Shadowlands)
Re: First Helmet Tips
Now that you ask, most plate armor that comes to mind has the plate gorget over the cuirass. Sorry about that.critch wrote:You put the neck piece on before the cuirass and back? Is it supposed to go under the chest piece or sit on the top of the chest?
"There is a tremendous amount of information in a picture, but getting at it is not a purely passive process. You have to work at it, but the more you work at it the easier it becomes." - Mac
-
wcallen
- Archive Member
- Posts: 4777
- Joined: Mon Oct 29, 2001 2:01 am
- Location: North Carolina, USA
- Contact:
Re: First Helmet Tips
This thread seems to have wandered a lot, but what the heck.Keegan Ingrassia wrote:Now that you ask, most plate armor that comes to mind has the plate gorget over the cuirass. Sorry about that.critch wrote:You put the neck piece on before the cuirass and back? Is it supposed to go under the chest piece or sit on the top of the chest?
Most 15th c. plate bevors go over the breastplate.
Most 16th c. gorgets go under the breastplate.
Most 15th c. mail collars to under the breastplate.
Most 17th c. gorgets (when they wore a breastplate) go under the breastplate.
So as usual, it depends, but the plate gorgets shown above go under the breast and back.
Wade
-
Keegan Ingrassia
- Archive Member
- Posts: 6424
- Joined: Thu Jul 16, 2009 4:07 pm
- Location: College Station, Texas (Shadowlands)
Re: First Helmet Tips
Thanks for the clarification, Wade! My brain wasn't putting my thoughts into words all that well this morning. I couldn't bring to mind specific examples...my focus is generally earlier than the advent of gorgets...but I was pretty sure that the order shifted through the centuries.
"There is a tremendous amount of information in a picture, but getting at it is not a purely passive process. You have to work at it, but the more you work at it the easier it becomes." - Mac
Re: First Helmet Tips
More awesome information!
Any websites with variation of cross' (since I seem to be going that route for my first build)
And any websites with variation of patterns and symbols and their meanings? (like bear, fish, elk, etc)
Great idea for the drilling process by clamping them together.. should make short work on it.
I will have to start looking around at yard sales for files and tools since I'm on a tight budget right now.. Damn car...
WCallen, thanks for the clarification.
I'm not sure if you answered but do you know if 13th/ 14th century teutonic knights ever wore greaves or anything like plate armour?
AMAZING NEWS! MY RIVETS CAME IN! Time to finish this helmet!
-
Konstantin the Red
- Archive Member
- Posts: 26725
- Joined: Sun Oct 21, 2001 1:01 am
- Location: Port Hueneme CA USA
Re: First Helmet Tips
From mid-fourteenth on, yes they did.
Bascinet armours (bascinet, camail, body armor under jupon; splint limbs in the middle third of the century, plate limbs later for they adopted the shiny arm and leg plate armor there later than most (and there was overlap, so the later in the middle third you choose, the more plate limbs get mixed in), greaves and pointy sollerets), and the heraldry of the jupons would have been quite German. You can find reference books on charges fashionable in the Germanies, like with double- or triple-headed eagles or linden-leaves; my refs that I'd look in would be Boutell's or Woodward's Treatise. Fox-Davies hasn't much reference to anything in Continental (French, Italian, German mainly) heraldry. Spain and Portugal had heraldry of their own style, with heraldic art featuring remarkably squared-off shields. Germans did cough up some different, very graphic-arts, sorts of divisions of the field, often very dramatic looking compared to English practice. Studying this one will take labor, and looking in sites like effigiesandbrasses.com for 14th century European knightly array. They tended more to elaborately fashioned jupons than the English nobility did -- quite busy dagging at the hems, even adding false sleeves hanging from the armholes which I suppose flapped like banners behind you at full gallop, trimming edges with fringe. Gaudy, really.
I have mentioned already that charges, for example bears, fishes, elk, etc., don't carry any general meaning in and of themselves emblazoned upon a shield. Three fish means this one guy, two fish and an elk antler on a chief embattled, some other guy. Nobody looking at either shield is thinking, "He bears X, which means Y to every man." Doesn't happen. Could be his great grandfather was terribly fond of herrings in cream and might have asked a herald helping him with a design for his arms to put some fish in.
Like I said, one's arms are not a résumé, not a rebus, but a flag. (About as near to a rebus as they come is heraldry sometimes makes puns, like the family Lucy have luce fish on their arms. The puns may be in quite another language, even in English heraldry. This sort of thing was thought pretty subtle, and some armigers with a robust sense of humor went for this kind of thing.)
Were I looking up what the 'Net knoweth about crosses in heraldry, I'd google on cross heraldry and the other way around to see what shakes out -- it should be numerous varieties of cross.
Crosses have a flexibility most other Ordinaries really don't: it can show up as a charge, as multiple charges, or of varied forms behaving like an Ordinary in extending all the way across the shield's field from edge to edge to edge. The entire design is dominated by such a cross, blazoned as "a cross [such-&-such, it may be a particular kind] [color] throughout." Even a cross form much more common as a charge might be enlarged to become throughout, touching the top, either side, and the point on the bottom of the shield.
Here is a "cross crosslet fitchy," having a pointy stake as its bottom limb so you can fix it in the turf if you're of a mind to. The "crosslet" is those little crossbars on the other three arms:
 Snappy looking thing, isn't it?
And this one is drawn almost completely "throughout;" couldn't find one that was altogether so (easier with the "cross patée fitchy") but this comes close; just stretch it a little more in all directions:
Now here is a more typical use of cross-crosslets fitchy as a design element:
There's a "bordure embattled" making a frame around the edge.
Another:
The Howard family is very famous in Scottish history.
Bascinet armours (bascinet, camail, body armor under jupon; splint limbs in the middle third of the century, plate limbs later for they adopted the shiny arm and leg plate armor there later than most (and there was overlap, so the later in the middle third you choose, the more plate limbs get mixed in), greaves and pointy sollerets), and the heraldry of the jupons would have been quite German. You can find reference books on charges fashionable in the Germanies, like with double- or triple-headed eagles or linden-leaves; my refs that I'd look in would be Boutell's or Woodward's Treatise. Fox-Davies hasn't much reference to anything in Continental (French, Italian, German mainly) heraldry. Spain and Portugal had heraldry of their own style, with heraldic art featuring remarkably squared-off shields. Germans did cough up some different, very graphic-arts, sorts of divisions of the field, often very dramatic looking compared to English practice. Studying this one will take labor, and looking in sites like effigiesandbrasses.com for 14th century European knightly array. They tended more to elaborately fashioned jupons than the English nobility did -- quite busy dagging at the hems, even adding false sleeves hanging from the armholes which I suppose flapped like banners behind you at full gallop, trimming edges with fringe. Gaudy, really.
I have mentioned already that charges, for example bears, fishes, elk, etc., don't carry any general meaning in and of themselves emblazoned upon a shield. Three fish means this one guy, two fish and an elk antler on a chief embattled, some other guy. Nobody looking at either shield is thinking, "He bears X, which means Y to every man." Doesn't happen. Could be his great grandfather was terribly fond of herrings in cream and might have asked a herald helping him with a design for his arms to put some fish in.
Like I said, one's arms are not a résumé, not a rebus, but a flag. (About as near to a rebus as they come is heraldry sometimes makes puns, like the family Lucy have luce fish on their arms. The puns may be in quite another language, even in English heraldry. This sort of thing was thought pretty subtle, and some armigers with a robust sense of humor went for this kind of thing.)
Were I looking up what the 'Net knoweth about crosses in heraldry, I'd google on cross heraldry and the other way around to see what shakes out -- it should be numerous varieties of cross.
Crosses have a flexibility most other Ordinaries really don't: it can show up as a charge, as multiple charges, or of varied forms behaving like an Ordinary in extending all the way across the shield's field from edge to edge to edge. The entire design is dominated by such a cross, blazoned as "a cross [such-&-such, it may be a particular kind] [color] throughout." Even a cross form much more common as a charge might be enlarged to become throughout, touching the top, either side, and the point on the bottom of the shield.
Here is a "cross crosslet fitchy," having a pointy stake as its bottom limb so you can fix it in the turf if you're of a mind to. The "crosslet" is those little crossbars on the other three arms:
Snappy looking thing, isn't it?And this one is drawn almost completely "throughout;" couldn't find one that was altogether so (easier with the "cross patée fitchy") but this comes close; just stretch it a little more in all directions:
Now here is a more typical use of cross-crosslets fitchy as a design element:
There's a "bordure embattled" making a frame around the edge.
Another:
The Howard family is very famous in Scottish history.
Last edited by Konstantin the Red on Thu Aug 07, 2014 7:54 pm, edited 1 time in total.
"The Minstrel Boy to the war is gone..."
-
Konstantin the Red
- Archive Member
- Posts: 26725
- Joined: Sun Oct 21, 2001 1:01 am
- Location: Port Hueneme CA USA
Re: First Helmet Tips
Crosses Paty, or Patée:
 On the right, a cross pattée fitchy. On the left, a cross patée fitchy at the foot. Looks like you could decorate a German WW1 cemetary plot with it, doesn't it? Stick it right in the sod.
You wanted a site to look at; looks like http://www.heraldsnet.org might be a good one, where I got these crosses from. There's also VikingAnswerLady for more. (Some of her image files won't post here -- too indefinite, too big, too something. This site will take up to 800 across by about 1200 tall.)
Rivets in? Loud cheers.
From http://www.americanheraldry.org, some crosses:

What makes a Cross Potent so...? (ahem) -- it's an old word for crutch. Cross Moline is like a mill-iron on a grindstone. Cross Bottony probably was a sloppy-drawn variation on the Cross Crosslet -- see how alike they really are?
There are some cross and field combinations assigned to various saints and associated with the patron saints of nations, like the crosses making up the UK's Union Jack (designed by some heralds, not very popular with everybody else at its introduction):
St George's Cross: red, throughout, on a white field
St Andrew's Cross: white X, throughout, on a blue field
St Patrick's: a red X (a saltire like St Andrew's) on white
-- the patron saints of England, Scotland, and Ireland. Cross of St. Patrick is nowhere near as old in use (1780s date) as the other two, and makes some nationalist Irishmen mad -- they call it an English invention. They add adjectives.
Oh, in the SCA, pointedly do not use the Cross Fylfot, a/k/a the swastika. 'S got a bad name. Nor a 3-armed, triangular version of that; that was the insignia of an SS armored division. Borrowing fantasy writer Fritz Lieber's 7-armed swastika assigned as a sigil of the wizard Ningauble wouldn't fly with the SCA College of Heralds either -- though it's a mazy-looking thing entirely appropriate to a wizard!
Heraldic beasts have blazonable postures. Here are some of them. You can look up rampant your own self.

On the right, a cross pattée fitchy. On the left, a cross patée fitchy at the foot. Looks like you could decorate a German WW1 cemetary plot with it, doesn't it? Stick it right in the sod.You wanted a site to look at; looks like http://www.heraldsnet.org might be a good one, where I got these crosses from. There's also VikingAnswerLady for more. (Some of her image files won't post here -- too indefinite, too big, too something. This site will take up to 800 across by about 1200 tall.)
Rivets in? Loud cheers.
From http://www.americanheraldry.org, some crosses:
What makes a Cross Potent so...? (ahem) -- it's an old word for crutch. Cross Moline is like a mill-iron on a grindstone. Cross Bottony probably was a sloppy-drawn variation on the Cross Crosslet -- see how alike they really are?
There are some cross and field combinations assigned to various saints and associated with the patron saints of nations, like the crosses making up the UK's Union Jack (designed by some heralds, not very popular with everybody else at its introduction):
St George's Cross: red, throughout, on a white field
St Andrew's Cross: white X, throughout, on a blue field
St Patrick's: a red X (a saltire like St Andrew's) on white
-- the patron saints of England, Scotland, and Ireland. Cross of St. Patrick is nowhere near as old in use (1780s date) as the other two, and makes some nationalist Irishmen mad -- they call it an English invention. They add adjectives.
Oh, in the SCA, pointedly do not use the Cross Fylfot, a/k/a the swastika. 'S got a bad name. Nor a 3-armed, triangular version of that; that was the insignia of an SS armored division. Borrowing fantasy writer Fritz Lieber's 7-armed swastika assigned as a sigil of the wizard Ningauble wouldn't fly with the SCA College of Heralds either -- though it's a mazy-looking thing entirely appropriate to a wizard!
Heraldic beasts have blazonable postures. Here are some of them. You can look up rampant your own self.
"The Minstrel Boy to the war is gone..."
Re: First Helmet Tips
I really like the Tau Cross, Patriarchal Cross and the Cross Moline... Decisions decisions... Do people typically make their own tunics, etc or do they commission someone to make one? Are they typically costly if so?
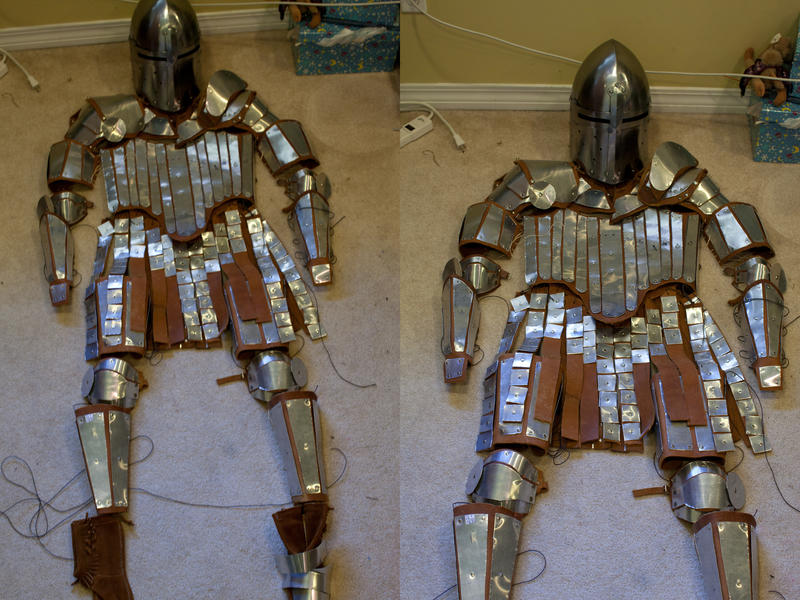
I'm assuming this is splint armour?
I'm going to have to do some homework for chainmail as well. Is it best to buy the steel wire yourself or buy it pre spun so all you have to do is cut and assemble it? I've never done mail before so this outta be fun!
I'll be sure not to use the swastika one LOL... I understand it's not a fan-favorite at all hah! Interesting though it was called something else.
Also I know it was mentioned prior, however.. everyone has been saying to put the rivet on the inside of the helmet and peen it on the outside.. How would you go about hammering within the helmet if you want the dome shape on the outside?
-
Konstantin the Red
- Archive Member
- Posts: 26725
- Joined: Sun Oct 21, 2001 1:01 am
- Location: Port Hueneme CA USA
Re: First Helmet Tips
If you really want the rivet head outside, you need something long to reach the inside, like a nice stout crowbar sort of thing to use as a transfer pin to reach the shanks of the awkward rivets deep in the helm top, while you beat on the other end with a crosspein hammer -- heavier than your biggest ball pein and so delivering more rivet-smushing power.
That's not splint; more Indian/Oriental/Turkish and I wouldn't call it authentic to any of the three. (Some dude redesigning the wheel.) Handsome new funny-sugarloaf helm with a sort of bascinet top to it though... he'd'a wanted real German-style splint harness with a pair of plates under a jupon, to be consistent with the helm. What we call harmony, both in space (geography) and time (the same half century, say). Suit's got splint-ish elements to the limbs, but I'll show you what I have in mind after I get back to the house.
Re mail: getting just the wire is cheapest -- get it in bulk, find a place sells wire by the pound, not in little packages. The process is much more like knitting than like cutting out cloth pieces. I'll link you to a tute, the best on the Net. It's also simple!
Butted mail you can't screw up in a hurry. If you do screw it up -- drop a stitch as it were -- you just undo it again and fix the oops. You've got boltcutters that will do just fine to cut coiled wire with into a pile of steel Cheerios; 2 pr pliers takes it from there.
"The Minstrel Boy to the war is gone..."
Re: First Helmet Tips
Awesome sounds good. Can't wait to find out how to properly do it for the spacing, etc. I understand riveted chain mail is tougher. I'm going to be buying a ton of wire. I plan on doing head to toe chainmail for this teutonic build..
-
Konstantin the Red
- Archive Member
- Posts: 26725
- Joined: Sun Oct 21, 2001 1:01 am
- Location: Port Hueneme CA USA
Re: First Helmet Tips
With that big and long a project, to try and keep it from weighing eighty pounds before you're done, I recommend 16ga (Steel Wire Gauge) galvanized wire (.063" dia), with a 1/4" link ID. Pretty strong, not too terribly heavy, Stainless steel wire would be stiffer, less prone to getting bent open in severe use, but it'd cost four or five times as much. Don't use the 16ga black re-bar tie wire on this; it is dead soft and would pull apart on you, as well as not standing up to being hit, if and when; it rusts easy too. So far I think you're talking costume-mail here -- am I off-base?
I think we're talking about 50 lb of 16ga. Getting as much of it as you can at once means it will all age the same color throughout. Before it closed, I used to buy galvy off a coil in a lumberyard in town. It was a good deal because they'd always cut me some extra (free!) to guarantee I indeed got as many pounds of wire as I'd ordered. Couple-hundred-foot hardware store packets of wire will wreck your budget -- find a lumberyard or a fence-supplies place that sells wire in bulk. Any price around a dollar a pound of wire is a good one.
Stiff, spring-ish welder wire can be gotten from a welders´ supplies place. Now there you need to get about 50 pounds to get to a price break, again to around a dollar the pound. Don't bend that wire at 90 degrees for any purpose; it will snap. But it will cope with being bent around in a circle. Welding wire people will only talk wire diameter; gauge numbers they don't do. Guess they like their space age precision and not 19th-century, uh, tolerances and slop. (Gauge numbers probably had something to do with how many smaller and smaller holes in succession in the drawplate they pulled the wire through. They still make wire the same basic way, dragging it through holes in hard metal. There have been some improvements, yes.) So, you shop there, ask for mild steel welding wire and look for diameters in the range of .055-.065 inch. The skinnier you can go and still make it work, the easier to coil using a power drill and the more feet of wire you get from a pound. Re-annealed, for it's too hard as it comes, this stuff in roughly .045-.050" makes a good feedstock for making riveted (and welded) links, which will make a shirt come out lighter than a .063" shirt and fifteen or twenty times as strong.
The Net's best mail tutorial is here; it has directions for making a historically correct sort of shirt, and a coif.
http://homepage.ntlworld.com/trevor.bar ... r/mail.htm It copies a German mailshirt from Hamburg, right around 1438. Unusually good dating for mail; since mail has so few intrinsic datable features (context of its find place or record of its provenance is more usual) you're doing pretty well to get it within a half century. A specific decade would be outstanding. And as far as mail goes, wouldn't friggin' matter very much.
"The Minstrel Boy to the war is gone..."
-
Konstantin the Red
- Archive Member
- Posts: 26725
- Joined: Sun Oct 21, 2001 1:01 am
- Location: Port Hueneme CA USA
Re: First Helmet Tips
Now, your bolties aren't going to fit their jaws inside a 1/4" springlike coil of wire, but they don't have to. Feed the coil of wire to the jaws of the boltcutter at an angle so the tips of the jaws can bite on the wire. If you really want to pop two links for every one cutting stroke, you're going to have to grind a notch into one of the cutter jaws to allow their end to fit farther in the coil. (I don't much like doing that with boltcutters and haven't a grinder anyway.)
With butted mail, you can save a lot of weaving time after you've coiled some coils to start cutting Cheerios. Take half of those coils, grab either end, and stretch the coils out to slightly over twice their original, tightly coiled length. This opens a hundred and more links before weaving, all in a second. Beats hell outta cranking them open with pliers one at a time! The coils you didn't stretch out, you just cut into Cheerios and close, preclosing these ahead of time. Cut the stretched-out coils the same way. Store opened and closed links separately. You'll waste an awful lot of time if you mix the two together. With opened and closed links, you can assemble mail two rows at a time, by a method you can read about here: http://www.mailleartisans.org/articles/ ... hp?key=203.
Though I'll bet for your first few inches of mail you'll assemble it one ring at a time -- abbrev'd as the ORAAT technique. Just until you get an eye for the Euro 4-1 pattern. Then you can go to two at a time. Some people build chains of mail links like my article describes, then zip chains together. That works. There are a couple dozen ways to put mail together in E4-1 weave alone. Anyway, M.A.I.L's site is good for teaching you other mail stuff too. Articles and picture galleries are to be found under Library there in the top bar.
"The Minstrel Boy to the war is gone..."
-
Konstantin the Red
- Archive Member
- Posts: 26725
- Joined: Sun Oct 21, 2001 1:01 am
- Location: Port Hueneme CA USA
Re: First Helmet Tips: Splint Armor
Splint Armor, Splint Harness:
This guy, Guenther von Schwartzburg:
 He was a distinguished German commander who was a king in the HRE for a few months, but got sick, lost a decisive battle, and abdicated. They paid him 20,001 silver marks to do it. Died next month, poor guy. What with all that, they commissioned a nice memorial for him and here it is.
Splint arm-harness, taken off:

SCA-type splint cuisses (thighs) and knee cops. These splints are entirely internal, but they can be alternate inside and outside they way Guenther's were. Splint armor hinges very nicely around your limb when you do it that way.
 Note the knee cops were made in two halves and welded down the midline.
Line drawings copied from memorial slabs someplace:

This guy, Guenther von Schwartzburg:
He was a distinguished German commander who was a king in the HRE for a few months, but got sick, lost a decisive battle, and abdicated. They paid him 20,001 silver marks to do it. Died next month, poor guy. What with all that, they commissioned a nice memorial for him and here it is.Splint arm-harness, taken off:
SCA-type splint cuisses (thighs) and knee cops. These splints are entirely internal, but they can be alternate inside and outside they way Guenther's were. Splint armor hinges very nicely around your limb when you do it that way.
Note the knee cops were made in two halves and welded down the midline.Line drawings copied from memorial slabs someplace:
"The Minstrel Boy to the war is gone..."
-
Konstantin the Red
- Archive Member
- Posts: 26725
- Joined: Sun Oct 21, 2001 1:01 am
- Location: Port Hueneme CA USA
Re: First Helmet Tips
Splint Arm, clickable -- good SCA work. Shows a flat-link riveted mailshirt to advantage also. Its left sleeve has been tucked up to show off the splint arm.
Interior-splint legs, clickable -- this guy works entirely in spring steel. Kneecops of that type are known as "soupcans" because they are most often nearly cylindrical compared to the really well dished sorts that came a generation of men later. These are unusually cuppy for soupcans.
Splinted construction cuisses and articulated kneecops with steel lames above and below:

Both these men feature splint cuisses and plate greaves.
Well built splint greaves for Battle of the Nations fighting -- they use rebated steel weapons and fight to submission -- hard core:
http://battleofthenations.org/wp-conten ... reaves.png
Interior-splint legs, clickable -- this guy works entirely in spring steel. Kneecops of that type are known as "soupcans" because they are most often nearly cylindrical compared to the really well dished sorts that came a generation of men later. These are unusually cuppy for soupcans.
Splinted construction cuisses and articulated kneecops with steel lames above and below:
Both these men feature splint cuisses and plate greaves.
Well built splint greaves for Battle of the Nations fighting -- they use rebated steel weapons and fight to submission -- hard core:
http://battleofthenations.org/wp-conten ... reaves.png
"The Minstrel Boy to the war is gone..."
-
Konstantin the Red
- Archive Member
- Posts: 26725
- Joined: Sun Oct 21, 2001 1:01 am
- Location: Port Hueneme CA USA
Re: First Helmet Tips: 14th-c. jupon/harness
 A Teutonic Order knight crusading in NE Europe in the fourteenth century might sport a jupon on his armor in a color scheme like this one.
Mail chausses with schynbald greaves strapped on over them, and reinforcing pieces also strapped on (surely pointed up on top somewhere too, so they stay up) over the sleeve of the hauberk, with a pair of plates/coat of plates under the surcoat, detectable by the weapon- and helm-chains hanging from the chest.
 First third of the fourteenth century, I'd say. This sort of art is from a church someplace -- New Testament, "and the guards fell down and became as dead men." Sleeping or collapsed guards, in armored panoply, are in art all over Europe where the Resurrection of Christ is depicted. Often the student of armor gleans details of contemporary harness from these.
"The Minstrel Boy to the war is gone..."
-
Konstantin the Red
- Archive Member
- Posts: 26725
- Joined: Sun Oct 21, 2001 1:01 am
- Location: Port Hueneme CA USA
Re: First Helmet Tips
This wanders afield from your greathelm and mail, but it does land on your 14th century interest.
Keegan Ingrassia set about the very large goal of teaching himself how to make an entire 14th-c. bascinet armour, head to heel, cap-à-pie. You might enjoy this example of what a man can do with determination. You can ask him anything about it.
viewtopic.php?f=1&t=139024 It's a long read so you might want to get yourself a coffee or soda first.
"The Minstrel Boy to the war is gone..."
-
Konstantin the Red
- Archive Member
- Posts: 26725
- Joined: Sun Oct 21, 2001 1:01 am
- Location: Port Hueneme CA USA
Re: First Helmet Tips: Heraldry
Again, somebody's charges on his coat-of-arms can be very small, homely things: the Butler, or Botiler, family of Skelbrooke goes back a looong way -- to the Conquest -- has several branches, and for arms one branch bears a red shield with three gold covered cups on it. Possets, they are. Just plain, ordinary domestic goods. Another branch in Lancashire, that spelt it Boteler, bears a bend between six of those covered cups, seen 3/4 of the way down the page linked to below. (Amazing the stuff you can find.) Some more laboring in the storehouse of heraldry would probably tell me what colors. Yay.
Since the botiller served the drinks, the imagery of the arms reflects the family's name -- Butler. Hence, the punning, or canting, illustrative nature of their arms.
There's a c. 1335 memorial slab in the old family seat at Skelbrooke when they were lords of the manor. The artwork is, well, terrible unless he really did have that Babe Ruth nose, but it shows Sir John le Botiler in hauberk, helmet, and surcoat -- and those three cups on his shield. Scroll all the way to the bottom to look, in this page all about them and the town.
http://midgleywebpages.com/barn_gallery.html
The family and its branches stuck with gold, covered cups as their arms' charge for a long time.
"The Minstrel Boy to the war is gone..."
Re: First Helmet Tips
No need for a ton. A half mile or so should do by length.critch wrote:Awesome sounds good. Can't wait to find out how to properly do it for the spacing, etc. I understand riveted chain mail is tougher. I'm going to be buying a ton of wire. I plan on doing head to toe chainmail for this teutonic build..
Really, you need to try narrowing things down a bit on the timeline. 13th-14th century sees a lot of change over 200 years. Turn of the 13th-14th, 1290-1310, or even a 50-year 1275-1325 is much more limited and definable for the type of helmet.
If you want all mail and a barrel helm in the style of that Monty Python Green Knight, it's a doable first project. Hopefully you'll be one of the people who enjoys weaving mail. You can wear a pair of plates (frequently called a coat of plates here) over your mail if you feel you need more protection for your ribs. Otherwise, you could add a padded gambeson or jupon over the mail, or perhaps even a scale coat if needed. An additional mail coif or pisan (also called a standard) worn beneath the helm can cover any required, rigid, neck defense. Plate knees can be attached to gamboissed (padded or quilted) thigh defenses. Schynbalds of plate protect the front of the shin. Arms should generally be covered by mail, with some simple roundels at the elbows laced to the mail. The rest of the elbow protection can be worn beneath the mail sleeve, over or under the aketon. Attached mail gauntlets are in use c. 1300, as are separate mail gauntlets. Scale gauntlets also show up by about 1315. You might want to consider using a basket hilt in the SCA with a half-gauntlet so the armor looks appropriate. I had one pair of scale mittens pass inspection routinely.
ferrum ferro acuitur et homo exacuit faciem amici sui
-
Konstantin the Red
- Archive Member
- Posts: 26725
- Joined: Sun Oct 21, 2001 1:01 am
- Location: Port Hueneme CA USA
Re: First Helmet Tips
So far I'm assuming Critch is centering around 1300 AD, by about fifteen or twenty years either way, 1280 to 1320 at the widest. If that's where he's indeed centering, or even if he'll stay there.
But for now, that's a good time for hauberk, chausses, and helm. He's building a 5 piece barrel helm/greathelm. It's in 16ga steel, so about the only place the Creative Anachronists would use that helm would be in Youth Boffer combat. Looks like the single-eyeslot Pembroke style; I don't see a nasal tab on his ventail plate. Unless he puts a band or a cross on the face of his helm, and he might be.
If he goes 14th-century at any time, well, the Fourteenth Century Mafia can advise him, a lot.
"The Minstrel Boy to the war is gone..."