Rectangular tent...a work in progress.

An area for discussing methods for achieving or approximating a more authentic re-creation, for armour, soft kit, equipment, ...

Moderator: Glen K

Mac
Archive Member
Posts: 9953
Joined: Thu Jan 04, 2001 2:01 am
Location: Jeffersonville, PA

Re: Rectangular tent...a work in progress.

Post by Mac »

FrauHirsch1 wrote:
Mac wrote:
FrauHirsch1 wrote:Also, our inner and outer valences are what I think have shrunk over the years.


Do you think that this is the result of a different orientation of the fabric?
It is not clear why to me. The grains seem to be running the same direction. Could be just this batch of canvas? Not sure, but because of this, I have noticed other tents with the same issue.

-J
Are you able to tell for sure which way is "warp" and which way is "weft" in the pieces in question?

Mac
Robert MacPherson

The craftsmen of old had their secrets, and those secrets died with them. We are not the better for that, and neither are they.

http://www.lightlink.com/armory/
http://www.billyandcharlie.com
https://www.facebook.com/BillyAndCharlie
Tracy Justus
Archive Member
Posts: 478
Joined: Fri Oct 24, 2003 1:01 am
Location: Burlington. NC

Re: Rectangular tent...a work in progress.

Post by Tracy Justus »

Mac- It looks to me like you've sewn the sleeves for the frame to the canopy and to just below the seam attaching the valence to the canopy, and the ropes are attached to a flange that extends from the sleeve/valence seam. Am I seeing that correctly?

T.
User avatar
FrauHirsch1
Archive Member
Posts: 1422
Joined: Tue Mar 22, 2011 4:49 pm

Re: Rectangular tent...a work in progress.

Post by FrauHirsch1 »

Mac wrote: Are you able to tell for sure which way is "warp" and which way is "weft" in the pieces in question?

Mac
I think they are running in opposite of each other due to the dimensions - the valences cut long way, to minimize seams around the roof perimeter, but the roof panels cut long way over from the perimeter to the top of the peak of the roof beam.

Where there were bias cuts it is more obvious.

Visually the fabric appears to be an even weave. The shrinking happened over several years but I didn't keep track of whether it was rained on or not between frame adjustments.

-J
Mac
Archive Member
Posts: 9953
Joined: Thu Jan 04, 2001 2:01 am
Location: Jeffersonville, PA

Re: Rectangular tent...a work in progress.

Post by Mac »

Tracy Justus wrote:Mac- It looks to me like you've sewn the sleeves for the frame to the canopy and to just below the seam attaching the valence to the canopy, and the ropes are attached to a flange that extends from the sleeve/valence seam. Am I seeing that correctly?

T.
Tracy,

Here is a quick sketch of what's going on. The left is a perspective, looking into a corner. On the right is a section through the canopy and valance. I expect the basic structure to scale up, but the seams will be handled differently to minimize the number of thicknesses of canvas that I will have to sew through.

Image

Mac
Robert MacPherson

The craftsmen of old had their secrets, and those secrets died with them. We are not the better for that, and neither are they.

http://www.lightlink.com/armory/
http://www.billyandcharlie.com
https://www.facebook.com/BillyAndCharlie
Mac
Archive Member
Posts: 9953
Joined: Thu Jan 04, 2001 2:01 am
Location: Jeffersonville, PA

Re: Rectangular tent...a work in progress.

Post by Mac »

FrauHirsch1 wrote:
Mac wrote: Are you able to tell for sure which way is "warp" and which way is "weft" in the pieces in question?

Mac
I think they are running in opposite of each other due to the dimensions - the valences cut long way, to minimize seams around the roof perimeter, but the roof panels cut long way over from the perimeter to the top of the peak of the roof beam.

-J
That's what I thought we would see. It makes the best use of fabric, and follows the rule of putting the greatest tension on the warp threads. As long as the fabric shrinks evenly in both directions, all is fine. But, it might not....and then things get weird with the passage of time.

I will get in touch with the salesman at Itex, (where I got my fabric) and ask him if he has any information about expected shrinkage with respect to grain direction.

Mac
Robert MacPherson

The craftsmen of old had their secrets, and those secrets died with them. We are not the better for that, and neither are they.

http://www.lightlink.com/armory/
http://www.billyandcharlie.com
https://www.facebook.com/BillyAndCharlie
User avatar
Sean Powell
Archive Member
Posts: 9908
Joined: Sat Jul 13, 2002 1:01 am
Location: Holden MA

Re: Rectangular tent...a work in progress.

Post by Sean Powell »

Mac wrote:
Tracy Justus wrote:Mac- It looks to me like you've sewn the sleeves for the frame to the canopy and to just below the seam attaching the valence to the canopy, and the ropes are attached to a flange that extends from the sleeve/valence seam. Am I seeing that correctly?

T.
Tracy,

Here is a quick sketch of what's going on. The left is a perspective, looking into a corner. On the right is a section through the canopy and valance. I expect the basic structure to scale up, but the seams will be handled differently to minimize the number of thicknesses of canvas that I will have to sew through.

Mac
Design thought: You can save yourself some cutting, avoid 2 raw edges (one of which is visible inside the tent below the beam) and only have to sew through 3 layers (presuming 3 layers can take the rope strain) if you make the sleeve integral to the end of the wall.

Also, there is no twisting in the frame that might induce splitting but it's fairly easy to split a 2x2 with a notch in one end. The paranoid engineer in me says avoid knots in the end regions like the plaque and consider a nail with 2 washers to rivet the 2x2 and prophylacticly stop the cracking. It may be overkill and not under any stress once setup but it would suck if something happened during setup.

Luck!
Sean
Attachments
Macs Tent.JPG
Macs Tent.JPG (38.81 KiB) Viewed 208 times
User avatar
FrauHirsch1
Archive Member
Posts: 1422
Joined: Tue Mar 22, 2011 4:49 pm

Re: Rectangular tent...a work in progress.

Post by FrauHirsch1 »

I'll ask my husband for verification, but my guess is it has shrunk close to 6" over the last 14 yrs over a 24' length of the roofline, and maybe 2-3" over the 14' width of the roofline. This was enough to change rope points.
Mac
Archive Member
Posts: 9953
Joined: Thu Jan 04, 2001 2:01 am
Location: Jeffersonville, PA

Re: Rectangular tent...a work in progress.

Post by Mac »

Sean Powell wrote: Design thought: You can save yourself some cutting, avoid 2 raw edges (one of which is visible inside the tent below the beam) and only have to sew through 3 layers (presuming 3 layers can take the rope strain) if you make the sleeve integral to the end of the wall.
I am considering this. I am also considering cotton webbing as a substitute for the hemp webbing we see on the surviving tents. Wrapping a piece of webbing around the seams at the bottoms of the pockets would enclose the raw edges and add strength.
Sean Powell wrote:Also, there is no twisting in the frame that might induce splitting but it's fairly easy to split a 2x2 with a notch in one end. The paranoid engineer in me says avoid knots in the end regions like the plaque and consider a nail with 2 washers to rivet the 2x2 and prophylacticly stop the cracking. It may be overkill and not under any stress once setup but it would suck if something happened during setup.
In did not draw them in my sketch, but the model has tinned iron ferules to keep the finger joints from splitting.

Mac
Robert MacPherson

The craftsmen of old had their secrets, and those secrets died with them. We are not the better for that, and neither are they.

http://www.lightlink.com/armory/
http://www.billyandcharlie.com
https://www.facebook.com/BillyAndCharlie
Mac
Archive Member
Posts: 9953
Joined: Thu Jan 04, 2001 2:01 am
Location: Jeffersonville, PA

Re: Rectangular tent...a work in progress.

Post by Mac »

FrauHirsch1 wrote:I'll ask my husband for verification, but my guess is it has shrunk close to 6" over the last 14 yrs over a 24' length of the roofline, and maybe 2-3" over the 14' width of the roofline. This was enough to change rope points.
That's something like 2% along the weft, vs. 1.14 to 1.66% along the warp, if I did the math right.

Mac
Robert MacPherson

The craftsmen of old had their secrets, and those secrets died with them. We are not the better for that, and neither are they.

http://www.lightlink.com/armory/
http://www.billyandcharlie.com
https://www.facebook.com/BillyAndCharlie
Mac
Archive Member
Posts: 9953
Joined: Thu Jan 04, 2001 2:01 am
Location: Jeffersonville, PA

Re: Rectangular tent...a work in progress.

Post by Mac »

I started building the cutting table today. There should be pics tomorrow.

Mac
Robert MacPherson

The craftsmen of old had their secrets, and those secrets died with them. We are not the better for that, and neither are they.

http://www.lightlink.com/armory/
http://www.billyandcharlie.com
https://www.facebook.com/BillyAndCharlie
User avatar
FrauHirsch1
Archive Member
Posts: 1422
Joined: Tue Mar 22, 2011 4:49 pm

Re: Rectangular tent...a work in progress.

Post by FrauHirsch1 »

Mac wrote:
FrauHirsch1 wrote:I'll ask my husband for verification, but my guess is it has shrunk close to 6" over the last 14 yrs over a 24' length of the roofline, and maybe 2-3" over the 14' width of the roofline. This was enough to change rope points.
That's something like 2% along the weft, vs. 1.14 to 1.66% along the warp, if I did the math right.

Mac
To be more clear, I think it is all from warp shrinkage of the internal and external valences.
Mac
Archive Member
Posts: 9953
Joined: Thu Jan 04, 2001 2:01 am
Location: Jeffersonville, PA

Re: Rectangular tent...a work in progress.

Post by Mac »

FrauHirsch1 wrote:
Mac wrote:
FrauHirsch1 wrote:I'll ask my husband for verification, but my guess is it has shrunk close to 6" over the last 14 yrs over a 24' length of the roofline, and maybe 2-3" over the 14' width of the roofline. This was enough to change rope points.
That's something like 2% along the weft, vs. 1.14 to 1.66% along the warp, if I did the math right.

Mac
To be more clear, I think it is all from warp shrinkage of the internal and external valences.
OK, I got it. The shrinkage in the length is caused by the shrinkage in the valence (which is shrinkage along the warp).

Mac
Robert MacPherson

The craftsmen of old had their secrets, and those secrets died with them. We are not the better for that, and neither are they.

http://www.lightlink.com/armory/
http://www.billyandcharlie.com
https://www.facebook.com/BillyAndCharlie
Mac
Archive Member
Posts: 9953
Joined: Thu Jan 04, 2001 2:01 am
Location: Jeffersonville, PA

Re: Rectangular tent...a work in progress.

Post by Mac »

Here is a pic of the cutting table. It's 6' wide by 8' long. My plan called for stretchers on the legs, but I may not put them on after all. It seems rigid enough without them. Dragging the frame up the stairs to the loft was a bit of a trial, and it barely made the turn through the door. The plywood came up separately.

I am glad I went with the iron pipe to support the roll, rather than a broom handle. If you look through the pipe, you can see that is is deflecting under the 110 lb. weight of the fabric.

Image

Image

Mac
Robert MacPherson

The craftsmen of old had their secrets, and those secrets died with them. We are not the better for that, and neither are they.

http://www.lightlink.com/armory/
http://www.billyandcharlie.com
https://www.facebook.com/BillyAndCharlie
User avatar
FrauHirsch1
Archive Member
Posts: 1422
Joined: Tue Mar 22, 2011 4:49 pm

Re: Rectangular tent...a work in progress.

Post by FrauHirsch1 »

Also note, its Sunforger, mildew resistant, fire resistant canvas from Panther. I think they all may stretch, but if you don't have a frame, it might not be noticeable. Our roofbeam had to be redrilled as well.
Tracy Justus
Archive Member
Posts: 478
Joined: Fri Oct 24, 2003 1:01 am
Location: Burlington. NC

Re: Rectangular tent...a work in progress.

Post by Tracy Justus »

Mac- I looked through your fine album of pavilion pics and it raised a question for me: why did you choose to have your ropes attach to the roof under the valence? Quite a few of your pics show them attaching at the angle where the valence and roof meet. I'm not questioning the legitimacy of your choice, just why you selected that fastening method over the other.

T.

ETA: A link to Mac's picassa album so you don't have to dig through this thread.
Mac
Archive Member
Posts: 9953
Joined: Thu Jan 04, 2001 2:01 am
Location: Jeffersonville, PA

Re: Rectangular tent...a work in progress.

Post by Mac »

Tracy,

Both arrangements are pretty common. I guess I tend to focus on the ones where the ropes come from under the valence because there is no way it can be done without a frame of some sort.

Mac
Robert MacPherson

The craftsmen of old had their secrets, and those secrets died with them. We are not the better for that, and neither are they.

http://www.lightlink.com/armory/
http://www.billyandcharlie.com
https://www.facebook.com/BillyAndCharlie
Baron Alcyoneus
Archive Member
Posts: 39578
Joined: Tue Sep 23, 2008 7:00 pm

Re: Rectangular tent...a work in progress.

Post by Baron Alcyoneus »

Mac wrote:
Tracy Justus wrote:Mac- It looks to me like you've sewn the sleeves for the frame to the canopy and to just below the seam attaching the valence to the canopy, and the ropes are attached to a flange that extends from the sleeve/valence seam. Am I seeing that correctly?

T.
Tracy,

Here is a quick sketch of what's going on. The left is a perspective, looking into a corner. On the right is a section through the canopy and valance. I expect the basic structure to scale up, but the seams will be handled differently to minimize the number of thicknesses of canvas that I will have to sew through.

Image

Mac

Wouldn't having that layer to the outside encourage water to seem into the seam?
Mac
Archive Member
Posts: 9953
Joined: Thu Jan 04, 2001 2:01 am
Location: Jeffersonville, PA

Re: Rectangular tent...a work in progress.

Post by Mac »

Baron Alcyoneus wrote:
Mac wrote:

Wouldn't having that layer to the outside encourage water to seem into the seam?
Alcy,

I don't see any way around having a horizontal seam for attaching the valance. it might trap water and drip a bit, but it will drip to the outside of the walls.

Mac
Robert MacPherson

The craftsmen of old had their secrets, and those secrets died with them. We are not the better for that, and neither are they.

http://www.lightlink.com/armory/
http://www.billyandcharlie.com
https://www.facebook.com/BillyAndCharlie
Mac
Archive Member
Posts: 9953
Joined: Thu Jan 04, 2001 2:01 am
Location: Jeffersonville, PA

Re: Rectangular tent...a work in progress.

Post by Mac »

I am all ready to start cutting fabric, and I can't get my sewing machine to behave its self.

It is very frustrating. I am going to try making a few adjustments to the needle bar height. If that doesn't work, I am going to take it to the local repair guy and just pay him to get it working......this really hurts my ego.

Mac
Robert MacPherson

The craftsmen of old had their secrets, and those secrets died with them. We are not the better for that, and neither are they.

http://www.lightlink.com/armory/
http://www.billyandcharlie.com
https://www.facebook.com/BillyAndCharlie
User avatar
Sean Powell
Archive Member
Posts: 9908
Joined: Sat Jul 13, 2002 1:01 am
Location: Holden MA

Re: Rectangular tent...a work in progress.

Post by Sean Powell »

Dumb question: What might the connection look like if the walls seperated from the roof? Would there be a seam where the roof met the valence?

Sean
Mac
Archive Member
Posts: 9953
Joined: Thu Jan 04, 2001 2:01 am
Location: Jeffersonville, PA

Re: Rectangular tent...a work in progress.

Post by Mac »

Sean Powell wrote:Dumb question: What might the connection look like if the walls seperated from the roof? Would there be a seam where the roof met the valence?

Sean
Sean,

The walls *do* separate from the canopy. They are not shown in the sketch, but they will toggle onto the fabric "flange" under the frame "pockets".

Does that make sense?

Mac
Robert MacPherson

The craftsmen of old had their secrets, and those secrets died with them. We are not the better for that, and neither are they.

http://www.lightlink.com/armory/
http://www.billyandcharlie.com
https://www.facebook.com/BillyAndCharlie
User avatar
Keegan Ingrassia
Archive Member
Posts: 6423
Joined: Thu Jul 16, 2009 4:07 pm
Location: College Station, Texas (Shadowlands)

Re: Rectangular tent...a work in progress.

Post by Keegan Ingrassia »

Mac, would this layout work for the valence? In this configuration, you would not have an exterior seam that could trap water.
Attachments
valence-idea1.jpg
valence-idea1.jpg (16.23 KiB) Viewed 391 times
"There is a tremendous amount of information in a picture, but getting at it is not a purely passive process. You have to work at it, but the more you work at it the easier it becomes." - Mac
User avatar
Sean Powell
Archive Member
Posts: 9908
Joined: Sat Jul 13, 2002 1:01 am
Location: Holden MA

Re: Rectangular tent...a work in progress.

Post by Sean Powell »

Mac wrote:Sean,

The walls *do* separate from the canopy. They are not shown in the sketch, but they will toggle onto the fabric "flange" under the frame "pockets".

Does that make sense?

Mac
Does now, thanks!
Sean
Aussie Yeoman
Archive Member
Posts: 919
Joined: Tue Apr 11, 2006 10:16 pm
Location: Canberra, Australia

Re: Rectangular tent...a work in progress.

Post by Aussie Yeoman »

Well this is disappointing. I thought (knew) I had been subscribed to this thread, but it stopped sending notifications.

Maybe this superfluous post will refresh my notifications.

Very cool to see things in person size start to come together. Joe will be jealous!

Dave
User avatar
Jon
Archive Member
Posts: 959
Joined: Tue Sep 10, 2002 1:01 am
Location: Chicagoland
Contact:

Re: Rectangular tent...a work in progress.

Post by Jon »

I have no experience with internal frames so I have a couple of questions. Would the stretch and shrink cycle of the canvas on a wet then dry day be a problem? My ordinary tentmaster changes size by several inches over 24 hours with rain and sun. I might have missed it but what are you using for valence wood in the full sized tent? I would think the relatively small cross section of a 2x2 hanging in a wet bag would have a stronger twist force than the corner joints could stop.

The only suggestion I have is for your table. I've seen commercial tent makers use a gravity feed table angled down to their machine. Masonite or similar slippery material and the sloped table make it easier to pull the ever growing pile of canvas toward and through your machine. Very informative thread, thanks.

Jon
Extra omnes pratum meum.
Mac
Archive Member
Posts: 9953
Joined: Thu Jan 04, 2001 2:01 am
Location: Jeffersonville, PA

Re: Rectangular tent...a work in progress.

Post by Mac »

Keegan Ingrassia wrote:Mac, would this layout work for the valence? In this configuration, you would not have an exterior seam that could trap water.
KI,

You guys and your computer drawings! How *do* you do that?!?!?

That would probably do OK, but it seems to me that you are solving what is probably not problem at the cost of a more complicated construction.

The other thing that concerns me is how the seam where the "pocket" joins the canopy at the "shoulder" will be put under direct tension when guys pull the structure tight. I try to design the structure so that my heavily stressed seams are loaded in shear rather than in tension.

Mac
Last edited by Mac on Fri Jun 15, 2012 8:59 am, edited 1 time in total.
Robert MacPherson

The craftsmen of old had their secrets, and those secrets died with them. We are not the better for that, and neither are they.

http://www.lightlink.com/armory/
http://www.billyandcharlie.com
https://www.facebook.com/BillyAndCharlie
Mac
Archive Member
Posts: 9953
Joined: Thu Jan 04, 2001 2:01 am
Location: Jeffersonville, PA

Re: Rectangular tent...a work in progress.

Post by Mac »

Jon wrote: Would the stretch and shrink cycle of the canvas on a wet then dry day be a problem? My ordinary tentmaster changes size by several inches over 24 hours with rain and sun. I might have missed it but what are you using for valence wood in the full sized tent? I would think the relatively small cross section of a 2x2 hanging in a wet bag would have a stronger twist force than the corner joints could stop.
Jon,

I don't know how well this is going to work. I hope that the moisture related size variation of the canvas will not be beyond what the frame structure can deal with. We will see....
Jon wrote:The only suggestion I have is for your table. I've seen commercial tent makers use a gravity feed table angled down to their machine. Masonite or similar slippery material and the sloped table make it easier to pull the ever growing pile of canvas toward and through your machine.
Thanks for the tip on the gravity assisted feed tables. I will keep that in mind.

Mac
Robert MacPherson

The craftsmen of old had their secrets, and those secrets died with them. We are not the better for that, and neither are they.

http://www.lightlink.com/armory/
http://www.billyandcharlie.com
https://www.facebook.com/BillyAndCharlie
Mac
Archive Member
Posts: 9953
Joined: Thu Jan 04, 2001 2:01 am
Location: Jeffersonville, PA

Re: Rectangular tent...a work in progress.

Post by Mac »

I am back at it after a short break. My machine is never going to do as nice a job as i would like, and I just have to resign myself to that for this project. It seems that the spacing between the shuttle and the driver is not sufficient to allow the heavy thread to pass without the occasional catch, which causes the top thread to not come up tight. The sewing machine Guru did the best he could with it, and I am just going to have to get more appropriate machine for the next project.

Here is a page from one of my notebooks about the gable ends. I am leading the gores into a triangular piece to avoid having too many seams in one place. The triangle will be doupled for strength, and the seam at the bottom will be staggered to avoid bulk. Likewise the canopy panels will end on a doubled ridge panel which is also staggered.
Image

Here are the templates for the gable pieces. I will probably have to remake the triangle template when I see just how wide the top of the completed gable gore assembly really is. It is an act of the boldest optimism to assume that it will come out to specs.
Image

The templates are the size of the gores, sans seams, except for the bottom edge, where the seam is included. I have made notes on each one indicating the grain direction and the amount to include for the seams.
Image

The aluminum disc gives me my 3/4" seam allowance. The washer gives me the 1/2" offset for the flat felled assembly.
Image

Here are the gable gores all laid out.
Image

Checking to make sure I have the correct number of gores.
Image

Mac
Robert MacPherson

The craftsmen of old had their secrets, and those secrets died with them. We are not the better for that, and neither are they.

http://www.lightlink.com/armory/
http://www.billyandcharlie.com
https://www.facebook.com/BillyAndCharlie
Tracy Justus
Archive Member
Posts: 478
Joined: Fri Oct 24, 2003 1:01 am
Location: Burlington. NC

Re: Rectangular tent...a work in progress.

Post by Tracy Justus »

Using washers as spacers around your masonite pattern pieces to determine your seam allowance is a clever idea. --T.
Mac
Archive Member
Posts: 9953
Joined: Thu Jan 04, 2001 2:01 am
Location: Jeffersonville, PA

Re: Rectangular tent...a work in progress.

Post by Mac »

Last night I spent the hours between 8 and 11 sewing the gable gores together, but I neglected to take any pics.

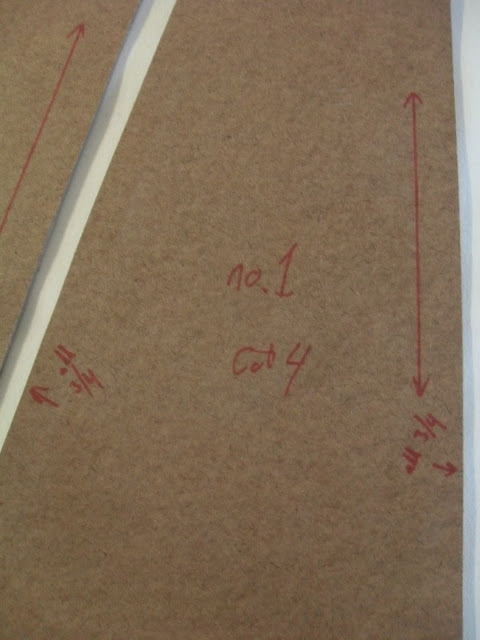
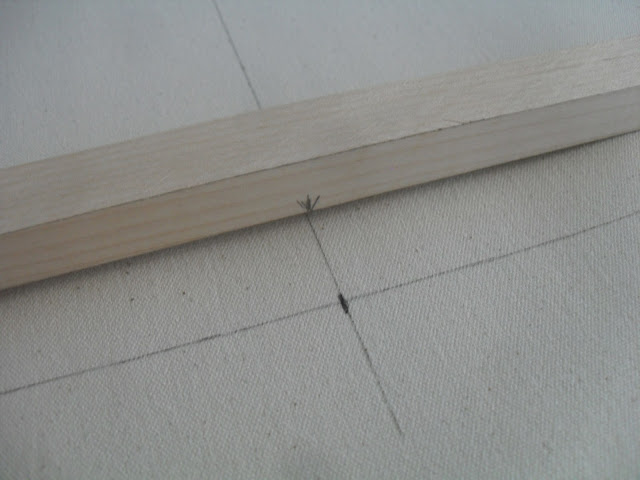
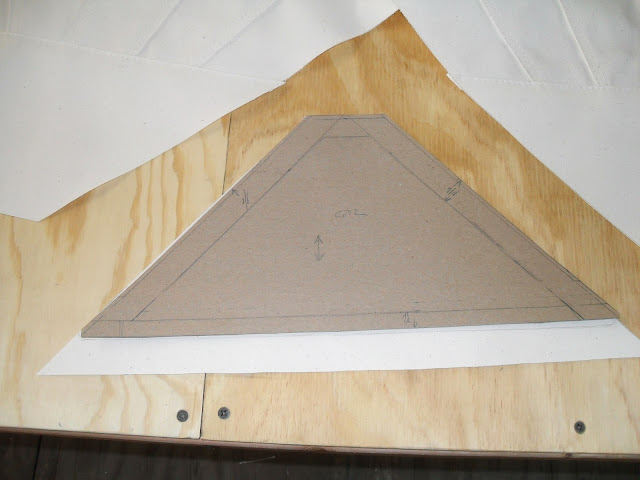
As I suspected, my template for the triangular top piece was off by the time I was done sewing the gores. It was not off by as much as I had feared, but it was worth making a new template anyways. This time, I just used cardboard, and made it include the seam allowances
Image

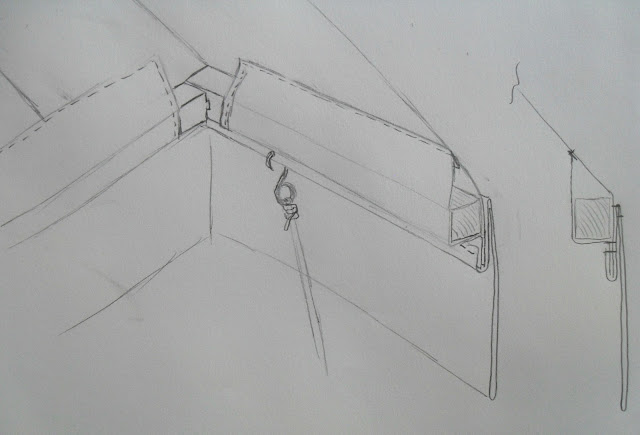
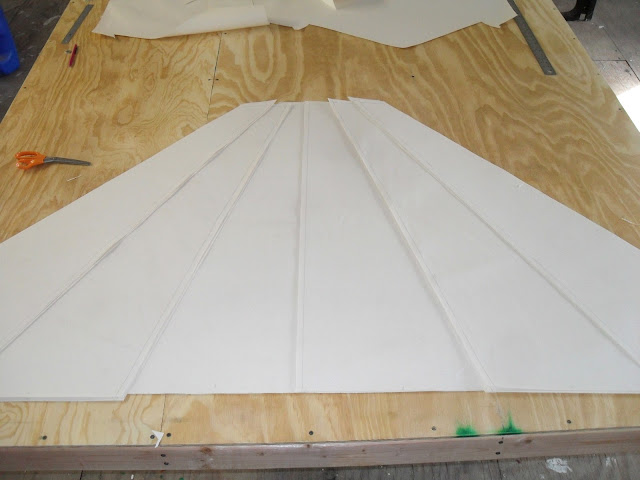
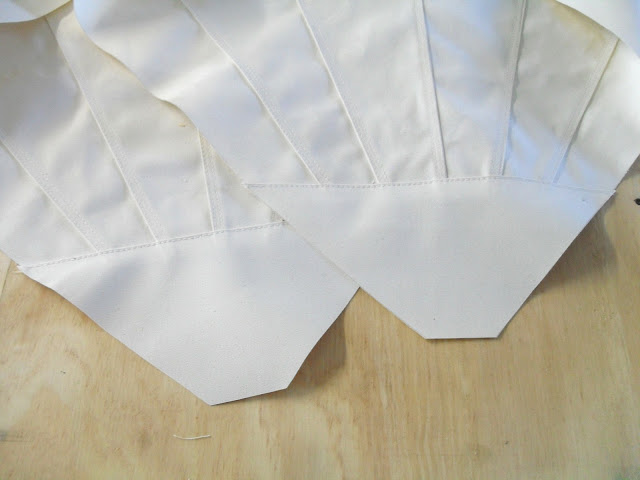
This is what the tops of the gables look like with the first layer of the triangular piece sewn in place.
Image

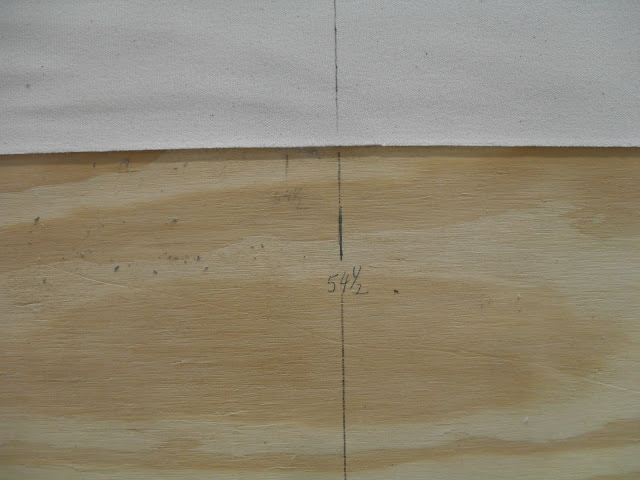
For the second layer, I used the same template, but added one inch to the bottom.
Image

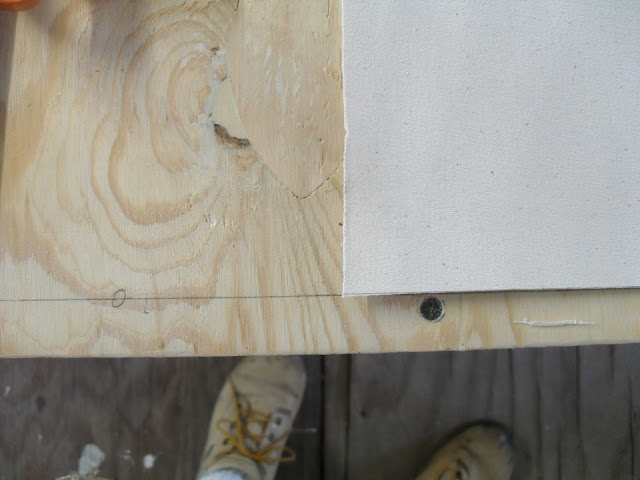
Here is what the back side looked like while I was attaching the second layer. In the photo, it is held in place with polyester basting tape.
Image

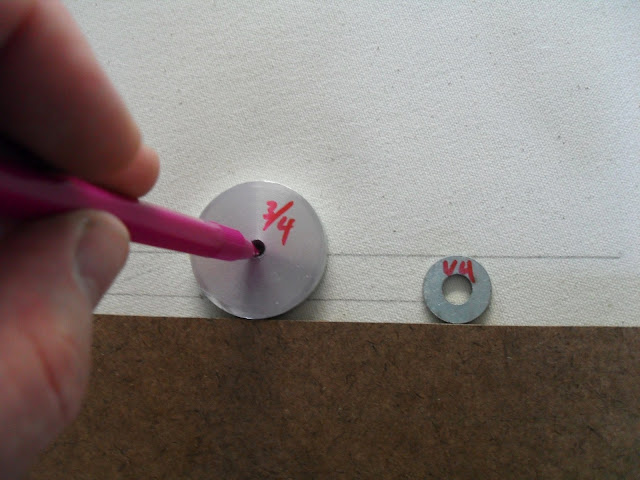
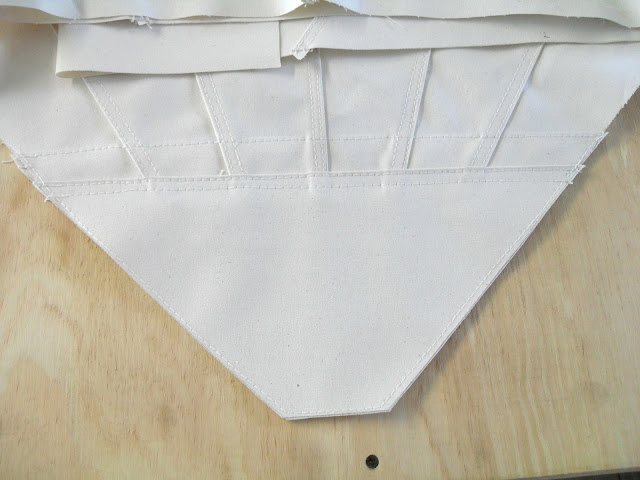
Both layers are in place here, and I have stitched around the edges to help control the layers when it comes time to flat-fell the gables to the rest of the canopy. Note that the triangles have an extra 1/8" of seam allowance. This will give me extra material for the bulkiest part of the seam.
Image

That was the sexiest part of the construction, but it had to be done first. Now I will use the completed gables to figure out the lengths of the canopy panels. I hope to get those cut out this afternoon and sewn together tonight.

Mac
Robert MacPherson

The craftsmen of old had their secrets, and those secrets died with them. We are not the better for that, and neither are they.

http://www.lightlink.com/armory/
http://www.billyandcharlie.com
https://www.facebook.com/BillyAndCharlie
Mac
Archive Member
Posts: 9953
Joined: Thu Jan 04, 2001 2:01 am
Location: Jeffersonville, PA

Re: Rectangular tent...a work in progress.

Post by Mac »

Tracy Justus wrote:Using washers as spacers around your masonite pattern pieces to determine your seam allowance is a clever idea. --T.
Thank you, Tracy! I wish I could take credit for it but I think I saw it somewhere. Perhaps it was one of the many clever things that the quilters do....

I could not find an appropriate washer for 3/4" so I had to turn one up on the lathe.

Mac
Robert MacPherson

The craftsmen of old had their secrets, and those secrets died with them. We are not the better for that, and neither are they.

http://www.lightlink.com/armory/
http://www.billyandcharlie.com
https://www.facebook.com/BillyAndCharlie
Aussie Yeoman
Archive Member
Posts: 919
Joined: Tue Apr 11, 2006 10:16 pm
Location: Canberra, Australia

Re: Rectangular tent...a work in progress.

Post by Aussie Yeoman »

Glad to see you back, Mac, I was beginning to think some horrid event had happaned to you.

It sure is nice seeing the tent come together, though I suspect you find it even nicer.

What do you mean that the seam will be staggered at the bottom?

Dave
Mac
Archive Member
Posts: 9953
Joined: Thu Jan 04, 2001 2:01 am
Location: Jeffersonville, PA

Re: Rectangular tent...a work in progress.

Post by Mac »

Aussie Yeoman wrote: What do you mean that the seam will be staggered at the bottom?

Dave
I mean that the edges of the two triangles and the two ridge pieces will all fall in different locations in the seam to avoid the bulk where the roof will meet the gable. Look again at the diagram in the upper left, and tell me if that makes sense now.

Image

Mac
Robert MacPherson

The craftsmen of old had their secrets, and those secrets died with them. We are not the better for that, and neither are they.

http://www.lightlink.com/armory/
http://www.billyandcharlie.com
https://www.facebook.com/BillyAndCharlie
Aussie Yeoman
Archive Member
Posts: 919
Joined: Tue Apr 11, 2006 10:16 pm
Location: Canberra, Australia

Re: Rectangular tent...a work in progress.

Post by Aussie Yeoman »

Perfectly. Thanks Mac.
Mac
Archive Member
Posts: 9953
Joined: Thu Jan 04, 2001 2:01 am
Location: Jeffersonville, PA

Re: Rectangular tent...a work in progress.

Post by Mac »

So, here's the drill for the duck.....

Pull the fabric to the end of the cutting table and use a straight edge to mark a line. Cut off square.
Image

Use the straight edge to make another line at the 54 1/2" marks.
Image

Use the story rod to mark of the widths of the three panels at each end.
Image

Connect the lines with the straight edge.
Image

Cut out the panels.

Repeat until you have a stack of 16.
Image

I will start sewing as soon as I have a clever idea about how to mark off the 1/2" offsets.....

Mac
Robert MacPherson

The craftsmen of old had their secrets, and those secrets died with them. We are not the better for that, and neither are they.

http://www.lightlink.com/armory/
http://www.billyandcharlie.com
https://www.facebook.com/BillyAndCharlie
Post Reply